


The Basic Guide To Machine Polishing

IN THIS FREE GUIDE:
- Learn every fundamental of machine polishing from cutting and restoring, to refining and finishing
- See the products you need to start your journey, and learn how they work
- Discover the step by step process that will give you the very best results
Learn the fundamentals and go on to master your paint correction skills
Machine polishing is often thought of as the dark side of, or at least a dark art in, detailing. But, while it's true that this is where many a pro-detailer really earns their keep, that doesn't mean that you can't learn the process and almost instantly get amazing results. It's not as complicated as many think, either. With the best detailing products and a little practice, we firmly believe that anyone can learn the fundamental skills to go on and completely master the art of machine polishing. But, before all that of course, you need to know the basics, and that's where we come in…


First, what is polishing?
You could say there are a few different forms of what may be referred to as "polishing'. Maybe you've heard them described as cutting, refining, restoring, compounding or a number of other names and sub-categories. The first thing to remember though, is that on a very basic level, all these terms mean the same thing.
Polishing, whether that's by hand or machine on paintwork or even gloss plastics, is simply the mechanical (or physical) removal of defects through surface abrasion. For the most part, the process involves abrading the top layer to remove a microscopic amount. This in turn smooths out the defects creating a flatter surface. This also causes light to bounce off in a more uniform direction, levelling the optical finish, making the surface appear deeper and shiner. Polishing then, is a bit like exfoliating for cars!
What distinguishes say, cutting and refining from one another is the intensity of the products used for the desired result. A coarse cutting compound for example, will be more abrasive and remove more of the surface material more quickly. While a finer finishing compound or polish will have a much less aggressive level of cut, and be designed to smooth out the surface on an even more microscopic level, inflicting scratches so tiny that they simply can't be seen.
Think of it as just like sanding down a block of wood. A coarse sandpaper will take away a large amount of material quickly, but leave a noticeably unrefined finished. Following up with varying degrees of finer sandpaper smooths the surface to a level that's pleasing to the touch and pleasing to the eye. It's exactly the same idea when polishing paintwork, just on a more infinitesimal level.
The real questions here then, are: how intense does the polishing need to be? And how much of the surface layer do you need to take away? Well, this is directly proportional to the defects you're trying to tackle in what kind of paintwork.


Paint Types
Over the years the type of paint applied to cars has varied significantly, mostly due to new technology, along with health and safety regulations for for paint application. Using poisons like cyanide in paint used to be more common, along with a whole load of other toxic ingredients, and paint is pretty nasty stuff to this day. But even so, new regulations to make paint safer to apply and more environmentally friendly when released into the atmosphere mean that ingredients change regularly. This also means that there's no reasonably quick and simple list of every type of paint that's out there. Many a book has been written on the subject.
The good news is that we don't need to know what it's made of to polish it, we don't need to know if it's an air-dying paint, or one that uses a separate hardener to cure, either. What's of particular note here is that, for the most part, your paintwork will fall into one of two categories…

Single Stage Paintwork
Classic and vintage vehicles tend to have single stage paintwork, which gets its name because it can be (but isn't always) applied in one single stage. Basically speaking, this type of paintwork consists of just the colour pigment (base coat) layer, which is applied to the panel over a primer layer. The resulting cross section looks like: panel - primer - colour coat.
With that in mind, when you machine polish single stage paintwork you are actually abrading the top layer of the colour coat, which is why you may notice pigment being transferred to your compound and pad. Unless that colour is the primer of course, it doesn't mean that you've burned through. On two stage paint however, it's a very different story.

Two Stage Paintwork
Just about every car since the mid-1980s uses two stage paintwork. This means that the paint (above the primer layer) is applied in two stages - the coloured base coat, followed by a protective clearcoat (lacquer). This includes metallic and pearlescent paints which have aluminium powder or ceramic crystals mixed into the base coat to reflect and refract light, bringing on the sparkle. Candy paints are similar in application, but essentially, they get their extra-deep appearance from multiple coats of tinted lacquer.
So, with this in mind, two stage paintwork means that you're not really touching the colour pigment at all, just the clearcoat. This can be likened to peering out of a window. When polishing clearcoat you're essentially cleaning any defects from the window glass to give it more clarity, offering a much better view of what's on the other side.
While always harder than a base coat, the toughness of your lacquer will also vary from marque to marque (and even from car to car) and, the harder the clearcoat, the tougher it is to polish. In some cases, the variance can simply be down to manufacturer location and home market. German cars for example, tend to have very hard clearcoat. Many attribute this to the fact that it's illegal to wash your car on the street in Germany, so arguably German cars have to be more abrasion resistant because they're only cleaned at the local car wash. The point is that polishing one car may be different to polishing another, which is why we always test areas and tend to air on the side of caution when choosing compounds and combos.
Unless you're a professional detailer dealing with a huge turnaround of different cars, too, it's extremely likely that any car you detail will be relatively modern and fall into the two stage paint category.

How far can you polish?
Paint thickness is measured in microns, and again it varies from manufacturer to manufacturer. It's also true to say that single stage paintwork tends to be thinner (and softer), but on average two stage OEM paintwork will be around 100-140 microns thick. This consists of the primer layer (12-40 microns), the base coat (25-40 microns) and the slightly thicker clearcoat (45-70 microns). To put this into context, 70 microns is around the thickness of a human hair.
As you can imagine, job number one is making sure there's enough of a layer to polish - just one of the reasons that professional detailers use paint depth gauges, especially when they don't know the history of the vehicle. When completely removing any paint defect you're effectively levelling the whole surface down to the bottom of the defect.
The other reason is that many cars have had touch-ups and panels re-painted through ongoing repairs, denoted by unusually thick readings on the gauge. It's common practice for these panels to be blown-in or blended so the repair is less noticeable. When machine polishing it's important to avoid these areas to ensure that no hard edges are revealed.
All this may sound a little scary of course, but the truth is that the vast majority of cars you're likely to detail will have plenty of clearcoat, and you'll nearly always know the history, including any areas to avoid. A single stage removes a miniscule amount of the surface - between 1-2 microns of clearcoat for fine refining and 5-6 for heavy cutting.

Common Defects
Effective machine polishing can remove numerous paint defects, and while it can't completely eradicate deep scratches and stone chips that have worked through into the base and primer layers (because you'd be levelling the surface way too far), it can certainly reduce their appearance by rounding off hard edges to soften the way the light is reflected back to your eye.
The most common defects we come across when detailing are…


Swirl Marks
The classic wash time nightmare, these are essentially fine scratches caused by bad cleaning techniques (namely not pre-washing effectively and dragging grime across surfaces). These have a spider's web appearance as the sun hits them. To highlight these and other defects during correction stages we use a strong light source that's designed to emulate the sun, like our Swirl Spotter Detailing Light. A good detailing lamp is a tool that's nearly as important as a machine polisher itself.
Fine Scratches
Often caused by abrasion with hedges or clothing, these are very light scratches in the lacquer layer noticeable because they refract light in a random fashion. Often you'll find that these are far more linier than swirl marks.
Water and Acid Etching
Etching is where a substance eats directly into the clearcoat or top paint layer causing a visible mark. It's rare, but some cases where corrosive substances have been left for long enough, etching can be so severe that it goes through the top layers all the way to the primer.
The main causes of etching are bird droppings (which contain highly corrosive uric acid) and acid rain, which is brought on by excess carbon and sulphur dioxide in the atmosphere, which dissolves into water vapour and then falls as rainwater.
Water Spots
These are surface level marks caused by the impurities found in tap water. Unlike normal rainwater, tap water - the stuff we use to wash our cars - isn't particularly pure, and contains all sorts of mineral deposits. If allowed to dry on your paintwork these impurities are left behind, embedding themselves into the surface. This is the reason why it's important to dry your paintwork with an Aqua Deluxe Drying Towel or Silk Drying Towel after every wash, so these impurities never get the chance to settle and eat into the top layer.
Holograms
Sometimes called buffer marks or buffer trails, these tend to come from poor refining techniques, or immediately after coarse cutting stages. Often appearing as dull, burry trails, these require polishing out during the refining and finishing stages.
Oxidation
This can also be eradicated through polishing and is where, over time, oxygen molecules in the air react with the paintwork to cause a milky, faded appearance. This is perhaps most noticeable in red cars when they fade too pink, or black cars where they fade to grey.


The desired result?
Apart from the defects you're attempting to remove, there's a few other questions you need to ask yourself, and the answers will always dictate the detailing products, processes and time you use along the way.
The first is the most important: what results are you looking for? In other words, is it a single stage enhancement you want to undertake? Is it full paint correction prior to applying a ceramic coating? Or are you just after a stunning finish for the next show? You can spend anything from a few hours on a single stage enhancement to a week or more on a full multi-stage correction. So, it's important to plan how much time you have, and keep in mind what results can be achieved.


Another key consideration is the type of protection you'll be adding after you've refined your paint. If it's a car you're looking to finish with a hard wax, then technically you can use any compound or polish on your paintwork, including those which already contain some wax based protection, like our Tripple All-in-One Car Polish. For a single stage enhancement Tripple can't be beaten, as it cleans away oxidation, refines paint, and adds a degree of protection all in one go.


Tripple
Discover the ultimate car polish with Tripple All-In-One Car Polish, designed to deliver outstanding results in record time. This advanced polishing compound is... See product details More
If however, you're looking to apply a tough ceramic coating these are not designed to be applied over a wax, because the wax layer will stop the coating from bonding to the freshly prepared lacquer. In this case only a product like One Step Single Stage Polish, our Pro Series Compounds or the multi-stage compounds in our Revitalise V2 System can be used, these contain no waxes or fillers, so will not inhibit chemical bonding from the silica in the coatings.


Combos
You may hear detailers talk about combos - all this means is a certain combination of polishing pad and compound/polish that can bring about the desired result. Everyone it seems has their favourite "magic' combo, but it's by no means a one-size-fits-all scenario. These are designed to be easily varied (by changing the pad or product) to make up for differences in the severity of defects and variances in the hardness of paint or clearcoat layers.
The key thing to remember here is that machine polishing pads are also abrasive, these vary from coarser cutting/restoring pads, to medium polishing pads and on to fine refining pads. So, it's all about getting the correct mix (or "combo') of product and pad for the job in hand. A multi-stage correction may require a cutting stage, followed by a polishing stage, and then a refining stage, with each having its own combo.
Of course, we've made it easy with our colour-coded Revitalise System. This set includes Revitalise No:1 Restoring Compound, Revitalise No:2 Polishing Compound, and Revitalise No:3 Refining Compound, along with matching 5-inch Revitalise Foam Pads. Our Pro Compound Kit also includes 3-different Pro Series compounds to take you through all stages of cutting and refinement, along with corresponding pads. Both of our combo systems are available in even more comprehensive kits that include a DPX Dual Action Machine Polisher - the Master Machine Polishing Kit and the Complete Polishing Kit.


Polishing Techniques
How a particular combo is actually used is also an important part of how it works. In basic terms, how a Car Polish or compound breaks down or is "worked through' is crucial to getting the desired result. Fully working your product into the paint is essential, regardless of if you're heavy cutting as part of a multi-stage correction, or performing a single stage enhancement with Tripple.
The idea is to make sure the abrasives in the compound fully break down to become less abrasive and offer a more and more refined finish as you work. Think of this as large, sharp stones being smashed around together in a barrel, eventually all the stones will break up, with the edges rounding themselves off and the large stones will become smaller pebbles, making them smaller, smoother and less abrasive. This is what's happening to the abrasives in the compound on a microscopic level. In most cases you need to work the product enough for it to turn clear. This is one of the most common mistakes in machine polishing, usually caused by attempting to tackle too big an area for the machine being used, or trying to finish the job too quickly.
The ideal area for polishing is about six times the size of your polishing pad, and the rule of thumb is to start off at a low speed, working multiple passes to a high speed, before working back down for a final pass on a low speed to ensure the product has fully broken down. It's also important not to rush through each pass, moving the machine slowly and smoothly (but also always keeping it moving) is the key. About 2-3cm a second is an ideal pace for machining.
The only exception to the rule is our advanced One Step Single-Stage Car Polish which takes a few more passes to fully work through. This is because, unlike every other compound that can only break down slightly, One Step is designed to start off as a course cutting compound but refine down to a fine finishing polish. That means that you can tackle a heavy cut and still finish down to near flawless without changing products and pads along the way.
For full, multi-stage corrections though, it's essential to choose the correct pad and polish for the particular task, and this will nearly always require testing. Not all paintwork needs restoration after all, and equally not all paintwork needs a huge amount of refining. So, why perform a three-stage correction when you only need two, or even one stage?
In other words, unless it's obvious what combo you need to start off with, do some testing with the finest compound and pad, and see what it does. If it hasn't given enough bite to cut out the defects, try again with the next coarsest combo, and then the next, and so on. When you have the ideal finish from your test, then you can start your correction by working back down from coarse to fine combos.

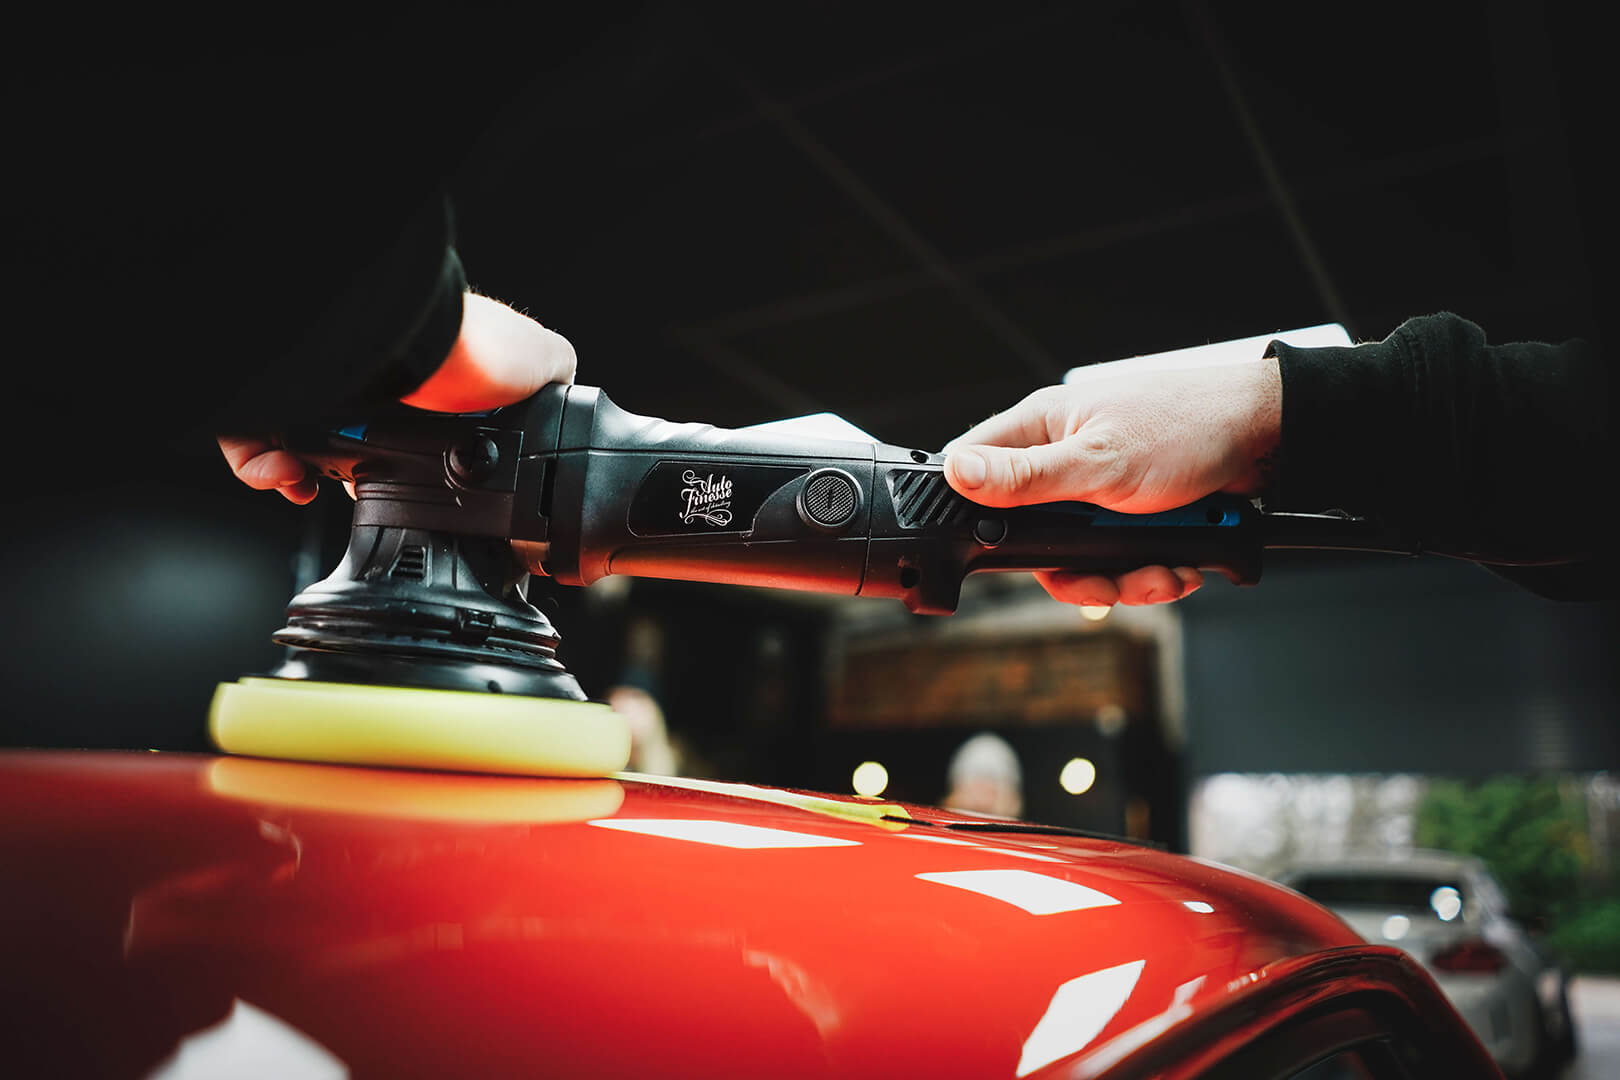
Machine Polishers
The final part of the puzzle is the actual machine polisher you intend on using. It's not just the size of what you've got either, as we said you'll want to look at working on an area around 6 times the size of your pad, the very reason why we offer our full size, 5-inch DPX Dual Action Machine Polisher, and our MPX Dual Action Machine Polisher which is capable of utilising 3-inch Spot Pads for smaller and curvier areas.


But, what's also important is the nature of how a machine polisher applies the pad to the surface of the vehicle. There are a few different types that you may come across…

Rotary Polishers
Used specifically for correcting heavier defects, a rotary polisher has a direct power delivery over the area to be polished. This comes from a non-orbital pad rotation, meaning they spin in a circular motion on a single axis.
No matter what angle or the curvature of the panel to be corrected, a rotary polisher will not stall, and neither will it stall by applying too much pressure to the machine. This makes them a specialist tool for heavy cutting where a large amount of heat and friction is needed.
Edges and low-paint areas should be avoided and, for the most part, rotary polishers are only used well by experienced professionals. While they're quick to cut, because they build up a huge amount of heat under the pad, they need to be treated with caution to prevent accidental "strike through' (where you burn through your clearcoat or paint layers). This can be especially prevalent on edges and when used on painted plastics, including bumpers, which do not dissipate heat as effectively as metal panels.
Dual Action Polishers
Capable of performing enhancements and multi-stage corrections without leaving a visible trail, a DA (or random orbital) machine employs a free-floating spindle to promote pad rotation in two directions - both concentric circles from the head and a wider circulating motion from the spindle. This type of oscillation (sometimes known as the wobble) cuts down on premature heat build-up under the pad, a safety measure to prevent burning through paintwork. The 'throw' of a DA machine is simply how much oscillation it has off centre, and the bigger the orbit, the greater the surface area being polished at any one time but typically the greater the vibration.
A DA will also stall (stop spinning the pad and simply vibrate) when too much pressure is applied, when the machine is on the edge of the pad, or if the machine is held at an uneven angle. This stalling makes a DA far safer to use than a rotary polisher, because it's almost impossible to burn through clearcoat or paint layers.
An essential tool for both professional detailers and enthusiasts, the most modern machines like our DPX and MPX dual action polishers are capable of removing the same sort of heavy defects as rotary polishers.
Forced Rotation Dual Action
This is a little more unusual and a unique machine that offers a mixture of the qualities of a dual action and a rotary polisher. The drive oscillates like a DA for a degree of safety (promoting heat dispersal) but this action is force-driven to prevent stalling. This gives a finish similar to a rotary polisher and makes this type of machine ideal for cutting and polishing curvy panels where a DA may be inclined to stall. Again, without a stalling action, it's more geared towards professional use. This type of machine may be safer to use than a rotary, but it is still possible to burn through paintwork.


The Polishing Process
Stage 1 - Cleaning
First thing's first, it's vital to have paintwork extremely clean and decontaminated before any polishing can begin. This is simply to prevent dragging around any heavy dirt particles with your machine, and essentially doing more harm than good.
It also makes sense to perform your car wash as safely as possible - as you would on any maintenance wash - by following the correct procedures. This will prevent inflicting even more defects that will need to be polished out later. Why give yourself more work than you have to?
There really is no substitute for the correct preparation. So, always perform a thorough pre-wash, using a suitable pre-cleaner like Citrus Power Bug & Grime Remover, and be sure to flush out all the arches and panel gaps, to rid the vehicle of any dirt or dust that may interfere with your polishing stages later. Follow your pre-wash by using Avalanche Snow Foam to loosen and lift any remaining grime, and then contact wash with Lather Car Shampoo using the usual 2-bucket method.
Remember that getting the wash stage correct is important before polishing, and even more crucial when it comes to maintenance, in fact there's not much point in polishing at all if you don't wash you car correctly. Otherwise it'll be full of swirls again after just a few washes.


Stage 2 - Decontamination
In addition to your wet work, we always recommend a full 3-stage decontamination before polishing. This collection of quick and easy processes eradicates the contaminants that washing alone can't pull out of your paintwork.
The first stage is chemical removal of sharp, embedded metal particles using Iron Out Fallout Remover.Engineered to dissolve ferrous metals on contact, Iron Out can be sprayed over paintwork and glass, where it will react with the metals (turning blood red in the process) and suspend them in the solution. These can then be safely rinsed away without touching the surfaces.


Iron Out
Developed as a heavy-hitting ferrous fallout remover, Iron Out is an advanced decontamination remover in a reactive gel, capable of safely and effectively eradi... See product details More
The next step is using ObliTARate Tar & Glue Remover to melt away stuck-on tar and other sticky contaminants. This solvent-based formula dissolves these kind of contaminants allowing them to be wiped away with a microfibre cloth.


ObliTARate
Auto Finesse® ObliTARate tar and glue remover, is a solvent-based formula that quickly dissolves stubborn tar and glue residues and contamination on contact eve... See product details More
The final part of the decon trio is using clay to physical pull out other organic contaminants, overspray and anything else that's been left behind. Here you can utilise a detailing Clay Bar, along with Glide Clay Lube, over the whole vehicle, to leave your paintwork seriously smooth. You can actually feel the difference "claying' makes as you work.
For more information on professional 3-stage paint decontamination you can check out our full guide: How To Safely Decontaminate Your Paintwork.


Stage 3 - Dry Down and Mask Up
It's crucial to dry your vehicle before polishing, not only to prevent the water spots caused by mineral deposits in tap water, but to prevent diluting your compound, too. If you'd like to avoid making a mess, always polish on a perfectly dry car, and make sure take your time when drying, being sure to mop up any last drips that may trickle out from panel gaps, window rubbers, under wing mirrors and behind door handles.
The next preparation process involves using Masking Tape to cover any areas that may be damaged with your polishing pad - or indeed, areas that may actually damage your pad. Compounds and polishes are designed for paintwork, not rubber or matte plastic trim, so always mask up any areas that could potentially be in the way. Look out for window rubbers, badges, plastic grilles, sidelights, decals and matte plastics - basically anything at risk of coming into contact with your polisher.


Masking Tape
A good quality masking tape is a must have when using a car polisher on paint work and carrying out paint correction. The Auto Finesse® masking tape is perfect... See product details More
Stage 4 - Correction
This is clearly the bit where your polishing takes place. Whether that's a 3-stage correction, a one stage enhancement or anything in between, for maximum safety we'd always recommend one of our Dual Action Machine Polishers for this job. Unless of course you have the professional training and experience necessary to safely wield a rotary polisher… and even then, we'd still recommend using a DA - there really is no downside.


Machine Polishing
Polishing and paint correction is often seen as the stage where your car wash becomes a fully-fledged detail. But, whether you’re restoring and refining your paintwork with a machi...


Stage 5 - Protection
Whether you're using a ceramic coating, paint sealant or wax-based protection, now's the time to bring on even more shine and, most importantly, stop the environment from, extremely quickly, ruining your work.
Remember that "protection after correction' is everything. It's just plain silly not to safeguard the hours you've put in and keep your paint looking how it should for as long as possible. With adequate protection, all that's needed from here on in is safe, effective maintenance washing.


AF Top Polishing Tips
To finish off, you can make use of a few professional tips and tricks to help you along the way...

Use the right method for each area
It sounds obvious, but you'll be surprised how many people try to polish a tiny, curvy area with a 5-inch pad, or a huge flat area with a 3-inch pad. Pick the correct size pad (and machine) for each area, and don't underestimate the effectiveness of hand polishing the tiniest parts that your machine can't reach, it all adds up to the finish.

Get yourself a Swirl Spotter
Having a detailing light, like our Swirl Spotter, makes life so much easier for highlighting defects and being able identify areas that may need more work. These are designed to emulate strong sunlight, enabling you to get a true show car sparkle no matter where you polish your paint.

Centre your pad
To be most effective your pad needs to be perfectly centred on your machine. The easy way to make sure this is carried out properly is as simple as giving it a spin by hand. If there's too much wobble, pull off the pad and try again.

Always start off with Pad Prime
Yes, foam polishing pads are supposed abrasive, but new pads in particular can give a little too much (and hence, unwanted) scrub. A light spritz of Pad Prime is the answer here, this will effectively lubricate your pad to prevent any scrubbing on the first pass.

Control your cable
The name of the game here is to never let your polisher cable touch the paintwork as, or after, you polish. This is to prevent any accidental abrasions which will need more polishing. The professional way is to simply put the cable over your shoulder to give you more control. Just one of the reasons we spec all of our polishers with an extra-long lead.

Go easy on the product
Another common mistake is using too much product, which has the triple effect of making a mess, having an excessive amount compound to effectively work through, and simply wasting a whole load of your cash. You don't need to saturate the pad, just a few pea-sized drops on a 5-inch pad is plenty to start you off.

Keep that pad on the paint
Again, starting and stopping your machine while keeping the pad flat on the car will save slinging around your product, keeping clean-up time to a minimum.

Always protect after polishing
Yes, it's so important, we've said it twice. Protection after correction is a mantra to live by.
Want to learn more?
So, that's the basic guide, but naturally there's always the opportunity to learn much more with the wealth of knowledge in the Guides Section Of Our Blog.
Why not adapt this guide to your next detail and push your results to the next level?


