


The Pre-Sale Detail - How To Clean a Car Ready To Sell

IN THIS FREE GUIDE:
- Learn how to prepare any vehicle for sale and make the best possible first impression on a buyer.
- Discover the best products to use and what areas to look out for to maximise your chance of selling.
- Master simple detailing processes that will not only retain the value of your vehicle but add value, too.

WHAT ARE THE BENEFITS?
- A good detail can make any vehicle appear to be 'well looked after' through the course of your ownership.
- Keeping an eye on just a few areas can create much more impact and leave nothing for the hagglers.
- Maximising value means more cash in your pocket, an easier sale and a happier buyer.
There's only one chance to make a first impression… and first impressions count for everything when it comes to selling your car!
Some say that your pride and joy will probably never look better than the day you buy it and then the day you sell it, and although in our world we're here to make cars look amazing all the time, we get the sentiment because you only ever get one chance to make a first impression… and it goes without saying that you stand a much better chance of making a sale if the first impression is one that instantly drops jaws!
The truth is that carrying out an enhancement detail, along with spot of finishing with the correct products, can easily push your vehicle to a cut above the rest on the market. In the mind of a buyer at least, if your car looks like it's been pampered, then it's almost certainly been wrapped in cotton wool and looked after with no expense spared for your entire ownership… even if that's not strictly the case. Perhaps best of all, this impression can be achieved with nothing more than detailing, and just a few pounds' worth of products can bolster the value of your vehicle by hundreds, if not thousands. After all, that's car sales 101, isn't it? Give them nothing to knock you down on.
So, this is where a bit of care and attention can pay dividends when selling your car, and here's our top tips on what to look out for and what to use for the perfect pre-sale detail…

Start with your engine bay
One thing that 90-percent of owners, and even dealers, never think of when selling their car is giving their engine bay anything more than a quick wipe over. The reality is though, even non-enthusiasts will almost always look under the bonnet, even if they have no idea what they're actually looking at. If it's dirty, it's a bargaining chip, it's as simple as that.
At the very least the condition of the bay can be seen a tale-tale sign on the condition of the rest of the mechanicals and, as a buyer, will raise questions on how well any vehicle has been maintained and serviced. But, the good news is that all modern engine bays are relatively straightforward to detail and dress, turning your dirty engine into a top selling point. This process can be carried out in a matter of minutes using Eradicate Engine Degreaser and Dressle All Purpose Dressing. Oh, and while you're under there, make sure you top up any fluids a that need it, too. Don't fall at the final hurdle.

First protect any exposed electrics or air filters, always avoid these with your pressure washer as you work. Give the whole bay a good rinse to remove any loose soiling. Many forget the underside of the bonnet here, so this is exactly where we always start.

Next apply a liberal helping of Eradicate, this powerful degreaser is completely safe on painted surfaces along with rubber, metal and plastics, so basically the whole bay and underside of the bonnet can be treated. With that in mind, always focus on the most contaminated areas, and reapply as much as you need as you go. Eradicate is designed to quickly break down and lift oil, grease and other tough contaminants, suspending them in the solution, and allowing them to be rinsed away safely.

Agitate the solution with a Detailing Brush or Hog Hair Brush to really work it into all the recesses. Once you're confident that you have agitated every area, Eradicate should be thoroughly rinsed away, taking the grime with it.

Now the bay is clean, it's time to break out the Dressle! This water-based dressing will quickly transform the bay and can be applied to all areas while they're still wet. Liberally spray over the entire bay, close the bonnet and leave it alone. Once cured, Dressle will leave the perfect non greasy, dry-touch finish making it a great "spray and walk away' product, not to mention a nice surprise when your potential buyer lifts the bonnet.
Clean and Decon your wheels
As with any other exterior detail we start with the wheels. This is doubly important when selling a car because rims that are plastered in baked-on brake dust immediately scream about a hard life on the B-roads. Occasional decontamination with Iron Out Contaminant Remover is always a good idea as this formula is specifically designed to chemically remove this kind of harmful ferrous metal fallout. Simply spray on, brush in and even the hardiest of sharp metal particles will be chemically dissolved, allowing them to be rinsed away with your pressure washer.
Another product that's great on brake dust is Imperial Wheel Cleaner, which can be used as a stand-alone spray-on wheel cleaner, or helped along the way by brushing in with Revolution Wheel Soap. What's really important here is making sure you tackle the whole wheel, even the barrels. Just remember that the cleaner your wheels, the more attractive and "looked-after' your car will seem to a buyer. For this reason, always make sure you start with the inside of the rim using a Barrel Brush, before finishing the faces and spokes with a detailing brush, and following up with a mitt. If space between the wheel and caliper is too tight for your brush, it can be useful to roll the car forward a few inches when cleaning, just to make sure that nothing goes untouched. For a full rundown on how to clean any wheel, including those with specialist finishes, you can check out our Definitive Guide to Cleaning Alloy Wheels.

And don't forget your tyres…
If your tyres look old from the off, buyers tend to immediately start totting up the cost of replacements in their head, straight away casting doubt on the condition of the rest of the car. Very often tyres can appear discoloured due to UV fading and ground in salt and road grime, even if there's no other problems with cracking or worn tread. It makes sense, they're the only part of your vehicle to touch the ground after all, right?
The good news is that all this can be rectified using Tread Tyre Cleaner and a Rubber Scrubber Tyre Brush, both have been specifically designed to get your tyres looking like new in seconds. Tread should be applied liberally around the tyre walls and scrubbed in, as it's agitated this picks up and breaks down grime, so it can be blasted off with your pressure washer. A simple but seriously effective solution. This is also a great time to flush out your plastic arch liners with your pressure washer and give them a scrub, too. Tread does an amazing job of shifting the grime here as well.
At the end of your detail (when it's finishing touches time), a liberal spray of Dressle under the arches and even on the tyre sidewalls is a perfect finisher. It's true that Dressle may not be designed specifically as a tyre dressing, but it can do a great job, and gives a few days durability. For maximum durability over longer periods you may want to try Satin Tyre Crème for a natural matte sheen, or Gloss Tyre Dressing for that dripping-wet, show car look.
When you're finished cleaning, a good tip is to gently run the car back a few times, applying the brakes this will clean away any discolouration from water that has got on to on the discs during your wet work.

Give your car the safest and most thorough wash possible
When you're selling your car it always pays to bear in mind that there really is nowhere to hide. It's not like at a show where you can just close the doors and leave everyone checking out the exterior, because any prospective buyer will be looking everywhere in a bid to get a few quid off the price. This is why it's so important to be extremely thorough in the wash stages.
Simply not missing bits is perhaps the most important consideration, areas like the door jambs, inner doors and boot shuts are likely to be noticed on any test drive or tyre kicking session. And that's the reason why we like to start off by working a little Citrus Power Bug & Grime Remover or Eradicate Engine Degreaser into these areas using a soft Detailing Brush. Once rinsed this ensures that all the grime is removed for a spotless finish, or at least that they're prepared for a little polish later.
Another commonly missed area is the inside edges of the wing mirrors, something that's easily overlooked when contact washing but, when you think about it, an area you see plenty of when you're actually driving.
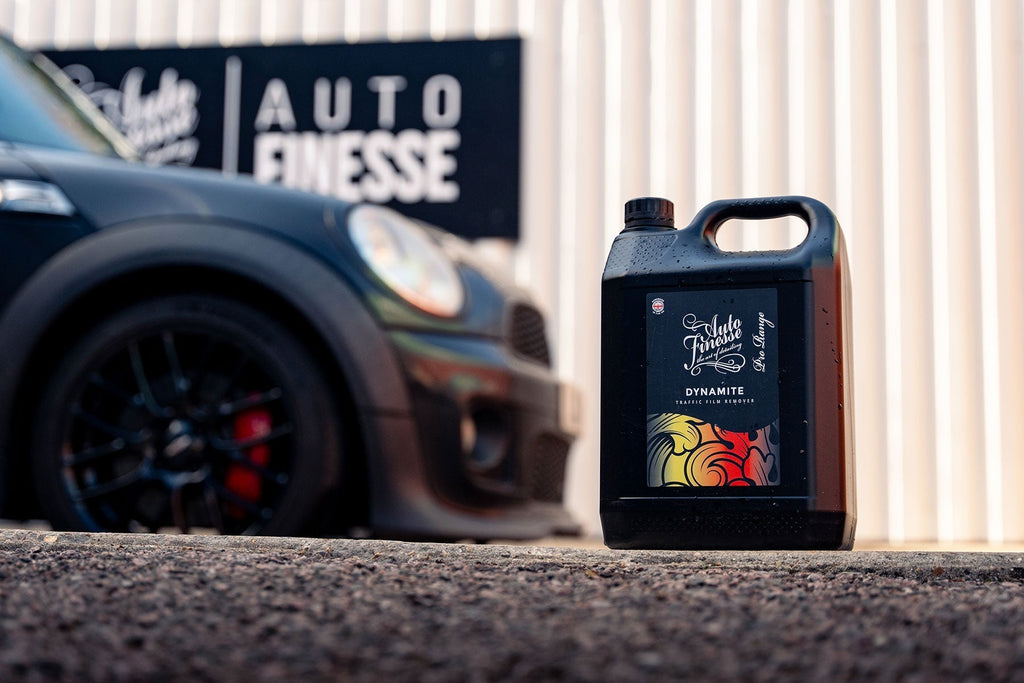
Most of all, and as always, the wash stage is the most crucial, and doing it safely is the key to the best finished result. Swirl marks are all too easily inflicted and although these are relatively minor defects, they can look a lot worse than they actually are. Prevention as they say, is always better than cure, so carrying out an effective pre-wash using a suitable cleaner like Citrus Power or Dynamite Traffic Film Remover is the best way to cut through the heaviest soiling, with no risk of dragging it around with your wash mitt.
Following this stage up with Avalanche Snow Foam is also the best form of damage limitation. A snow foam is designed to linger on the car, breaking down contaminants and offering lubrication to help them safely slip off of the surface, there's also the added bonus that the foam will work its way into all the panel gaps and recesses, deep-cleaning those, too.
The key to using Avalanche is to let it dwell on the car for a long as possible, without letting it dry, before you rinse. A good trick is to keep an eye on the windows as these tend to dry out first. While you're waiting of course, it also makes sense to use a soft brush to lightly agitate your suds into awkward areas like window rubbers, around badges and in grilles, this will help get the very best from your snow foam.

Finally a "two bucket' wash is the safest way to make sure the rest of the car is free of grime. The idea is to take one bucket containing your shampoo solution, and one with nothing but clean water, which you can use to wring the grit and grime out of your wash mitt between passes.
When it comes to your cleaning agent, we'd recommend using Lather Car Shampoo because it's not just a powerful cleaner, designed to dissolve and lift grime off the surface, but it's a lubricant, too. This means that it physically forms a slippery layer between the potentially harmful grime and your paintwork, so it can be rinsed away without touching the surface.
Apart from that, always wash in straight lines, tackling the cleanest parts of the vehicle first (to prevent cross contamination), and you shouldn't go far wrong.

Decontaminate like a pro
A full three-stage paintwork decontamination sounds like a big, complicated job but, using the correct products, it really isn't. It's actually relatively quick to carry out and will make all the difference. What this process does is remove the embedded, often harmful, contaminants that washing alone can't, leaving your paintwork super smooth and ready for polishing…
The first stage is always using Iron Out Contaminant Remover to chemically dissolve sharp metal particles that have embedded themselves in the top layer of your paint. This is important to prevent them being dragged around and inflicting damage when polishing later. This is, in fact, the primary purpose of Iron Out and a simple spray-on and rinse process - you'll know when it's time to rinse off, because the Iron Out solution turns blood red as it reacts with the metal. If a little more bite is needed Iron Out can also be slightly agitated with a Microfibre Work Cloth or Polish Pad.
Step two is using ObliTARate Tar & Glue Remover to tackle any sticky residues like road tar and glue (the clue is in the name here). This powerful solvent quickly melts away the sticky stuff, allowing it to be safely wiped away with a microfibre cloth, so it won't interfere with subsequent stages. This includes removing other extreme contaminants like traffic cone rash and even overspray.
After this process it's important to re-wash the treated areas with your Lather shampoo, this will neutralise the solvents, stopping them from interfering with the next step.
Finally, the last process involves removing organic contaminants, like those from highly acidic bird droppings and tough tree sap, using clay. For this you can utilise a Clay Bar or (part of our Handi Puck system), along with Glide Clay Lube. By running the clay across the surface, it physically pulls debris out, giving a paintwork a smooth, glass-like feel. Always clay the whole car, including the headlights and not just the front bumper and bonnet.
Once your three-stage decon is complete, you can go on to drying the car, and masking up any vulnerable areas ready for polishing.

Enhance your paint
The chances are that you won't be looking to spend hours, or even days, on a full multi-stage correction here, chiefly because a simple enhancement will always work wonders and easily make your car a whole lot more attractive to buyers.
The idea here is to clean away any surface oxidation, cut out light swirl marks and to refine paintwork to a high gloss finish. All this can be achieved in one step using Tripple All-in-One Polish. This extremely special formula contains advanced diminishing abrasives that break down and work through quickly and easily, making ideal for polishing by hand (with a Microfibre Applicator or Polish Pad), but it can also be used with a machine polisher for lightning quick and consistent results.
Like all abrasives, Tripple works by removing a tiny layer of the paint surface to smooth out defects on a microscopic level, it also contains glazing agents to fill and obscure swirls, making them far less obvious. This has the effect of allowing the light reflected off the surface (and back to your eye) to refract more uniformly, which makes the surface appear much deeper and glossier. It's worth remembering that deep-down the surface isn't flat at all, it's peppered with all sorts of ruts and recesses which will bounce back the light in random directions, so the more these can be smoothed out during refinement, the better the paint will look. It isn't actually deeper, it just looks that way, the ultimate optical illusion.
Tripple is also special because it's packed with deep cleansing solvents that will remove the most stubborn oxidation, and it will even leave behind a layer of carnauba wax. In other words, Tripple cleans, refines and protects in one single application.
When you've finished the large panels, again it pays to work on the often-forgotten areas like door jambs and boot shuts. A little Tripple on a microfibre cloth is ideal for cleaning and protecting these parts, and can also be used on gloss plastic trim, and even plastic headlights and tail lights - small touches that add up to a big difference. They could even make your sale!

Cut out the swirls
It's entirely optional of course but for cars with heavier swirling, you may find that a little more cut is needed for removal, but that's no problem because we've made the swirl correction process more straightforward than ever with One Step All-in-One Compound.
Unlike traditional compounds, One Step has an extremely wide range of cut, it's actually able to start off as a coarse cutting compound and break down to a fine refining polish as it's worked through. The special diminishing abrasives are just like the ones in Tripple, but they start off far bigger and coarser particles, giving the characteristics of a heavy cutting compound at the start, before being smashed together to become smaller and smaller until they can actually refine down to a near-flawless finish. In this way they can remove more of the surface of the paintwork, levelling it down to the bottom of the deepest swirl mark - essentially making the swirls disappear. And, don't forget that this is all without changing the product or the pad (we recommend a medium Revitalise No:2 Pad) as you would with a more traditional multi-stage correction.
It's also the reason that One Step has been developed for use with our DPX and MPX Dual Action Polishers. One Step has to be fully worked through to refine down all the way and, although it is possible to do this by hand, it will take far more effort, so using a machine is the best route to success.
This may be a relatively simple machining process, but it's one that can make a huge difference. As we said, swirl marks aren't major defects that are impossible to remove, but visually they can make paintwork appear to be way more damaged than it actually is, especially on darker cars. Using One Step instead of, or prior to, using Tripple will effectively remove these light defects, essentially making the paintwork look deeper and glossier, again this is something of an optical illusion because you've essentially removed some of the top layer so it can't be deeper. For more information on how to use One Step, you can click through to our full guide on How To Remove Swirl Marks.


Use protection for better looks
The thing about protection is that it's not just about creating a barrier for surfaces for the months ahead (you're selling the car, so maximum durability isn't the chief concern here) but it's equally about getting the best possible looks for maximum impact.
There is the choice of applying a ceramic protection here of course, we've developed our Caramics Paintwork Protection Kit to be extremely straightforward to use, and this can prove a great selling point, too. But for maximum impact and the best possible first impression, we think that nothing beats the warmth of a wax. There's a reason why show cars nearly always use wax protection, right?
We'd say that the best possible option here is using a hard wax that's tailored to make the most your particular paint type - the very reason why we offer a whole range of Signature Hard Waxes covering everything from vintage paint types, to metallics and pearlescent finishes.
The reason a wax looks so good is twofold. First of all, the application of a wax levels the optical finish, this means that visually it smooths the surface, filling in any microscopic ruts and recesses to create a perfectly level surface. Again, the reason this looks so good is all to do with light refraction - the smoother and more level the surface, the more uniform light will bounce off it, making it appear deeper and glossier.
The second reason waxes look so good is because they're not completely clear like man-made ceramic coatings. Natural waxes have some impurities that cause colour tinges, which is what gives them their warmth and makes them appear to be far less sterile.
When applying a hard wax we'd always recommend layering on an additional coat or two for extra depth and wet-look shine, this also builds up extra layers of protection. Just apply as normal, waiting at least 3-hours between coats for the layers to cure.

Of course, there are also other forms of wax-based protection aside from hard waxes. If time is a key concern, Radiance Carnauba Crème can be a great option here, while it may not be quite as durable (Radiance gives up to 3 months protection) this product has been developed to similar results to a hard wax, but in an "easy-on, easy-off' cream.
Glisten Spray Wax is another great option for adding almost effortless high-gloss finish and up to a month of protection. This advanced formula is a simple spray and wipe affair, ideal for treating hard-to-reach areas, and a little always goes a long way. Nothing is speedier, either.


Apply just the right finishing touches
We've already talked about enhancing the look of your tyres and inner arches using your choice of dressing, but the finishing touches shouldn't stop there - if anything this part is about going the extra mile and wowing your potential buyers. Clearly where more work is needed will depend on the car in question, but there's still a few top tips to be had…
Restoring faded plastic trim is a quick and easy job, and one that can make a huge difference to how your car looks in relation to its age or how it's perceived to have been looked after. For this job we have Revive Trim Dressing, a water-resistant silicone-based gel, designed to darken and restore colour to matt plastics. This formula is easy to use - simply apply using a sponge applicator, and after 5-10 minute buff away and excess - but Revive will also leave behind a natural-looking, dry-touch, satin sheen. This product also creates a UV-resistant barrier to prevent future fading, and it won't wash off in the rain. A winner every time!

A great little finisher that should never be underestimated is getting that exhaust tip gleaming with a little Mercury Metal Polish. Again, this polish uses light abrasives to clean away stubborn, ingrained oxidation, and to take away a little of the surface to reveal the fresh, clean metal underneath. Mercury is ideal for breathing new life into exhausts, brightwork, bare metal wheel lips and engine parts, and can be gently worked into surfaces using medium pressure and a microfibre cloth or Microfibre Applicator. Once you wipe away the residue, you'll immediately see the difference Mercury can make for a final finishing touch. We also have Mercury Xtreme for the extremely tough jobs which uses slightly coarser abrasives for added bite - think of this as a cutting compound, just for metal instead of paintwork.


One thing we're always asked is how to get the best finish on exterior and interior window rubbers… especially from those who may have gone a little wayward with their machine polisher! It's a good question because, as with any detail, it's the bad bits that really stick out!
The easy answer is using a little neat Verso All Purpose Cleaner on a cloth, and work back and forth over the surface with medium pressure. In a way this is a kind of polishing technique, you're actually stripping back a little of the surface of the rubber, to reveal a fresh finish underneath. A top little trick that add a huge amount to the final finish.

Get your glass sparkling
We've said it before and we'll say it again, nothing ruins a great detail like streaky, smeary glass, and that's why it gets its own section - it really is that important. You see, very often the vehicle glass is the first thing a prospective buyer will notice. Think about it like this, if you're looking at a new a car and your test drive looked like it was in 4K HD, you're going to be far more impressed than if you've been trying to peer through streaky, smokey windows. It's a fact that clean glass makes the rest of the car look cleaner and more appealing, too.
First, you'll need to consider the state of your glass in the first place. In the vast majority of cases, chemical cleaning with Crystal Glass Cleaner will do the job quickly and easily. This blend of mild distilled solvents quickly breaks down greasy, sticky films and grime, allowing it to be wiped away safely and buffed to a crystal-clear finish.
For restoring glass on older vehicles, and those with seriously stained, contaminated glass, Vision Glass Polish is the answer. Like an abrasive you'd use on your paintwork, Vision is used to physically scrub away stubborn stains, and can even remove light scratches to restore clarity. The secret is in the blend of these light abrasives and special deep-cleaning agents designed to chemically break down stains.


Utilising a few spritzes of our Caramics Glass Cleaner on the outside is also a great tip when selling your car. Like Crystal it will quickly dissolve residues and films, but it also installs a layer of hydrophobic protection. So, if it happens to be raining on the test drive, you can leave those wipers off and amaze potential buyers with how the water runs straight off.
A couple of extra tips for glass are to buff your glass cleaner one way inside and the other way on the outside, this makes it quicker and easier to locate smears and residues. And, after you've completed your interior detail (the next step), always go back and check your glass for fingerprints, marks and overspray from interior cleaning products. Glass literally takes seconds to clean, and could be the difference between a good first impression and a great one. For more on glass check out our guide on "How To Clean, Protect And Get a Sparkling, Smear-Free Finish".

Deep-clean and sanitise your interior
There's no doubt that there's an art to cleaning your interior, as you'll already know if you've read our Ultimate Interior Cleaning Guide. But, the key consideration as a seller is the impression you're giving regards to cleanliness, odour and, almost by default, how you've been using your car.
Look at like this, the exterior gives the first impression, but the interior - where any driver spends the most of their time - is always the clincher. So, making sure the inside is clean, tidy and free of nasty odours is crucial. Most buyers will overlook a few footprints on the carpets, or fingerprints on your touchscreen (although, obviously well get rid of those anyway to give the very best impression), but mouldy vents, stained seats, old bits of food and sticky steering wheels are all things that will see them running for the hills! If it looks like they're going to catch something, they're not going to buy it, and rightly so.
First thing's first, a good vacuum sets the stage. Don't just focus on the most noticeable areas, either. Getting right in there under the seats, and between the fabric folds is key. Leave no area untouched and there will be no surprises for your buyer.
It's not just the cabin, either. Always clean out and vacuum your boot - they will look because they'll be wanting to know what kind of space they're working with. And don't forget to pull up any carpets (if you have a spare wheel well) and vacuum under there while you're at it - most buyers will have a hunt around for the jack and tool kit.

Once you've cleaned away the mud and grime, next up is tackling those stains, sticky bits and odours. This process is just as important because no one buys a car with just their eyes - they'll use their touch and their nose, too.
For spot stain removal and general cleaning on carpets and fabrics, nothing beats the simple, deep-cleaning combination of Total Interior Cleaner and an Upholstery Brush. With these it's a simple case of spraying, agitating and wiping away any grime (for carpet cleaning our Scrubi Spot Pads are also amazing). Again, don't forget to clean the boot carpet and the floor mats here, too. Leather upholstery of course, can be tacked in exactly the same way with Hide Leather Cleanser.
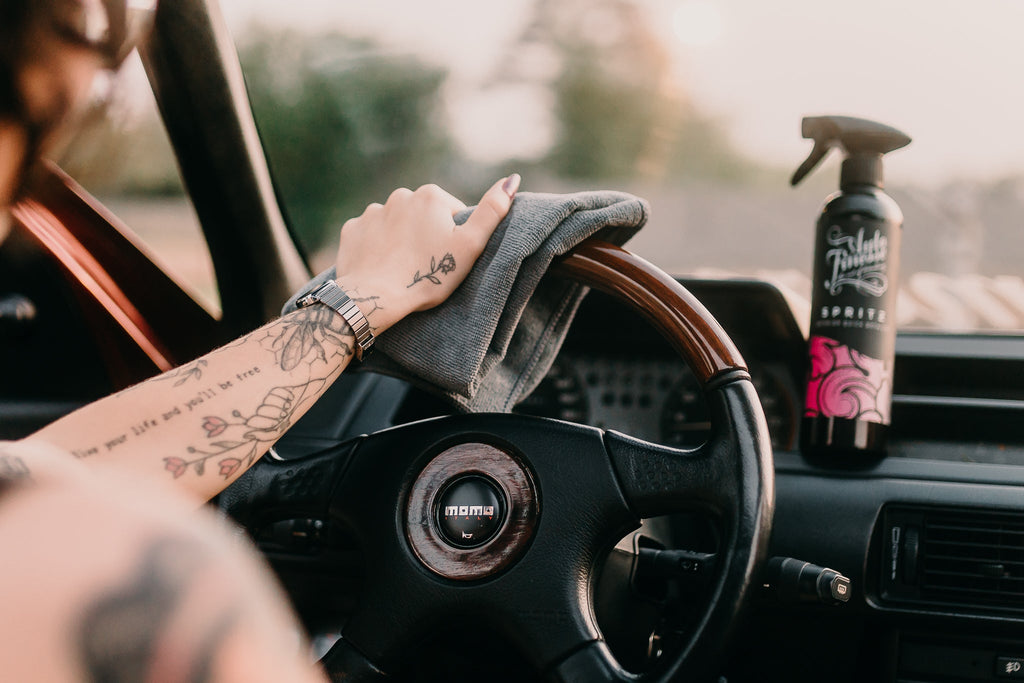
Total cleans deep down in fabrics, breaking down stains and odours, and leaving nothing but a fresh scent. It can also be used to clean and sanitise your dashboard (just spray and wipe with a microfibre cloth) to leave a natural matte finish that's arguably more attractive to a buyer than a shiny dressing because it comes across as more honest.
Total will also make short work of sticky residues on commonly-touched areas like steering wheels and gear shifters. You'll be amazed at how much dirt this formula can break down and draw out into your cloth! Don't underestimate the power of a detailing brush here, either. Agitating Total into more awkward areas around trim and air vents can make a huge difference in removing dust, dirt and bacteria. Follow this up with every cubby hole, door pocket and even the glove box, these are all places that can serve as major dirt and dust trap… and they never look better than when they're empty.
When it comes to odours, two places that pick up and retain nasty niffs are the headlining and seatbelts. And, think about it - both will be right in your buyer's face on the test drive. A great way to tackle these all-too-often forgotten parts is to add a little Total to a bucket of water, and use the solution to dampen a microfibre cloth. This can be used to wipe over your headlining and seatbelts (obviously, pull seatbelts all the way out first) and will kill odours instantly. When you're done, one of our Air Fresheners never goes a miss here either.


Finally, a littleWipe Out Interior Disinfectant sprayed into air vents will kill 99.99% of all viruses and bacteria that may have built up deep down in the system. Simply spray, wipe any excess and you're done.
Wipe Out can also be used to sanitise other areas like steering wheels and door handles before or after your test drive, you have to protect yourself from viruses too, after all.

One last check before you sell
We'd always recommend giving your car a final wipe down with Finale Quick Detailer just before your buyer turns up - this will remove any dust that may have settled in meantime and even add a little more warm carnauba protection. Finale can be used on all paintwork, and even glass, and you'll see that the results speak for themselves… so much so, that now you'll probably want to cancel that ad and keep it! There's no shame in that, either.


Need more inspiration? You can check out the full, in-depth video below...