50 Top Detailing Tips
A full half-century of professional tricks and tips put together specifically to push your detailing to the next level.

 Skip to content
United Kingdom
We're often asked what the best products are to get your pride and joy back to a suitably stunning state of detailed perfection after (mostly) sitting around all winter, or other long periods ranging from weeks to months. And, while we have to admit this can be a little on the subjective side - depending on where the car has been kept, exactly how much it's been used, and if it's been washed safely without inflicting those dreaded swirl marks - we've certainly got a dozen or so absolute essentials that can see you well on your way. In fact, whether it's a full-on show car, dry-weather drop top, a garaged classic or anything else you're looking to get back up to scratch, we've got you covered with a whole selection of easy-to-use products that can be adapted to any vehicle, and will see you fighting fit, in just a couple of hours…
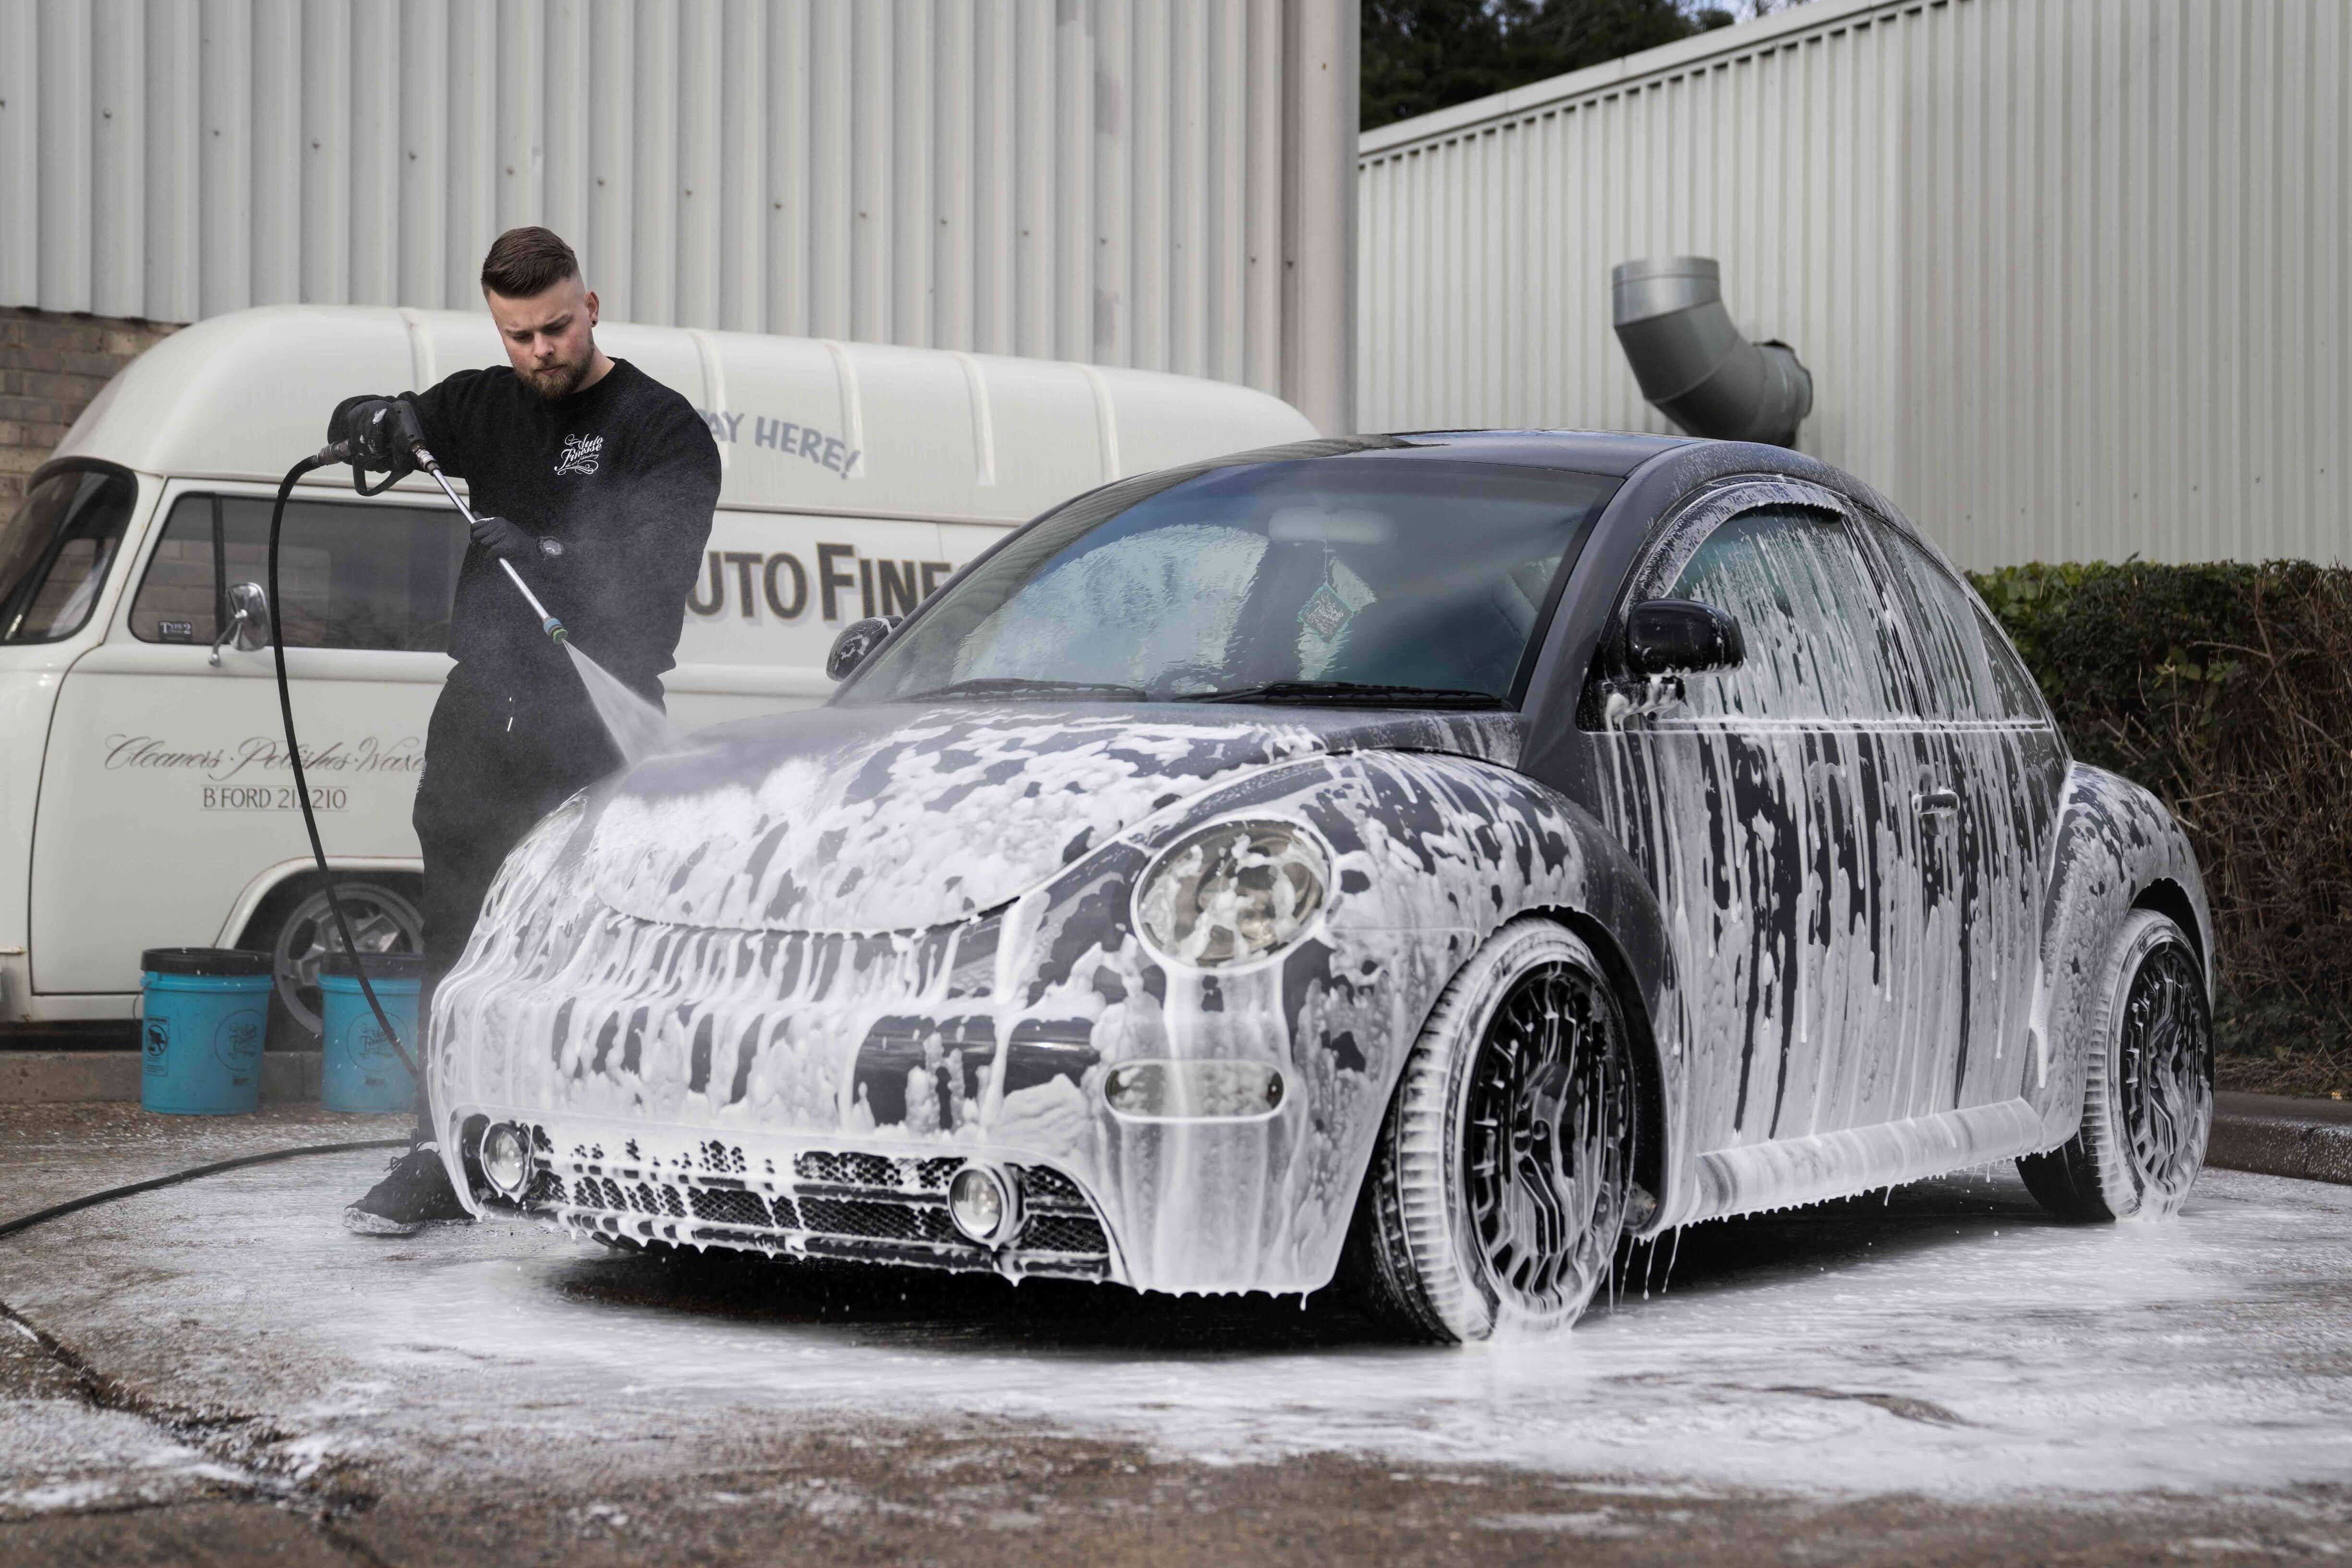
We have just the car to demonstrate the products that your detailing kit should never be without, and for once we even know the vehicle history. We detailed this little Beetle 1.8T at the beginning of last year, just a few months after it had been painted, treating it to full paint correction and wax protection. You can check that out in our article - Detailing a Fresh Paint Job.
Since then, this car has been driven around the UK attending a few meets and shows, before spending winter on a drive, uncovered, and out in the open. So, while it's by no means a daily driver, it's not the most pampered project, either. What we do know though, is that it has been machined polished and thoroughly protected, and being owned by a member of our staff, maintained correctly in the meantime. For sure, there's been more than a couple of wipe downs at events here and there, but the distinct lack of defects proves that carrying out your maintenance utilising the proper processes pre washing, snow foaming and a 2-bucket contact wash), along with periodically topping up protection layers, it is possible to maintain your vehicle, keeping it swirl-free for extended periods.
What we're facing here is a case of safely deep-cleaning to keep paintwork swirl-free, rectifying any stubborn stains and oxidation, and concours-level enhancement through proper surface preparation and adding warm, glossy protection layers - after all, the golden rule is to only ever carry out any paint correction as and when it's needed.
On initial inspection, there wasn't any heavy swirling at all here… although there was some oxidation, tree sap, a little metal contamination, organic build-up and a whole load of cobwebs…
We've said it before and we'll say it again, even if you're performing any sort of paint correction or enhancement later, it's always important to carry out the safest possible wash every time you detail your car. For some following the correct processes to limit damage is seen as more vital during maintenance washes, but look at it like this, is it sensible to risk causing defects at any time? If anything, it's more that you'll need to remove by polishing. The truth is that the wash stage is the most important part of any detail, after all, you can polish a car to perfection all day long, but that work be wasted within just a couple of washes if you use poor techniques.
Rule numero uno, is to start with the wheels and tyres, and this is because they will always be the dirtiest, most contaminated part of the vehicle exterior. The reason we clean these first (using separate kit to the equipment you use for washing the rest of the exterior) is to prevent any cross contamination of the most harmful particles - the ones most likely to scratch.
Understandably, as they're the only part to actually touch the ground, wheels and tyres typically contain substantially more salt, road grime and sharp metal contamination than anywhere else - all the nasties you don't want transferred to your paintwork, especially attached to your wash media. This is why we always cleanse wheels at the start of the detail using a separate bucket, brushes and mitts, eliminating the risk of transferring harsh contaminants during any part of the wash stage.
Imperial Wheel Cleaner is the go-to product here, it's safe to use on all painted and powdercoated wheels, and even sensitive surfaces like these easily-scratched, gloss black-painted rims. Imperial is a non-acidic cleaner designed to break down the contaminants, pulling them away from the surface and encapsulating them in the solution, allowing the grime to be safely rinsed away. Essentially, by surrounding harmful particles with viscous liquid, they can be removed without them touching (and hence scratching) the surfaces. A principle used by all good cleaners thought the whole of your detail.
After rinsing down your wheels to remove the loose grime (what we call pre-rinsing), Imperial can get to work where it's most needed. Simply apply liberally to the whole wheel, and agitate into the barrels and faces using brushes suitable for your type of wheel. Here, because of the ultra-sensitive surface, we're using a super-soft Wonder Wool Wheel Brush, and a scratch-less Detailing Brush to get to every inch.
The thing to remember is that you're merely agitating the cleaner to help work it into every little recess of the wheel, allowing the maximum contact for it to do its job. You don't need to scrub, or cause any hard abrasion, and using a little Revolution Wheel Soap, or even Lather Car Shampoo, in your wheel bucket to brush in your Imperial is also a hugely underrated trick. These products not only contain powerful cleaning agents, but they act as lubricants, allowing the contaminants to pass more easily across surfaces and onto the ground when you rinse them away.
At the same time as cleaning wheels you can also cleanse the tyres and inner arches. Again, pre rinsing goes a long way here and you can use your bucket of wheel soap as a cleaner (although for the deepest, most effective clean on heavy soiling, we'd always recommend a product designed specifically for the job like Tread Tyre Cleaner). The big difference here is that you can scrub away until your heart is content - you're not going to damage your tyres. For the best results use a Rubber Scrubber Tyre Brush to get into the treads and sidewalls, before rinsing away the grime.
Pre washing is, over and above anything else, is the most important part of the wash stage, and arguably detailing in general. Put simply, you must always carry out a pre wash, regardless of how clean or grimy the vehicle may appear. Very often there's plenty of harmful particles you won't see, or dirt and dust trapped in panel gaps and shuts, and the idea is to get these contaminants safely away from paintwork before you physically touch the vehicle using your wash mitt, dragging harmful particles across paintwork and inevitably inflicting damage.
For exactly the same reason that you pre-rinse your wheels, you always pre-rinse the whole exterior, taking extra care to flush out panel gaps, fuel flaps, wing mirrors and door jambs. This not only makes sure that these loose contaminants don't come back to haunt you later, but ensures that any cleaning agent you use is getting to work where it's most needed, instead of being wasted on soiling that could be blasted away first.
After this simply apply your prewash Cleaner (here we're using Citrus Power Bug and Grime Remover, but you can also use a suitable dilution of Dynamite Traffic Film Remover), over the whole vehicle, starting with the areas likely to contain the most contaminants to make sure they get the maximum dwell time. Again, pre-cleaners work by breaking down, lifting and encapsulating particles, surrounding them in the solution and allowing them to be rinsed away safely. It's simply a spray-on, dwell (without letting the product dry) and rinse away deal here.
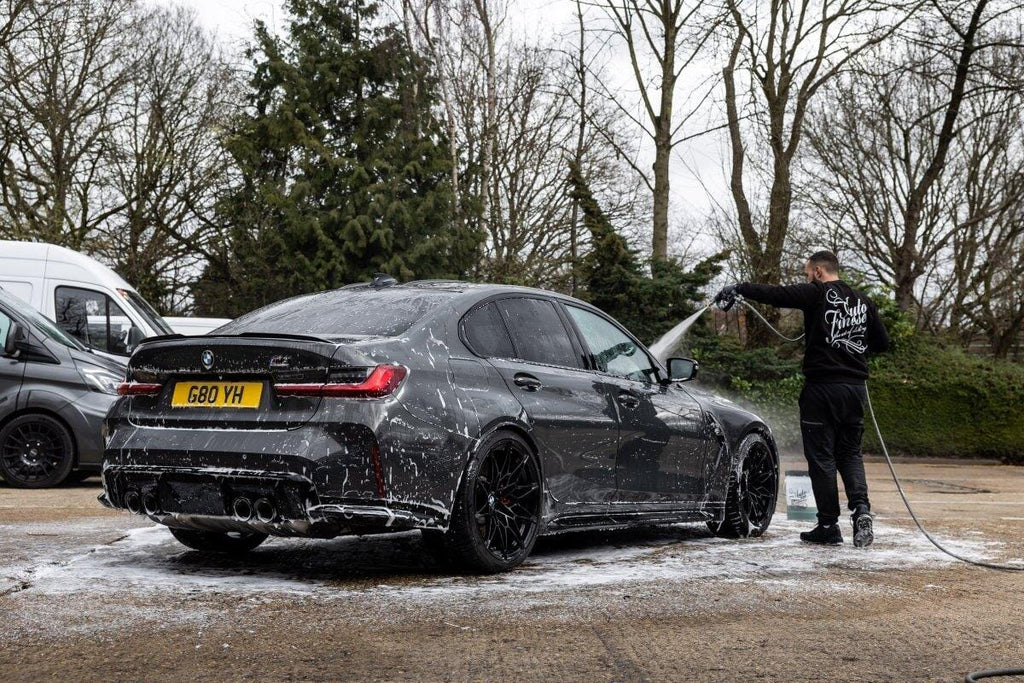
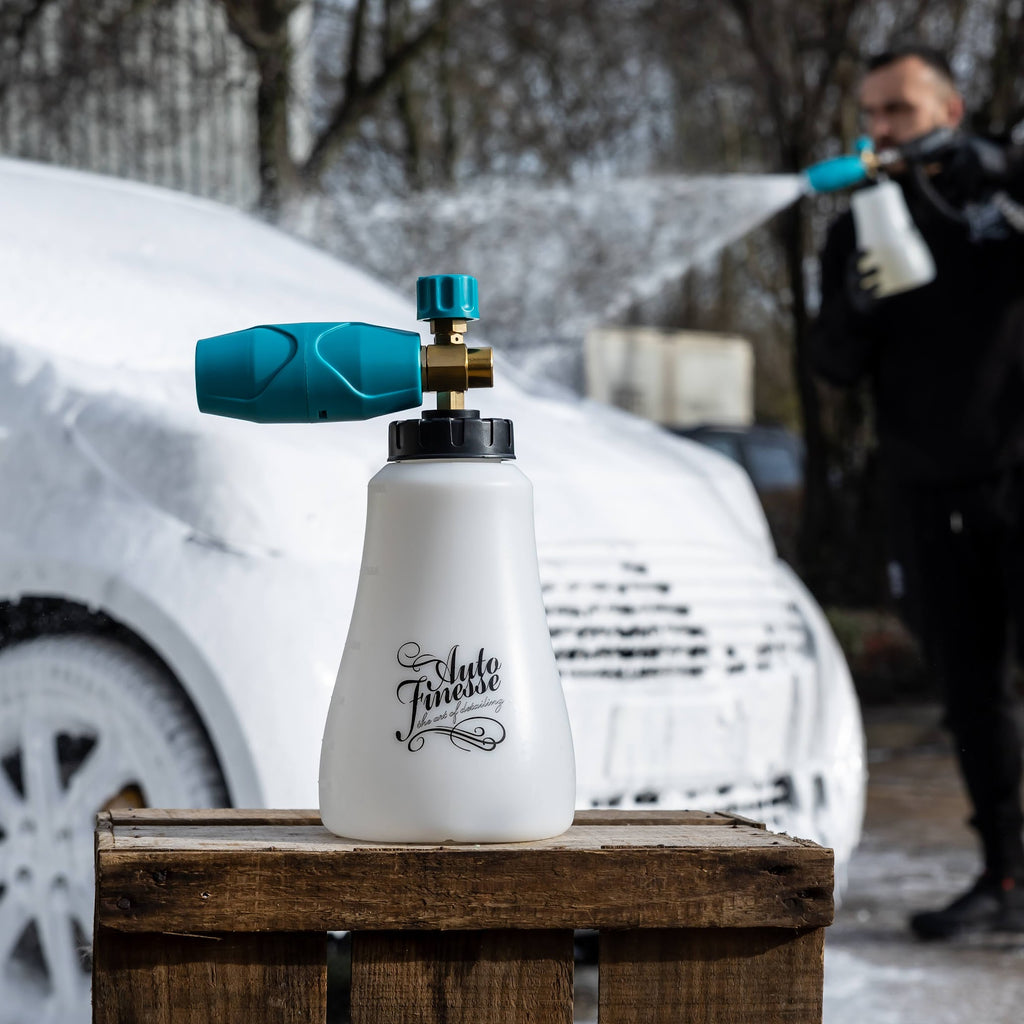
The second part of the pre-washing stage is using snow foam to attack any hardier soiling. Products like our Avalanche Snow Foam are another type of pre-cleaner, but one that's designed to be whipped up when applied with a Snow Foam Lance (which itself will contain a special metal gauze) to create a thick foam that's designed to linger on surfaces for as long as possible while it breaks down and lifts the stuck-on particles. Avalanche also works its way into panel gaps and other recesses, further cleaning away hidden dirt. Assuming you've carried out your initial pre-rinse and prewash effectively, snow foams are also safe to brush into the more awkward recesses, such as weather strips, grilles, around badges and inside fuel caps, this is to make sure the cleaning agent reaches every area.
Once you've rinsed away the grime with your foam, you can move on to the safest possible contact wash, comfortable in the knowledge that the heaviest particles will have been removed.
First thing's first, a 'two bucket' wash is important - but you already knew that, because it's likely the most talked about process in the whole of detailing, right?
Yes, you'll probably already know that you always use one wash bucket for your soapy solution, and another rinse bucket to clean out your mitt in between passes (before you go back to the wash bucket to load up on the suds) but there are other considerations when it comes to getting the perfect, swirl-free contact wash, and the first is as simple as the actual buckets you actually use.
What makes a proper detailing bucket', as opposed to the sort of buckets you find at a DIY store, is both the capacity and the fact that it will contain a grit guard to help prevent large, sharp particles being accidentally transferred from the bottom of the bucket (where they will sink) onto your wash media. The reason capacity is important too, is that the more water or solution your bucket can hold, the less likely it is that any grime you remove will be recirculated back onto your mitt. This is the very reason our Detailing Bucket will hold 20-litres of water, double that of standard bucket.
The cleaning agent and wash mitt you use is also crucial to the success of your contact wash. The best quality mitts - like the ones you'll find in our special wash mitt selection - are designed to trap and hold grime deep within the pile and away from paintwork until they're physically rinsed out.
We use Lather Car Shampoo as our cleaning agent because it's not only a powerful cleaner and degreaser, but it's also classed as a lubricant, which helps any remaining grime slip and slide over the surface without scratching. Lather is also ideal because it's a pure cleaner it doesn't contain any polymers or shining agents to create a false finish, or interfere with the rest of your detail.
The last consideration of course, is the one that many forget, and that's the actual route you take around the vehicle. To prevent dragging any grime to a cleaner area of the car, we always work on the cleaner areas of the car first. Starting with the roof, upper sides and bonnet, before tackling the front bumper, lower sides and rear end. Washing only in straight lines, from the top down, also cuts down on the possibility of creating swirl marks.
While decontamination, or a "decon wash' isn't a process that shouldn't be carried out during every maintenance wash, it certainly should be completed before any polishing, paint correction or the first time (as opposed to topping up) any protection layers. This is just as important if there's no immediately obvious contamination because, once again, there may be hidden particles that you won't want to be dragging around during subsequent stages. With that in mind, decontamination may be the removal of particles that washing alone can't - either by chemical reaction or physical removal - but it's as much about damage limitation during later processes as it is making your paintwork look better.
The first part of the decon process is specifically designed to remove ferrous metal particles, chiefly derived from brake dust. Essentially these are tiny shards of metal shrapnel that are abundant in the air, especially on fast and congested roads. They also come from your own brake pads floating around and embedding themselves in the top layer of your paintwork. On lighter colour paint these can often be seen as flecks of rust, which essentially, they are. Ferrous metals are so named because they contain iron, and as iron reacts with the oxygen in the air it becomes covered in a layer of iron oxide, the chemical name for rust.
Anyway, generally speaking, the worst of these embedded particles can't be physically pulled out of paint layers, they have to be chemically removed - or more specifically, dissolved using Iron Out Contaminant Remover. The chemical reaction here can actually be seen, as the dissolved iron suspended in the solution turns the whole lot blood red. It's even safe to gently agitate Iron Out (with a Microfibre or Foam Applicator) to refresh the solution and give it more bite. Simply spray on, wait a few seconds for the Iron Out to React, agitate if needed, and rinse away the contamination.
Granted, in our case there wasn't much to bleed out on the Beetle, but crucially there was some iron contamination… which can cause damage just like having a huge amount. Put it like this, having a load of sharp metal swirling around on your polishing pad or applicator isn't going to help your paintwork, and this is why metal decontamination is such an important part of the process.
The second stage of a full 3-stage decon is using ObliTARate Tar & Glue Remover, a strong solvent-based formula designed to melt sticky residues like adhesives, traffic cone rash and tar. ObliTARate is designed for more targeted application, on specific areas that are contaminated, rather than general application over the whole vehicle. It's also advisable to only use this solvent as and when it's needed (you'll be able to see contamination such as tar spots first) and this means that it's the only optional decontamination process. In our case there were no sticky residues, so we could skip this stage - as with many other times in detailing, it's all down to doing a proper inspection.
One part of the decontamination stage that isn't ever optional is using clay to physically pull out the last of the contaminants, even those that may be almost invisible to the eye. Now, utilising clay is where some feel that a wash becomes a detail, and while that may or may not be true, we can certainly understand the sentiment. What clay has is the unique ability to remove both organic and inorganic contaminants like tree sap, mineral deposits from hard water, protein deposits from bird droppings and industrial/environmental fallout - all of which there was plenty on the Beetle from where it had been sitting around over winter.
The key when using a Clay Bar along with Glide Clay Lube (both of which you'll find in our Clay Kit), is to be thorough, covering every inch of the paintwork, including gloss plastics and your headlights. Note that we said the whole vehicle here, areas like roofs and arches can be just as susceptible to contamination as bumpers and bonnets. Bear in mind that you don't need a lot of pressure, either. You're merely coaxing the embedded nasties out of the paintwork - let the clay do all the work and you'll actually feel the results.
Often forgotten, the drying stage is also a crucial part of the wash process. In fact, you should never leave any car to air dry after cleaning because tap water - the water you've just washed your car with - will contain all sorts of impurities. If left to dry these heavy mineral deposits will remain on your paintwork, often needing polishing just to get them out. As you can imagine this is especially important during routine maintenance, because you'll also be polishing away your protection layers.
In the interests of keeping any wash swirl-free until the end, it's also important to remove these impurities (along with the water) as safely as possible. This is why your drying towel needs to be supremely soft but also extremely absorbent - the idea is to soak up the water along with the impurities, rather than merely push them around with the risk of inflicting defects. A good drying towel like our Aqua Deluxe, or Silk Drying Towel (which we're using here) will do exactly that, ensuring that you don't fail at the last hurdle.
With the wet work complete, this is the part that gets even more subjective. In other words, one of the biggest parts of detailing is all about inspection and taking appropriate action on a job-by-job basis.
Here you may find that paint correction is needed to remove swirl marks any other defects. You may choose to break out the machine polisher and One step All-in-One Compound or Revitalise System V2 Compounds if you're looking to ceramic coat the vehicle. Or perhaps you're looking for more of a single stage enhancement using Tripple All-in-One Polish? Only you will know what you need, but once again we'll say that any sort of correction should only be performed as and when it's needed. However the same can't be said for prepping your paintwork with a product like Rejuvenate Paintwork Cleanser, prior to adding wax protection. This process is the key to removing stubborn oxidation to get the very best from your detail, creating a striking concours-level finish in no time at all.
As we said, our Beetle has been well maintained over the course of the show season and pretty much left alone for winter, but although there's no swirling present that doesn't mean that a little oxidation and a few water marks haven't crept into the paintwork. Technically these type of defects will stop any protection layer from bonding properly, but even worse than that, they instantly draw the eye in otherwise flawless paint. This is because, like all defects, light bounces off them and is diffracted in many different directions (even through your protection layers) instantly highlighting their presence. Removing these to reveal paintwork that's appears perfectly level means that light bounces back to your eye more uniformly, this makes the surface look deeper and glossier. Add a wax layer on top of that, for protection and even more gloss, and you're always onto a winner - that's how it's done by the pros.
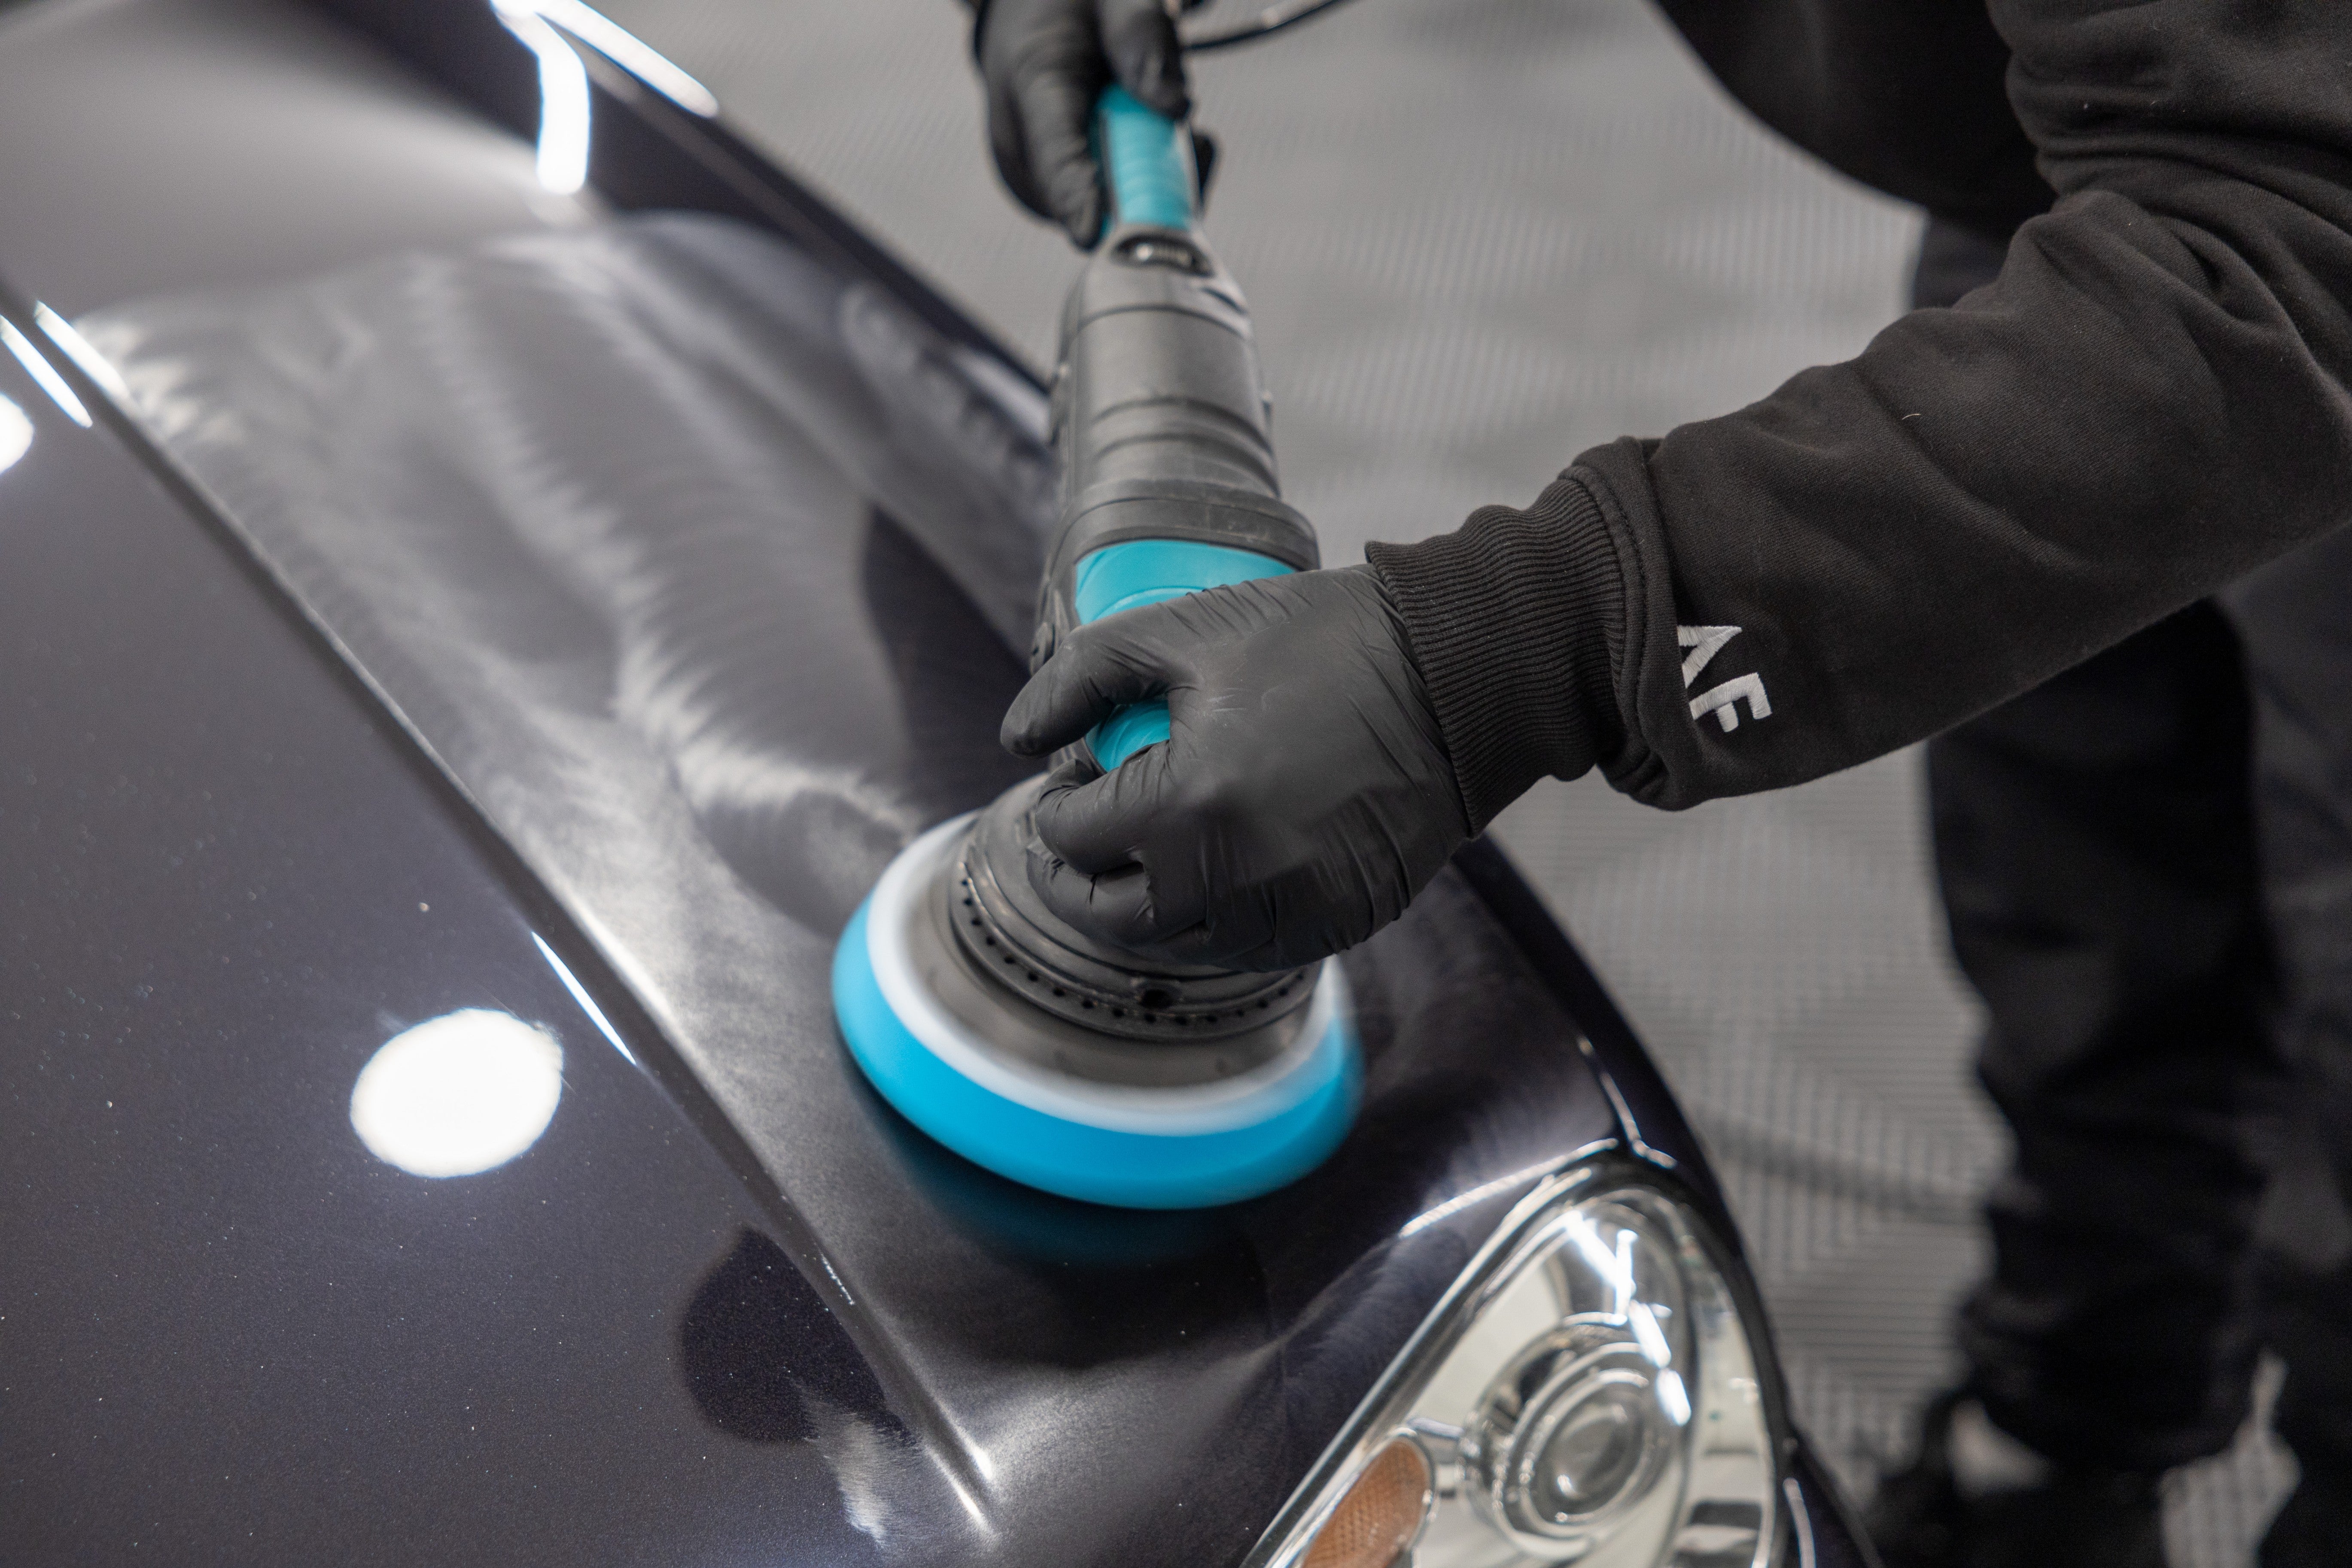
Rejuvenate works by using a combination of deep cleaning solvents and fine abrasives. In this way it's a polishing product capable or removing fine defects and enhancing paintwork, but it's mostly use for deep cleansing and oxidation removal through mechanical action (with the abrasives) and chemical action (with the solvents). Rejuvenate also contains glazing oils, so it can fill and level out light defects, making light bounce off them more uniformly, obscuring them to the eye. Once you've worked this liquid into the paintwork and wiped away the residue, it also creates the perfect base for wax bonding.
Application is extremely straightforward, too. And, although this particular cleanser works well with a machine polisher, it contains special (and extremely fine) diminishing abrasives that are easily broken down, so it's also ideal for use by hand, without having to create a whole lot of pressure. Here we're using a Microfibre Spot Pad on a Handi Puck for a little added bite including the wheels in the process, but Rejuvenate can also be applied, and worked through effectively, using Microfibre Applicator or Polish Pad.
Again, the type of protection you use is either down to personal preference or taken on a job-by-job basis. It also dictates the kind of correction product you be using during the previous stage.
You may have a daily driver or track car for example, and be looking to add hardcore ceramic protection using our Caramics Paint Protection Kit. In this case the polishing product you need to prepare the paintwork would have to contain no waxes or fillers, so you would have opted for our Revitalise compounds or One Step so there's no interference with the chemical bonding of the coating.
In our case of course, being something of a show car, we'll we've opted for wax based protection, simply because there's no denying that, for looks, nothing beats the warm glow of a wax. More to the point, too, nothing competes with the glow of a wax on a surface that has been prepared with Rejuvenate! We could also use one of our Signature Hard Waxes here, offering hardy long-lasting protection, but because we're looking for a speedier detail - and a wax-based product that's quick and easy to top up on regular maintenance washes - Radiance Carnauba Crème is the perfect solution for this particular job.
Durable for up to 3-months, and developed to give the look and water behaviour of a hard wax, this non-abrasive liquid formula is specifically designed for easy-on - easy-off application. In fact, aside from our carnauba-infused Glisten Spray Wax (which offers 4-weeks of protection), there's nothing quicker. Safe for use on all types of paint, Radiance can be applied over the whole vehicle (including the recently re-painted wheels) using a Wax Spot Pad, Polish Pad or Microfibre Applicator, before being buffed away to leave a super slick surface that will actively repel grime. Easy.
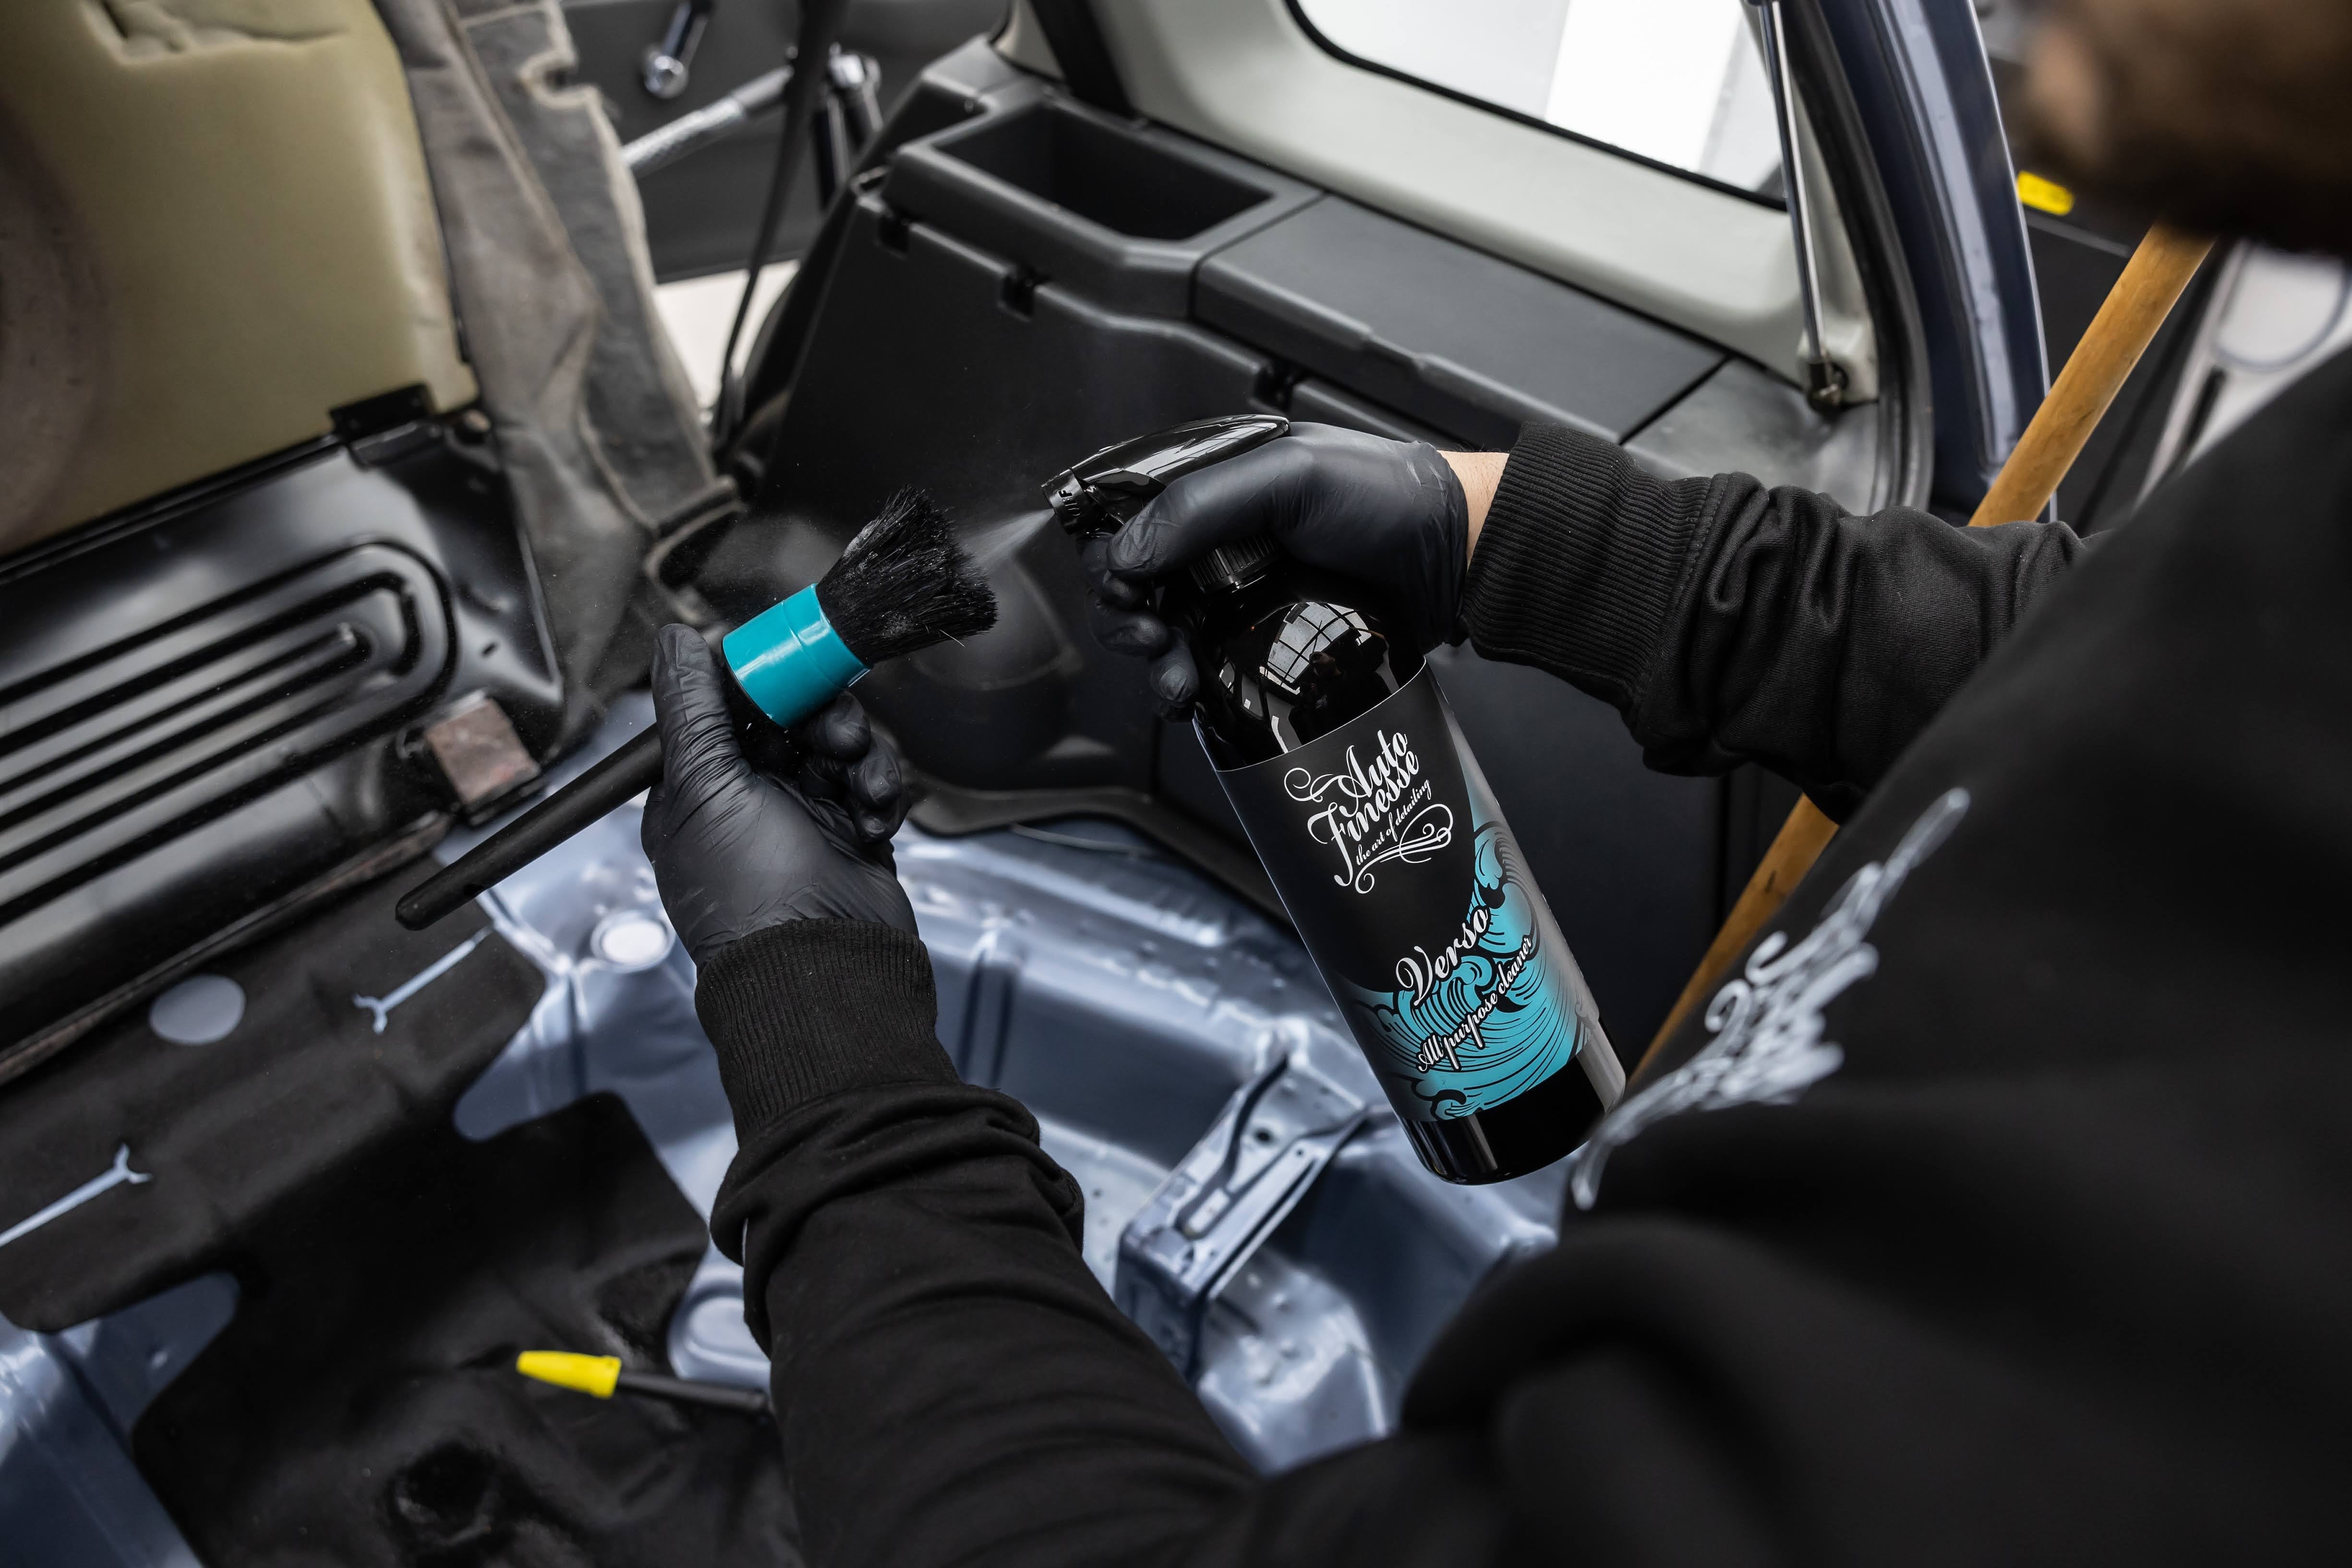
It goes without saying that how far you need to delve into interior cleaning will depend entirely on the level of contamination. While all the cleaning principles, and the products involved remain the same, how much you need to scrub will vary for job to job. Here, as you can imagine on a car that's been sitting around unused for a good few months, there's not a great deal of mud or heavy soiling the sort of contaminants where we'd need to break out the Upholstery Brush and Total Interior Cleaner. Aside from a little dust and debris, which is easily vacuumed and wiped away, cleaning here is more about removing the invisible nasties such as viruses and bacteria that may have incubated over time. Heavily contacted areas like steering wheels, shifters, switches and door cards can be effectively cleaned with just a few spritzes of Wipe Out Interior Disinfectant, which kills 99.99% of all bacteria.
Aside from dashboards, door cards and the like, two areas to always look out for here - our top tips if you will - are inside the heater vents and the seatbelts, both areas that are notorious for the build-up of spores and mould when a vehicle isn't being used daily. Always fire a few spritzes down your vents, and pull your belts all the way out to give them a spritz and a wipe over. Quick professional tricks that we can all use to great effect.
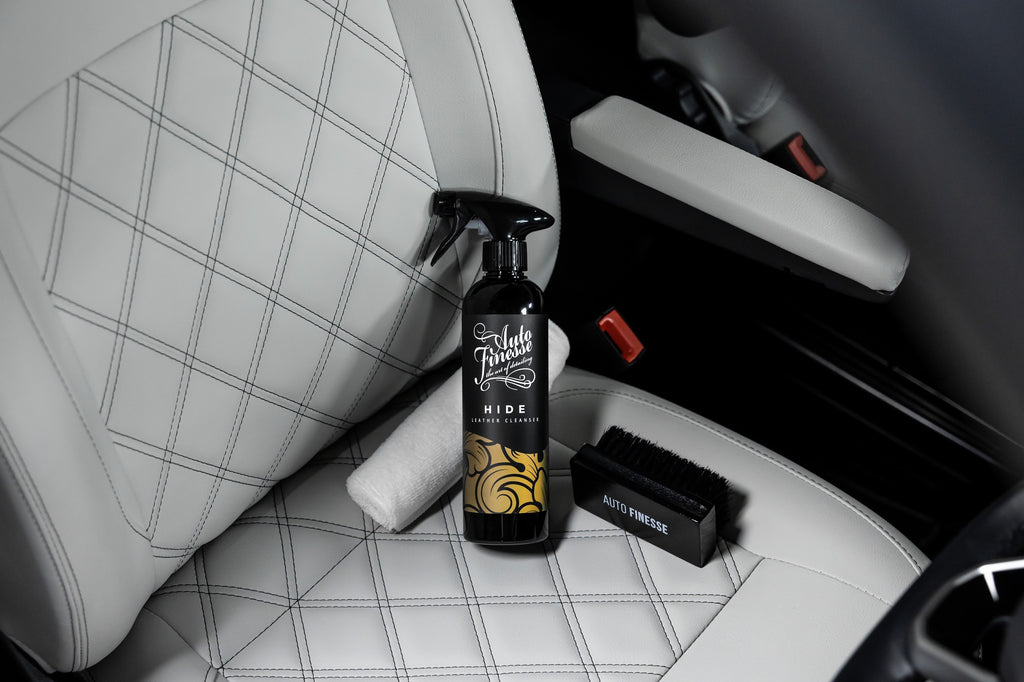
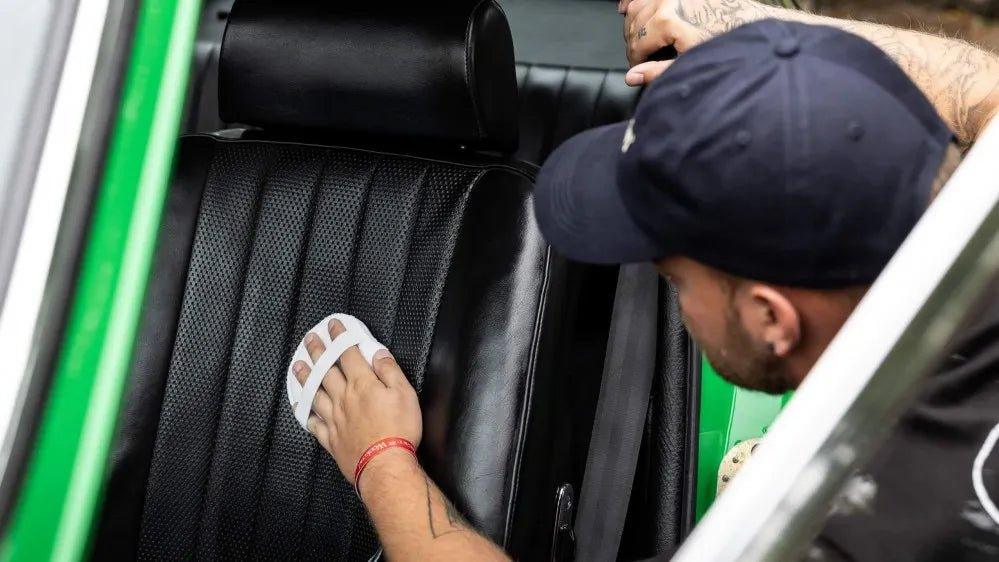
Fabric or leather seats, along with mats and carpets, can also be effectively cleaned with Total Interior Cleaner, or given the Wipe Out Treatment. But, for the poshest leathers, we'd always recommend Hide Leather Cleanser, a gentle, mildly balanced glycerine-based cleaner specifically designed to target and safely remove tough ingrained stains, while being mild enough to use on a regular basis without the risk of abrading or drying out your leather.
On light soiling (like here) a spray and a wipe will remove any debris, and on heavier soiling and stains, Hide can be agitated with a suitable brush to help break down the contaminants before wiping them away. Once again, both are extremely quick and easy processes.
The final stage is the finishing - what you might call the details that make the detail. And although we have a few great finishers and dressings you can use to push your any car to the next level and far beyond, there's two fundamental basics here that your general kit should never, ever, be without.
The first is Satin Tyre Crème, an amazing finisher and one that allows you to choose exactly the level of gloss you'd like. Simply add a single application for a subtle natural sheen or layer it up for a slick, glossy show car finish - perfect for this car we think you'll agree.
It's not all about looks here though, Satin also actively nourishes the rubber and leaves behind a layer of protection from the elements… and, let's face it, when it comes to protection, your tyres will always need all the help they can get!
Finally, the last stage of any detail, the glass. The reason that we wait until the very end to clean glass inside and out, is they're will inevitably be a few smears, fingerprints and dust from when you were working around the rest of the vehicle (we're only human, eh?), but these can be tackled extremely quickly using Crystal Glass Cleaner. After all, there's nothing that draws the eye away from the perfect paintwork like streaky smeary windows and mirrors, so this deep-penetrating blend of mildly distilled solvents has been developed to instantly cut through the grease and grime, leaving behind a sparkling smear-free finish.
All that's needed is a spray and a wipe here, but a good little tip here is to wipe the inside one way, and the outside the other - this will make it easy to spot if you've missed any residue. Another top pro tip there.
So, that's how we got this little show car out of the winter rut and ready for the next meet, and we think you'll agree that the results speak for themselves. You can of course adapt all these products and processes to your own vehicle because, after all, that's what detailing is all about. One thing's for sure though, it'll see you in good stead if you're never without these 12 detailing essentials.