


In The Detail - Ford Focus ST

This Full Detail Guide Includes:
- How to use a paint sealant and the benefits
- How to remove pet hair from interiors
- How to perform maintenance and decon washes
- How to deep-clean and finish a modified engine bay
Get a closer look behind the scenes of the video with our in-depth guide on this Ford Focus ST detail…
It goes without saying that modified cars make our world go round, but you know what's even better than a modified car? A modified car that gets used on the regular in all weather conditions - a modified car just like this wide arch monster right here.
What's coming up may be one filthy Focus from a detailing perspective, but what's interesting here is that there's a huge difference between well used and well maintained. Many cars are well used, we see them all the time, but if they're badly maintained using questionable wash techniques you can't call them well maintained, too. That's not the case here, this car has, we're told, been well maintained, so we're not expecting to see a whole load of swirl marks and paint defects for this detail. But as for being well used? Well, it's pretty obvious that this one has seen a good few miles since the last round of maintenance.
The full story is that James the owner is a friend of TeamAF and he recently completed a week-long winter trip to Austria and back. And, even though he neglected to mention that his four-legged friend went with him, it's pretty obvious where the unavoidable and huge concentration of grime has come from. But that's not a bad thing, because we love nothing more than using our detailing products to get stuck into a really mucky one.
So, although we'll inspect along the way and adapt our detail to suit, just like we always do, on the face of it what's needed here is something in between a traditional safe maintenance wash and a full deep-clean and paint correction detail. Of course, we'll include a decon wash along the way and, just because there's plenty more driving planned for the rest of the winter, install some of the hardiest protection available. Follow the video bellow and check out the process…

So, you've seen the processes in the video but it's pretty obvious that, in real-time, all this took a while longer than 10-minutes. So, let's dive into the full process with an in-depth guide to every product used, how we used them, and why they were chosen this time around…


Cleaning Wheels & Tyres
First, as with every detail, we tackle the wheels. This is because they're typically the most contaminated part of any vehicle. Your wheels and tyres come into direct (and prolonged) contact with the most corrosive contamination found on the roads. The most severe of all are salt, heavy grit and brake dust. These types of contaminants eat away at powdercoat and lacquer layers and, if left for long enough, will corrode the metal alloy itself. This is why it's so important to clean your wheels regularly.
The concentration of contamination, and the type of contamination itself, dictates the products we use on the wheels. What also should be considered is the type of finish, if they're standard or aftermarket wheels, and if there's any previously applied protection layers. This will tell us what products are safe, and the ones that will be most effective.
In our case here, these gloss black Work Emotion wheels have a relatively sensitive finish compared to standard wheels and, as with many aftermarket gloss painted or powdercoated wheels, will be more prone to the infliction of scratches and swirl marks while cleaning. You'll also find defects particularly noticeable on black wheels. All, this tells us that the wash media we use to agitate our cleaners must be gentle on the surfaces. Here we chose a combination of a Wonder Wool Wheel Brush, soft bristle Detailing Brush and a Plush Wheel Mitt, all products that are designed to lightly agitate cleaning agents and lift grime safely away from sensitive surfaces without scratching.
While reasonably grimy from road salt and brake dust, there is some protection present on these particular wheels, but what's most important here is to use a cleaning agent that's both kind to the protection layers and the wheel finish. Imperial Wheel Cleaner is the perfect cleaning agent for the job because it contains special surfactants designed to break down grime, physically pulling contamination from the surface and surrounding it in the solution. This allows the contamination to be rinsed away without touching the surface.
Imperial can power through the worst contamination, but is gentle enough to be safe to use on all painted and powdercoated wheels, whether they're standard or aftermarket.

When agitating our Imperial we used Revolution Wheel Shampoo for added cleaning power and as a lubricant to help large, potentially harmful, particles slip safely and more effectively across the surfaces.
Revolution can also be used as a gentle stand-alone cleaner for the most sensitive finishes of all, such as bare metal, chrome and polished wheels. But, because of the lubrication properties of this solution, and the fact that it's a concentrated shampoo that's designed to create deep-cleaning suds in a bucket, makes this one particularly ideal for use when agitating spray-on wheel cleaners. To be most effective, all wheel cleaners should be agitated, the key is to do this as safely as possible. Revolution in this instant is not only a cleaner, but a safety precaution, too.
The first step is to prepare our Revolution solution by adding a few capfuls to a bucket of clean water and froth up using our pressure washer.

Now we take on one wheel at a time and the first step is to give the wheel and tyre a thorough rinse down. The idea here is to remove any loose grime, grit and other heavy particles that can be removed by water pressure alone, before we use any cleaning agents. This leaves our cleaners to work on the bonded grime where they're most needed (rather than on grime that can be removed without them) cutting down on wastage. While we carry out the wheel pre-rinse we're also looking to flush out the inner arches as much as possible to remove any loose mud and road grime.

Next, we can move onto using our cleaning agents to break down and lift the bonded grime. The first step is to spray our Imperial Wheel Cleaner liberally all over the wheel, being sure to get plenty inside the barrels and any awkward recesses. The advantage of a spray-on cleaner here is that it's easy to direct your spray over each area.

When there's plenty on there, we'll let the Imperial linger for a minute or two while it starts to lift away the worst of the salt and brake dust, you can actually see this run off of the wheel in the solution. The Imperial left over on the wheel will be breaking the bonds of the stuck-on grime.

One of the most important parts of the wheel cleaning process comes with agitation. But, contra to popular belief, it's not so much about mechanical cleaning (physically scrubbing away heavy grime with your brush or mitt), agitation is simply a way of ensuring that your cleaning solutions get to every area, and that they're used in a way that's as effective as possible with as little wastage. Agitating in each area not only ensures that your cleaning agent makes physical contact, but it helps to move away any spent product (cleaning agent that's already reacted or encapsulating the maximum amount of contamination) and refresh the area with fresh solution to work on any remaining grime. If you simply spray on a wheel cleaner and then rinse, chances are that it won't reach every area and only the top layer of heavy grime will be removed (this useful for a pre-cleaning step on heavily soiled wheels, but to ensure that no areas are missed, you will always need to reapply and agitate after).
We start by agitating our Imperial into the barrels using our Revolution solution and a Wonder Wool Wheel Brush, making sure that we contact every part of the barrels. It's worth remembering that the inner wheels are just as susceptible to corrosion as the centres, in fact, they're typically even more contaminated so it pays to be thorough. The Wonder Wool gently massages the solutions into the surface and, because the cleaning media is deep pile microfibre, it's able to lift and lock away harmful particles away from surfaces, in a similar way to how a wash mitt works on paintwork. A good pro tip when cleaning barrels is to work from the top around the wheel in a clockwise motion, helping to ensure you don't miss any. For plenty of reach on this rather wide wheel the Large Wonder Wool is being used here.
Once the barrels are completed, we move on to the faces and behind the spokes using an Ultra Plush Wheel Mitt. Don't underestimate the advantages of having a dedicated wheel cleaning mitt, the sheer flexibility allows you easy accesses into a whole load of awkward recesses that would otherwise remain untouched. Last, we use a soft Detailing Brush to make sure we've agitated our solutions into potential dirt traps such as the rims and bolt holes. Only a brush will give you the best access here, but again it's important on wheels like this to use a brush that won't inflict swirls.


Before we rinse the contamination from the wheel, we can quickly clean all the oil residues, road grime and old dressings from the tyres. For this we utilise Tread Tyre Cleaner, a product specifically designed to power through the harshest, oily contamination, while remaining kind to the rubber underneath. This solution works in a similar way to your Imperial Wheel Cleaner (using surfactants and degreasers to break away and encapsulate grime) but unlike many harsh all-purpose cleaners it won't damage or dry out the surface, even with plenty of scrubbing.
That's the other thing about tyres, here you can mechanically clean away the grime with no fear of inflicting damage. In fact, using a stiff brush like our Rubber Scrubber Tyre Brush actually serves to draw out dirt from under the surface. Unlike a wheel your tyres won't get scratched, so you can spray your Tread directly onto the sidewalls and scrub vigorously. This process cleans the rubber thoroughly, offering a surface that will be easy for your tyre dressings to form a firm bond with. In this way your chosen dressing will not only improve the look (and not be riddled with grit and grime) in the finishing stages, but it will last longer, too. Once we've scrubbed in our Tread, we'll rinse down the wheel and tyre, removing all the contamination trapped safely in our various cleaning solutions. Then we'll move on to clean the other three wheels and tyres using the same process.


Deep-cleaning a Modified Engine Bay
There's a couple of things to look out for when tackling any engine bay. For a start, if its dirty enough to warrant wet cleaning - and by that we mean deep-cleaning with a pressure washer - the process is completed in the wash stage, before the paintwork. After all, we don't want to be cleaning our paint twice.
We're doing the job after the wheels because the bay here is dirty, but it's not filthy as it could be. There's plenty of light grime but it's not covered in oil and grease. If that was the case, as an extra precaution to avoid spreading oily and heavy grime to surfaces it could damage or stain, we'd be cleaning it at the very beginning of the detail. As it turns out though, while this bay is a little grimy, the ST lump is probably in better condition than the outside.


Second, it's important to ascertain if the bay can even be wet cleaned at all. On modern cars like this, we're pretty safe. With plastic covers everywhere there's usually plenty of protection for vital components. And, while we're still careful to avoid electrics and alternators, misting our pressure washer over the bay rather than sticking it right in there, here we can let the cleaning agents do all the work of lifting away the grime.
Some classic cars can be a little more complicated because they don't come with the same level of protection. And some modern cars, which have more tightly-packed bays (see our Porsche 911 Turbo Detail for one of those), may pose a risk when wet cleaning, so in these cases we'd opt for the safer - but slightly more labour intensive - approach of cleaning using a little 1:10 Verso and a Detailing Brush, carefully wiping away the grime as we go. In most cases we'd also do this after the wet work is complete, especially if we're only looking at a little light cleaning.
The final thing to look out for are any modifications that could cause you trouble. As with many modified cars, this ST has a huge open cone filter, and we don't want to be getting that wet. So here we're protecting that by avoiding the area with the washer, and by bagging it up, just in case. All stuff we look for on a job-by-job basis.
When wet cleaning a bay, we always start on the underside of the bonnet. There's one reason for this - gravity. While we're working its unavoidable to get grime and water dripping down onto the engine, so we start here to avoid having to clean the lower bay twice.
The first job is to give the bonnet a good rinse down to remove any of the loose grime.


Now we can get to work with our cleaning agent - Eradicate Engine Degreaser. This product is specially formulated cut through the kind of heavy grime, fuel deposits and oil-based contamination you'll typically find in and around engine bays.
It's a heavy hitter this one, packed with degreasers and powerful surfactants which allow it to break down the heaviest contamination. But, it's also safe to use on all the different materials you'll find in these areas. Painted metal, bare metal, plastics, rubber - it won't harm any of them. This way we can make sure that cleaning an entire bay is a quick and straightforward job.
We spray our Eradicate directly onto the underside of the bonnet and lightly agitate using a Hog Hair Brush. As with all agitation processes, this is purely to make sure that the solution is getting to where it needs to be, and that it's being refreshed in the most awkward dirt traps. When we've made contact with every area, we rinse away the residue.


Now we can move onto the rest of the bay, and the process is exactly the same. First a rinse down, then a liberal application of Eradicate, a little light agitation, and a final rinse to remove the grime encapsulated in the cleaning solution.


Just like with the cleaning process, different engine bays can be finished in different ways. It all depends on the materials used under the bonnet. If there's loads of chrome piping and other bare metal parts for example, a spot of Mercury Metal Polish will never go amiss during the finishing stages. Similarly, if we're detailing a bay that has lots of painted or lacquered carbon fibre parts, we can use Tripple All-in-One Polish to give them a lift, cleaning away any oxidation and bringing back the shine. Again, this would be one for later during in the finishing stages. Check out Mk8 Golf R Detail and you'll see the results that can be achieved putting Tripple to work in the engine bay.
Today though, we have a slightly different situation. Because the ST engine is in near-standard trim, and there's plenty of matte plastic engine covers, like most modern cars we can finish up the engine bay right now in the wash stage with Dressle All Purpose Trim Dressing.
What we have here is a quick and easy process designed for worry-free finishing.Dressle is a water-based product that's safe for all surfaces you'll find under the bonnet, and particularly good at bringing the life back to plastics and rubber. This means that it can be sprayed all over the trim, hoses and engine covers in one go - and you can even get it on there when the engine bay is still wet.
Dressle is also what we refer to as a "spray-and-walk-away' type product. Basically, you just spritz plenty on there, close the bonnet and forget about it until later. Over the next few hours, the advanced solution will spread itself around and then cure to give a perfectly-dressed, non-sticky finish to every surface. Then, at the end of your detail, you can go back and wipe up any excess with a clean microfibre cloth… although, we'll let you into a little secret, most of the time we don't even worry about doing that!
It's definitely one of our favourite finishers this one. We'll show you the results when it's cured at the end of our detail - a few hours for us, but just a few more paragraphs away for you!


Pre Wash
The pre wash is where we remove the heaviest grime from the relatively sensitive exterior surfaces, such as paintwork and gloss plastics, without physically touching them. One of the most important, if not THE most important, part of the wash stage. The idea is to cut down on the risk of scratching or inflicting swirl marks by dragging heavy grime across the surfaces with our wash mitt. Getting rid of these harmful particles now is a safety precaution that makes our contact wash as safe as it can be. In other words, no matter what sort of detail your doing, never skip the pre-wash stages. It's just not worth the risk!
The first step of any pre-wash is a thorough rinse down, to remove the loose heavy particles that can be removed with water pressure alone. Once again this ensures that our cleaning agents get to work on the bonded grime, where they're actually needed.
Now, in most cases, especially during routine maintenance, we'll rinse down the whole car from top to bottom, being sure to flush out any panel gaps, door jambs and boot shuts. Here though, because this car is particularly dirty, we'll tackle these awkward areas first, because they're definitely going to need some extra attention and a little cleaning agent. So, we'll clean these up first, and them move on to the exterior.
With that in mind then, we rinse out the jambs, boot shuts and panel gaps first.


Now that any loose soiling is blasted away, we can use our pre-cleaner to get in there and safely break down the bonded grime. The areas we're tackling here are notorious dirt traps and you'll find that they're often neglected when people wash their car, so there can be quite the build-up. Even during routine maintenance we'll make sure we use a wax, sealant and coating-safe pre-cleaner like Citrus Power Bug & Grime Remover, to ensure we've safely removed any grime that's worked its way in. Because of the increased soiling here though, we've opted for a 1:10 dilution of Verso All Purpose Cleaner to safely lift and encapsulate the grime. We agitate this in with a soft bristle Detailing Brush, before rinsing away the contamination.
Now, obviously the pre-wash stages are usually designed to be contact-free. But, while we wouldn't agitate any pre-cleaner on the exterior paintwork, because that increases the risk of inflicting defects, in these areas a little agitation is will usually be necessary to break down all the grime. In any case we're only talking very light agitation here, at no point are we looking to scrab away grime, we're simply making sure the solution is worked in, and refreshed on the layers of caked-on contamination when needed. It's best to tackle these areas one by one, spraying your Verso on directly. Don't forget the inner doors too, another area that's often neglected.


With the awkward areas sorted, and no risk of any heavy grime working its way out of these gaps and interfering with the rest of our detail, we can move on to the exterior.
Once again, we start with a thorough rinse down to remove the loose soling and heavy grit. We work from top to bottom to ensure that no heavy contamination is spread upwards.

As you can see, this one is pretty mucky, even after our initial rinse down. So, now we use our pre-cleaner to start breaking the bonds of the stuck-on grime.
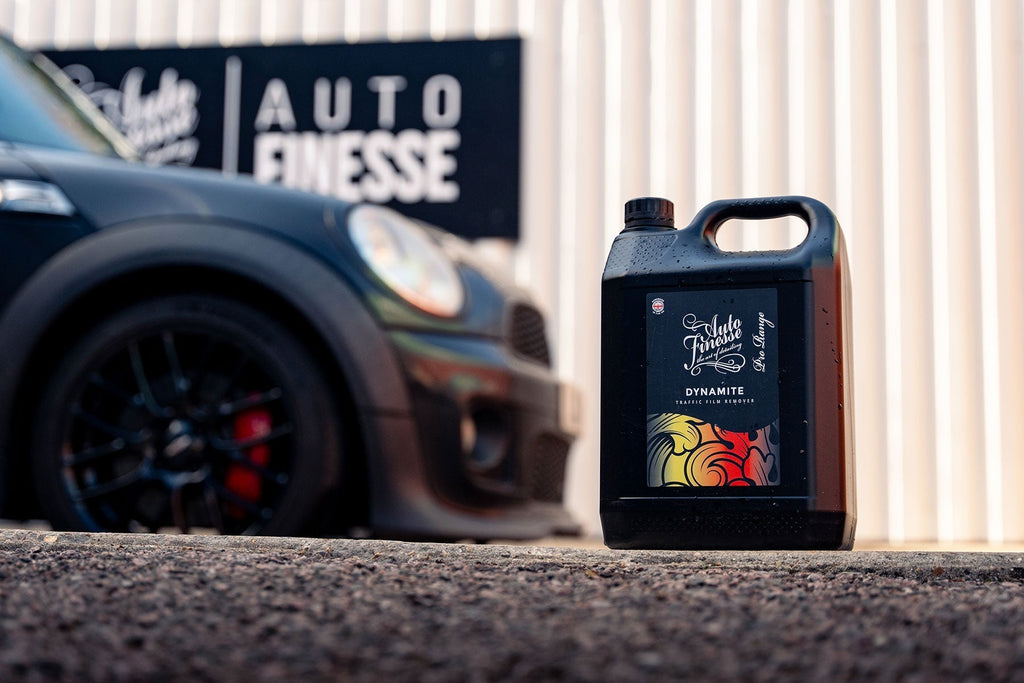
Obviously, we're going to need a heavy-hitter to cut through this little lot without agitation, so we opted for Dynamite Traffic Film Remover. The advantage of this product is that it's a super-concentrated dilute-to-suit solution, so it can be adapted to the task in hand. In most cases we'll use a 1:10 dilution, which is more than enough to power through heavy winter soil. Here though, just because there's much more bonded contamination than you'll find on most washes, we've mixed up a stronger 1:5 dilution.
We're also applying Dynamite to every surface here, instead of the usual route of just applying a TFR on the worst affected areas (typically the lower halves and bumpers). Again, this is because the whole car is covered with the sort of heavy contamination that usually you'll only find in these areas. The good news is that it's safe for use on all surfaces, so it won't harm any rubbers, plastics or glass, so there's no need to worry when using it over a whole car. Dynamite is also wax, coating and sealant safe, so it won't strip away any previously-applied protection, either. Not that it's a particular issue here you understand, but it certainly makes this TFR useful for routine maintenance.
We spray our Dynamite on liberally and give it a few minutes to break down the grime. Then we can rinse from the top down, using the water pressure to safely take off the spent Dynamite and all the soiling suspended in the solution.


Snow Foam
It's important not to miss out the pre-cleaning stage and skip straight to snow foam. First, because your snow foam is designed to linger on surfaces for as long as possible, breaking down the bonded grime, and the longer you leave it on there, the more it can deep-clean the surface on a microscopic level. By skipping the pre-cleaner all you're doing is using up your foam on the heavy particles that you pre-cleaner is capable of removing on its own. Essentially wasting your foam.
Second, in the snow foam stage we tend to use a little agitation to work the snow form into dirt traps like window rubbers, roof rails and around badges. If you skip your contact-less pre-cleaner you're increasing the risk of inflicting swirls, because the large gritty particulates will still be present.
Anyway, we use Avalanche Snow Foam for this stage, a citrus-based cleaner that stays on the surface using special surfactants to break away the bonded contaminants, allowing them to be safely rinsed away. As well as working on the larger panels, Avalanche is designed to work its way into all the gaps and shuts, effectively cleaning out those, too.
The most effective way to apply Avalanche is using a professional Snow Foam Lance. This detailing essential is designed to syphon the solution, mix it and then force it through a special metal gauze. What this does is activate the cleaning agents, and whip the solution up into a thick lingering foam. So, it stands to reason that the first step is to fill up your lance. We pour around an inch of concentrate into the Foam Lance Bottle, and them top it up with water. A good top here is to use a bucket of clean water to top up the bottle, this will stop it trying to foam up prematurely.


Now we apply over the whole car from the top to the bottom. Once again Avalanche is suitable for use on every surface, so we don't have to target the cleaning, instead we just get it on the car and let it get to work. The reason we apply from the top down, and not the other way around, is that usually heaver contamination is found on the lower areas, and we don't want to spread this upwards to cleaner areas. Again, it's all about damage limitation… that and not giving ourselves any extra polishing later on defects that could have easily been avoided.


The key to getting the best deep clean is letting the Avalanche linger on the surface for as long as possible, but without letting it dry. Like any "aqueous' cleaning agent Avalanche uses both the surfactants and the water molecules in the solution to physically pull grime from surfaces, before it can safely surround them. If you let the solution dry, well, you don't have the water anymore, so you'll be leaving the contamination stuck to the surface. So, that's why, like with any wet cleaning product, we don't let it dry, and we always avoid washing cars when it's hot outside, just to prevent the chance of them drying prematurely.
A good tip here is to keep an eye on the windows, as the glass tends to dry out first. When this starts to happen, you can rinse down the whole car from the top to bottom. In the meantime, though - while we're letting our Avalanche linger - we gently agitate into all the dirt traps with a scratch-free Hog Hair Brush… all the while keep an eye on those windows.


Swirl-Free Contact Wash
Only now, with the larger gritty particles on the floor where they belong, is it safe to move onto the contact wash. This process is designed to remove any remaining small particle grime but, even so, we still employ a few safety measures to make sure we're cleaning the sensitive surfaces as safely as possible. This is in regards to both the process, and the products we use along the way.
Precaution number one is using two buckets to prevent cross contamination of your wash water. One bucket for your shampoo solution, one with plain water for rinsing out your mitt, neither of which should be a bucket that's already been used for cleaning wheels. It sounds too simple, doesn't it? Yep, but it really is the most effective way of ensuring that the grime you take off the car doesn't end up floating around in your shampoo and end up back on your mitt.
We also use professional Detailing Buckets here, these not only utilise a special grit guard to make sure you're not picking up any sunken gritty particles from the bottom of your buckets, but the large 20-litre capacity also helps to prevent recirculation of grime back to your mitt.
Speaking of wash mitts, the one you choose is also important. All professional wash mitts are designed not to physically scrub the surface, but to glide across it picking up and locking away the grime in their pile. Instead of moving gritty particulates around, like you would with a sponge, all we're looking to do here is apply our shampoo, and make sure it contacts every inch of the car. This is how our mitt and our shampoo work together to break down and lift the grime away from the surface. Our selection of Pro Wash Mitts are constructed from microfibre or lambswool, materials that are particularly ideal for locking in the grime, and keeping it away from your paintwork. Here we're using a Plush Wash Mitt - which is the detailer's preference for this particular job - this mitt is great for soaking up plenty of shampoo and gliding freely over sensitive paintwork. It's particularly important here because the paintwork is swirl free and, so far, looks like it doesn't need any polishing.
The final precaution of course, is using the correct shampoo for the job. Here we've chosen Lather Car Shampoo as our cleaning agent for a number of reasons. First, this one is classed as a pure cleaner, which means that, even though it's kind to any previously-applied protection layers, it doesn't contain any waxes, coatings or shining agents itself. All we're looking to do here is clean the surface, we don't want to leave anything behind that may interfere with the rest of the detail. Some products, such asWash "n' Gloss Car Shampoo, or Caramics Enhancing Shampoo, contain extra ingredients designed to install protection, add gloss, or prolong the life of the protection that's already there. While that's ideal for topping up during routine maintenance, it's not a feature we need here. We also like to keep in mind what we'll be using for protection at the end of the detail and, at this point, we're not sure yet. Let's just say we're keeping our options open. If we used a shampoo that installs a ceramic coating or a wax, we'd have to use the same kind of protection at the end.
The other reason we're using Lather is that it's classed as a lubricant as well as a cleaner. This means it lubricates any scratchable particles, allowing them to slip over surfaces without causing damage.
So, now you know all the fundamentals that come together for the ultimate swirl-free wash, we can add a couple of capfuls of Lather to our wash bucket and froth it up with our pressure washer.


The final thing to consider is the route you take around the vehicle. The professional way of safely washing a car is to tackle the cleaner areas first, to prevent spreading contamination form the dirtiest areas to the cleanest.
Rather than washing in circular motions, which may promote swirls, we also wash in straight lines, starting on the roof, then the windows and upper-sides, and then move on to the bonnet, front bumper, lower sides and finish up on the rear. Basically speaking, we're washing the car from top to bottom, but targeting the cleaner areas first to make our wash as safe as is possible. Once we've applied and agitated our shampoo over every part of the car, then we can rinse away any grime that's trapped in the shampoo solution.


Decontamination
If this was simply a routine maintenance job, we'd be finished with the wet work now, and be able to move on to drying. In this case though, chiefly because we'll be adding protection later, we're going to perform a decontamination wash. This is to make certain that we're not locking in bonded contamination when we put our protection layers over the top. Chances are - even if we can't see them - there will be some unwanted deposits that will need to be removed.
This process will also make sure that there's no previously-applied protection left on there. While it doesn't look like there is because our rinse water isn't beading or sheeting, this paintwork has obviously been looked after, so we're assuming that it has had some before it started its epic journey.
A decon wash, is simply a way to remove any engrained contamination that washing alone won't be able to shift. In most cases these are sharp metal particles derived from brake dust, tar and sticky residues, and finally environmental contamination such as the mineral or protein deposits that are often found in rainwater, bird droppings and bug splatter. Each of these has its own specialist product and process for removal to ensure the surface is clean on a molecular level before we attempt to polish or apply protection.
The first part of the process is chemically dissolving any ferrous metal contamination using Iron Out Contaminant Remover. Iron Out is a concentrated fallout remover that's safe for periodic use on all paintwork and glass. It turns blood red when metal is present and this highlights the reaction while it's safely dissolving particles into the solution, so they can be rinsed away. Most of these particles are derived from hot brake dust and consist of tiny pieces of iron shrapnel that embed themselves into the top layer of your paint. The only way of removing these safely is through this chemical reaction.
Here we spray our Iron Out liberally across all painted surfaces. We do this rather than targeting the process to specific areas because, contra to popular belief, metal contamination is rarely limited to areas such as the lower sides and bumpers. While it's true that these typically see the heaviest concentration, remember that there's plenty of brake dust flying around in the air on the roads, so it's inevitable that you'll find some metal contamination on other areas such as the roof and bonnet.
Because the paintwork is already free of grit and grime here, we can also lightly agitate the solution with a microfibre Polish Pad, just to make sure the solution gets to every inch and is refreshed when needed. Then it's just a case of a thorough rinse from the top down.


The second decontamination phase is designed to tackle sticky residues and bonded tar. For this type of contamination, a powerful solvent is needed to safely melt the bonds to detach the foreign particles, surround them in the solution and allow them to be wiped away using a microfibre cloth. For this task we utilise ObliTARate Tar & Glue Remover to target these contaminants directly, rather than using our solvent over the whole vehicle. Unlike other types of contamination, such as metal shrapnel, which may not be immediately obvious to the eye, tar and glue residues are large blemishes that can almost always be identified on inspection. Most will be found on the bumpers and lower sides.
ObliTARate can be applied either by spraying directly onto the affected area, or via a Microfibre Applicator when working around potentially sensitive areas such as matte plastics. In our case we're spraying on the solution, because there's a substantial amount of contamination, but again, that's something we asses on a job-by-job basis.
This product doesn't need to dwell to cut through the residues - these can usually be wiped away immediately. What is also important is to re-wash any treated areas using your Lather shampoo solution when you're finished using your solvent. This process neutralises the solvents to stop them interfering with the rest of your detail.


Decon and Drying
Here on the Focus we're performing a 2-stage decontamination, whereas in most cases we'll opt for a full 3-stage decontamination. The last step of a 3-stage decon wash is using a detailer's Clay Bar, along with Glide Clay Lube, to remove any protein and mineral deposits that have bonded to the paint leaving a rough surface. This process is a way of physically pulling deposits from the top layer, leaving behind a smooth glass-like surface. So, why aren't we doing that this time around? Well, there's a couple of good reasons…
The first is that this car has obviously had some protection up until now, and the protection used has done its job of stopping deposits from bird droppings, tree sap, rainwater and bug splatter from bonding. Any that could have been present hadn't taken hold, and must have been sitting on the surface, these would have come away in the wash stages. We only use clay when there's contamination to be removed, otherwise we're running the risk of putting in defects and marring ourselves for no good reason. As there's no contamination here, in this case (albeit a very rare case indeed), there's no need to use this process.
The second reason is that we can see that this car doesn't need polishing, there are no defects such as scratches and swirl marks to be corrected. As we've said, this paintwork has been well looked after - the lack of swirls is likely a testament to the safe wash techniques employed by the owner during routine maintenance. We only polish any car as and when it's needed, not as a matter of course, and the clay stage is always performed prior to polishing, or using an abrasive paint cleanser. So, while many will assume that you must use clay before adding protection layers, that's not strictly true. You only have to clay paintwork when it's needed to remove bonded contamination, and if you're going to polish the surface after. You must perform at least a light polish after claying, just to make sure there's no surface marring before you apply your protection.
But, while we can skip that stage, it's important to never skip the drying process, no matter the type of detail. Many think that during maintenance, they can just rinse down the car and then leave it to dry naturally, but this will inevitably lead to problems.
Most of us use tap water to clean our cars, but the issue with tap water is that it's not pure - it actually contains all sorts of mineral deposits. In this way your tap water isn't just water, technically it's a solution, and if it's left to dry naturally the water part will evaporate off to leave the rest deposited on the surface. This is what causes water spots which, in many cases, may require polishing to remove. Not something we want to risk on any detail because we'll either be polishing paintwork that didn't need it in the first place, or at the very least creating more polishing that could have been avoided.
So, the easiest way to remove these deposits is while they're still dissolved in the "solution' (the tap water) and to do this the only way is to absorb them using a microfibre Drying Towel. Here we're using a Silk Drying Towel to soak up all the water - a simple case of passing it over the surface and letting the microfibre do all the work. For the tighter areas - chiefly to avoid dragging our large towel on the floor - we like to use an Ultra Plush Microfibre towel, which is also extremely absorbent, and ideal for areas such as wheels and door jambs, and to mop up any random drips.


Pet Hair Removal
Before we start on the protection and finishing stages, we'll get the last phase of cleaning out of the way - and that's the interior. Again, interiors are always assessed on a job-by-job basis, the processes and products we use will always be dictated by the level of soiling and the materials used on each interior surface.
Now, in our case, it may look like a bit of an extreme challenge, but it's actually far simpler than it appears at first glance. There's a little ground-in grime and a few odours here for sure but, unlike the exterior, there's nothing that suggests that it's in need of a full deep-clean. Looking past the ton of pet hair, to the trained eye we can see that little more than maintenance is in order here. We're not in a situation where we have to start using our wet vac and a load of heavy-hitting APC to suck mould out of the carpets this time, which is nice. As is appropriate for this type of vehicle, we'll also start in the boot and work our way forward, ensuring that we're cleaning every surface to sanitise and eliminate any lingering odours.
So, question number 1 - one of the most common questions we're always asked - how do you remove pet hair from interiors? The answer is as simple as using a vacuum cleaner and taking your time. If that doesn't work, grab yourself an Upholstery Brush and work over the surface to free the hair from the fabric or carpets, and then use your vacuum to suck them up. Sometimes the simplest way is the most effective.
Of course, it also stands to reason that the pets have been in contact so we'll also sanitise all these areas using a spritz or two of Total Interior Cleaner and a little agitation using an Upholstery Brush, but then again we'd be doing that anyway.


Interior Cleaning
After completing the boot area, the rest of the interior is cleaned in exactly the same way. First, we vacuum away any per hair and loose debris, and then we can use a suitable cleaning agent on all the different areas, to ensure that every surface is clean. Far from needing a full complement of cleaners here, the vast majority of tasks can be carried out using Total Interior Cleaner. Total is designed for safe use on all interior materials, from plastics and rubber to leather and carpet. This surfactant-based cleaner able to pull grime out of the pores/fibres of these materials, breaking the bonds and then safely surround it in the solution, allowing the contamination to be wiped away. The difference between this product and a harsh all-purpose cleaner is that it's formulated for regular use inside your car, so it won't dry out or damage sensitive surfaces when used on every maintenance detail.
You'll also notice from the video that we use Total in different ways, depending on the specific area we're working on. For soft fabrics and carpets we'll typically spritz Total directly onto the surface and then use an Upholstery Brush to agitate. Again, when cleaning interiors agitation isn't to scrub the surface in any way, it simply helps the Total to make contact with every part, refreshes the solution when needed on stains and stuck on grime, and helps draw out any ingrained dirt before you safely wipe it away.
For hard plastics, leather and rubber, we'll apply our Total directly and use a soft Detailing Brush for the same kind of agitation. The only reason we ever deviate from the process is if we're looking for more targeted application to avoid overspray when tackling tight areas, such as mucky dirt traps. Here we'll spray our Total directly onto our brush and apply it that way. These are always the most effective ways to clean each surface, and basically you can do them all with Total.


Deep Cleaning Carpet Floor Mats
One important interior cleaning process rarely takes place in the interior at all, and that's sorting out those mucky car mats.
Now, it stands to reason that these typically see the most ingrained grime and may need a little extra attention to draw it all out of the carpet. In most cased we'll use a 1:10 dilution of Verso if deep cleaning is needed, or a little Total for slightly lighter cleaning or routine maintenance. In this case we opted for the Verso and worked it in using an Upholstery Brush. The cleaning agent will break down and draw out the dirt which can then be removed using a wet vac or a microfibre cloth. Simple but effective.


UV & Anti-static Protection
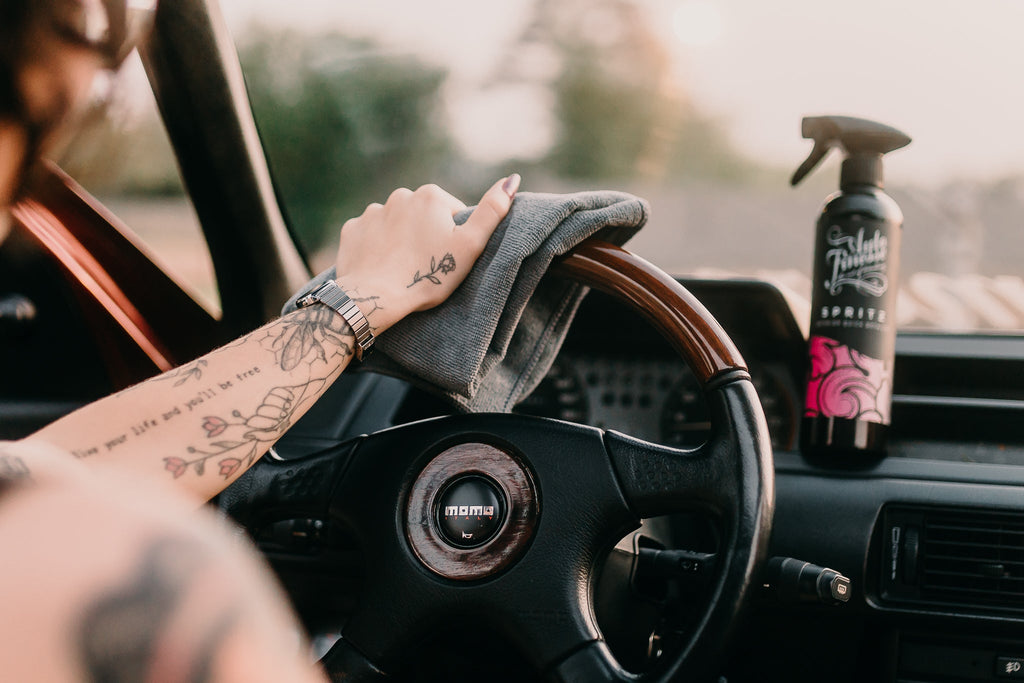
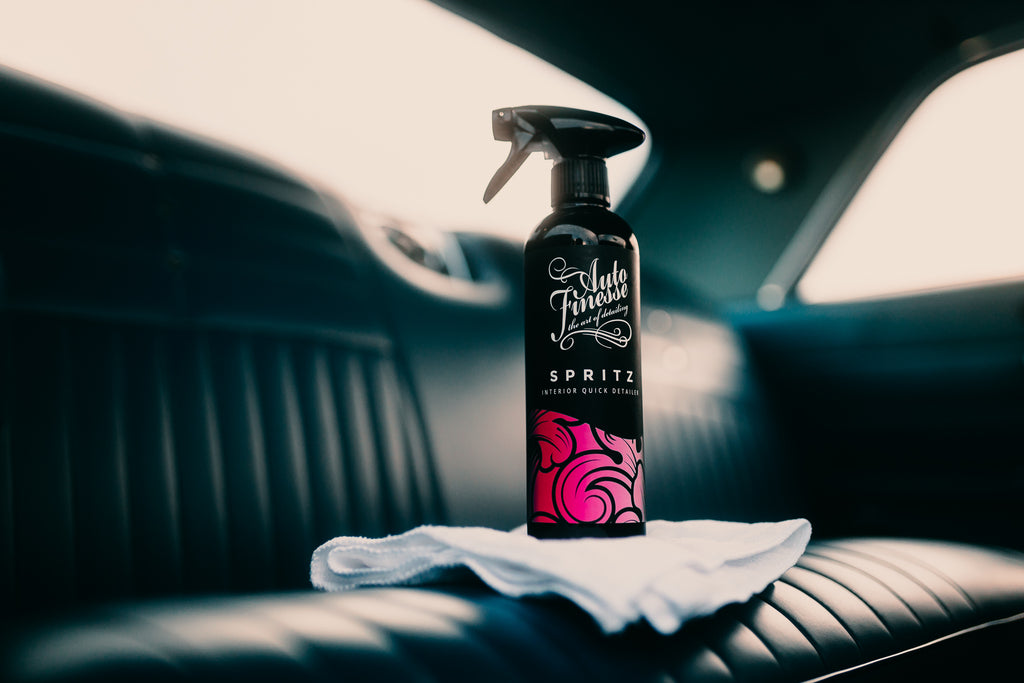
One last touch on the interior involves adding a little protection using Spritz Interior Quick Detailer. Now, while strictly speaking Spritz can also be used as a cleaner for screens, consoles and other hard plastic surfaces (we're using it here to remove all the fingerprints from the interior screens and such) what's also useful is that it's specially formulated using a load of special UV inhibitors. This means that it's great for preventing fading and cracking on dashboards and other plastics that are exposed to constant sunlight. Spritz also gives a subtle, satin sheen that's non-sticky to the touch - the perfect product if you're looking for the clean factory look without a sticky surface that's going to hold on to dust.
But, what about those screens? Well, apart from the cleaners Spritz also contains anti-static agents, to prevent dust and dirt being drawn back onto the surface. You can either Spritz directly onto the surface before wiping, or straight onto your cloth. It's a versatile little kit bag essential this one.


Sealant Paintwork Protection
With our interior - and with it all cleaning processes - complete, we can move on to the final stages, starting with paint protection.
Because this particular vehicle is as much a daily-driver as it is a show car (and as you can see the owner isn't afraid of using it in all weathers) we've opted for Graphene Liquid Filler Wax. This ultra-advanced product is designed to add a hardcore layer of protection, that's going to be ultra-resilient to road salt, grime, chemicals and any other environmental contamination that could prove detrimental to the paintwork going forward.
One huge advantage of using Graphene is how easy it is to apply. This product goes on as easily as a liquid wax (hence the name), but it's actually a specially engineered professional grade paint sealant which bonds on a molecular level to offer a flexible but impermeable barrier to the elements. Basically, because water can't get through, and grime can't stick, instead you get a whole load of beading and contamination sliding off of the surface. This not only protects what's underneath, but makes the paintwork far easier to clean during the next round of maintenance.
As well as adding an extreme high-gloss shine, the protection here lasts for up to 9-months and, as the name suggests, this product is also infused with graphene, a form of carbon that's one of the hardest substances to man known to man - 100 times tougher than steel and more elastic than rubber in fact. This is what makes the protection it offers particularly resilient to knocks and abrasion.
Like we said application is easy, simply apply a little Graphene to each panel using a Foam Applicator, wipe away any residue, refold your cloth and buff to a high-gloss shine. You only need to get a small amount on there to create a super-hard layer, just make sure you cover every inch of paintwork and that's about it - the results speak for themselves.


Finishing
It goes without saying that every detail is different, and what's left to do at this point will always be dictated by the car and what materials the manufacturer (or the modifier) has incorporated into the design. You may have a load of metal brightwork or exhaust tailpipes to freshen up using Mercury Metal Polish. Or it could be an older car where a little Revive Trim Dressing is needed to bring those faded matte plastics back to life. As with any detail we have to decided vehicle-by-vehicle, and we have the right product for every situation.
In our case here though, it's a pretty modern vehicle which leaves us only two detailing staples - the tyres and the glass. The truth is that these can both be finished quickly and easily, and they're the two that we always complete, with a couple of essential products, on every single detail. After all, we don't want faded tyres or streaky glass drawing the eye away from all the other work we've put in, right?
So, we start with dressing our tyres, and as they're already super clean from our wash stages, we can reach for the Satin Tyre Crème. The great thing about this water-based dressing is that it leaves a subtle, new-look satin sheen with a single application, but you can build up a few more layers to get more of a wet-look gloss if that's the finish you prefer. With Satin You get to choose.
Satin has also been formulated to nourish and condition the sidewalls, and it'll even add a physical barrier to the elements with UV inhibitors to help prevent fading and browning in the future. Here we're using a contoured Tyre and Trim Applicator for quick and easy application.


The last part of the process is cleaning the glass inside and out using Crystal Glass Cleaner. We leave this step until right at the very end of our detail, simply because it's almost inevitable that the glass will have picked up a little dust, a few fingerprints and maybe even a little product overspray while we've been busy completing the other tasks. Just one of the reasons why perfecting the glass and mirrors is one of those simple professional touches that has a huge impact on the overall finish.
Crystal is fast-flashing solvent-based formula that designed to cut through sticky residues and safely lift away dirt and dust. This allows contamination to be wiped away without leaving streaks smears. All you need is a light mist on each panel and this fast-flashing solvent formula is guaranteed to bring your glass to perfection.
As always with Crystal, we're using a Superior Waffle for our wiping and buffing. This premium cloth is specifically designed for the most effective glass cleaning because it incorporates a special weave that's geared towards the safest contaminant removal. Not only does the weave give it a huge effective surface area, making this cloth extremely absorbent, but the special air pockets in the material help to pick up grit, grime, residues and debris, and keep them away from the surface. This stops any smearing in its tracks.


The Results
So, that's the in-depth, step-by-step explanation of our Focus ST detail and here are the results that you could achieve. Why not adapt this one to your next detail and see if you can perfect and protect better than ever before?


See more of our big details and even more in-depth guides in the Guides Section Of Our Blog.


