


How To Machine Polish a Car

IN THIS FREE GUIDE:
- Discover how our all-in-one compound can make the cutting, polishing and refining processes simpler than ever before.
- See how effective deep-cleaning can lead to safer paint correction.
- Learn what protection layers can be applied after One Step to enhance gloss and lock in your work.

WHAT ARE THE BENEFITS?
- This single stage correction/paint enhancement can be performed without the need for multiple grades of compounds and pads.
- Our step-by-step guide shows how you can safely clean, correct and protect your paintwork in a single day.
- You'll save hundreds of pounds on professional swirl-mark removal by learning how to do the job yourself.
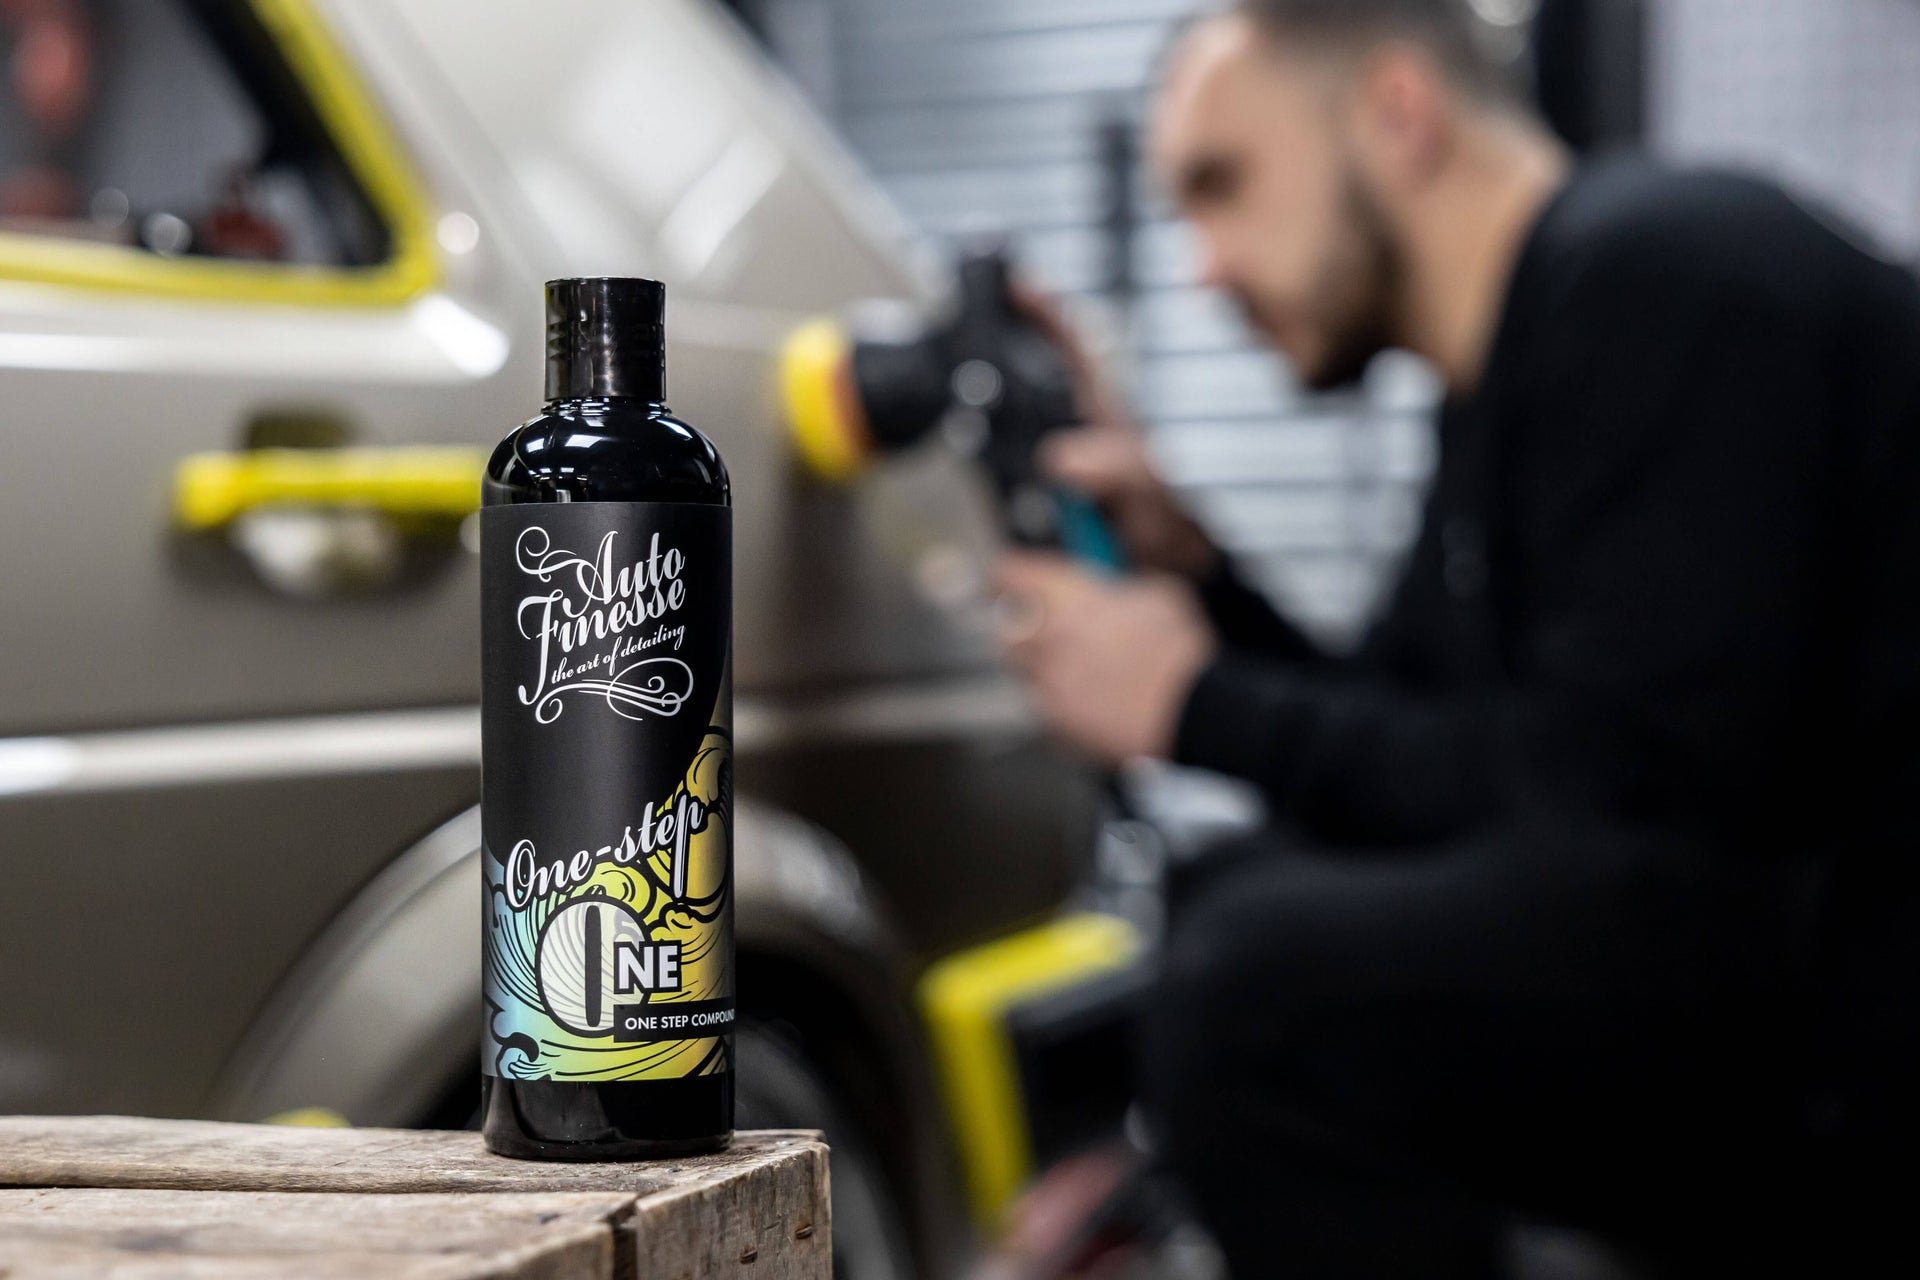
Need to slay those swirls for the summer season? Look no further than One Step All-in-One Compound!
Swirl marks, it has to be said, are the bane of car enthusiasts the world over. But, the good news is that you can rest assured that these spider's webs of annoying blemishes usually look far worse than they actually are, especially with all the famous UK the sunshine bouncing off them in summertime. The real point is that swirls are actually relatively minor defects and, although in the vast majority of cases they're going to be too much for a quick hand polish to remove, they can be rectified safely and effectively by using one of our Dual Action Machine Polishers. In fact, we can make the process relatively quick and painless, too. And, if you can learn to wash a car safely during maintenance, you can easily learn how to enhance the finish through polishing.
Of course, traditionally at least, this kind of paint correction would mean having to break out have a whole selection of compounds, polishes and pads, too. Not to mention having a few days on your hands for a multi-stage correction detail. But, with the use of our advanced One Step All-in-One Compound, we know can have you swirl-free and ready for showtime in a matter of hours, rather than days, and help you keep it that way all season long.
So, let's get to it, here's how you can slay the swirls and have your car ready for showtime like a pro, and of course, we'll be answering all of your most common questions along the way…

So, what is an all-in-one then?
There are various "all-in-ones' in the car detailing world, and the phrase is used to denote characteristics that go beyond that of a traditional product. In the case of Tripple, our flagship All-in-One Polish, it's called an all-in-one because in addition to polishing in the usual sense - using abrasives to cut and refine paintwork - it also contains deep cleansing agents and leaves behind a layer of carnauba wax. So, it actually cleans, polishes and protects all in one.
One Step, which we'll be using for the heavier swirling in this detail, is also denoted as an all-in-one because, once again, it can perform different tasks to that of a traditional compound. In this case it doesn't contain cleaners or protect paintwork, but it has an abnormally huge range of cut making it a unique product that starts out as a coarse cutting compound and ends up as a fine refining compound. This means it can tackle heavy swirling and defects, but still finish down to near-flawless without having to work through separate grades of compound or different polishing pads.
The advantage with this of course is that you can go straight through the key three stages of the polishing process - coarse cutting/restoration, medium cutting and finally finishing down, all with a single product, and all in one step. In other words, this product has been specifically engineered to save you time, money and effort when performing paint correction on any vehicle.

How do compounds actually remove defects from paintwork?
All compounds work by using abrasives (or sharp, heavy particles) to cut away at the top layer of your paintwork or lacquer. These abrasives come in various grades, which denotes the size of these particles. These be anything from coarse compounds which contain large particles suited to heavy cutting and defect removal, all the way to fine compounds which cut a small amount and are designed to refine the paint finish, smoothing it out and removing finer defects from previous polishing stages. You can think of these as like sandpaper, only on a microscopic scale. If you're shaping wood, you'd use a coarse grade to get the shape, and then follow up with finer and finer grades to smooth out the surface. Polishing paint is exactly the same, you move through the grades of compound and pad, from coarse to fine, until the desired finish is achieved.
The polishing action does three things simultaneously:
- First the polish cuts away the surface of the paintwork to level down to the bottom of the deepest defect. No matter if it's a scratch, a swirl mark or a micro scratch (hologram) from a previous coarser polishing stage, you're never removing the defect directly, you're actually removing the whole surface around it until the blemish effectively disappears.
- Second, you're smoothing out the surface, changing how it looks to the eye, levelling the physical and optical finish at the same time. Swirl marks and other defects catch the light and diffract it in different directions. When it bounces back to your eye it's all over the place making the defect not just noticeable, but making the paint look dull and damaged. The idea of polishing is to cut out the ridges and ruts as much as possible on a microscopic level so that the light bounces back more uniformly. This in turn makes the paint appear deeper and glossier. The smoother the surface, the better it looks.
- The last thing the polishing action does is break down the abrasive particles until they can no longer cut the surface, we call this working the product through. This process happens from the start with the particles beginning like large, jagged rocks and being repeatedly smashed together until all the sharp edges are rounded off making them more like smooth pebbles. At this point there's no edges left to physically abrade the paint, so the product is finished, and that's the end of that particular set.
For more on different kinds of polishes and compounds, and how they work, see our in-depth article - All Car Polishes Explained.

How is One Step different to a traditional compound?
All polishes and compounds (which technically speaking are the same thing) have a range of cut. Traditional coarse compounds for example, start off with large cutting particles that only get slightly smaller and more rounded as they're broken down - this gives a relatively small range of cut. The key here is that, even when worked through, a coarse compound will always leave behind a surface with slight defects that aren't as bad as the original defects, but will still be in need of refinement. This is why the paint will require further stages using finer and finer compounds.
One Step is different because it utilises advanced diminishing abrasives. Again, these are large particles at the beginning of your set, but rather than merely rounding off, they've been engineered to break up into smaller sharp particles as you work them through. In other words, they smash together to get finer and finer but will remain cutting through every stage. When they do finally round off, and can't cut the surface anymore, they're so fine that they've already refined the paint to near flawless. In this way One Step is able to transform from a heavy-hitting coarse compound to a fine refining compound, giving it a huge range of cut.

Can I use One Step as a hand polish?
Technically speaking the answer is that you could… but it would take so long to break down the particles that it would take forever to get the desired result. Worse than that, you'll likely end up with seriously inconsistent results because the pressure you apply will change, and you'll inevitably get tired along the way before you've worked the product through fully.
One Step has been specifically developed for use with a dual action machine polisher, such as our DPX or MPX polishers, and we all know that machines don't get tired. They're also able to break the product down quickly and effectively, so while you'll need a slightly longer set than with a traditional compound to work One Step through all the way, it doesn't take much more time. You'll also get more consistent results because machine polishers work on every panel in the same way.

What sort of protection is best for use with One Step?
That would depend on the job, but the good news is that you can use any one you choose!
One of the chief characteristics of One Step is that it always gives a true finish because it contains no fillers or waxes. That's not to say that in the right circumstances that products that do are unsuitable for paint enhancement - there are many cases where we choose to use Tripple All-in-One Polish with a machine polisher for lighter defect removal, cleaning up oxidation and protecting with a wax layer.
One Step however will not only remove heavier defects, but because it's free of extra ingredients, it won't block the chemical bonding needed when applying a ceramic coating, either. Silica-based coatings cannot be applied over wax layers for this reason, so when choosing to utilise ceramic protection at the end of your paint correction, it's important to polish with a true-finish compound like One Step. When it comes to waxes and sealants , these physically bond (they hold on to the surface) so these can be utilised after One Step just as well as a polish that contains a wax.

Can I use Tripple for my enhancement instead then?
Tripple is great for enhancement details and capable of removing light defects and oxidation so, assuming you'll be using a wax for your final protection layer, and Tripple can remove the defects you're trying to conquer, then yes you can. Have a look at a similar detail using Tripple for a lightening-quick enhancement - The Half Day Enhancement.
For heavier swirl marks, and when a ceramic coating is to be used for protection though, One Step is the product to reach for during a single stage correction and enhancement.


The detail: slaying those swirls
As always, the best way to demonstrate this kind of enhancement and correction is to do the job ourselves, so we drafted in a car that was in need of a good going over before the next event.
Over the winter this one has seen plenty of use on the road and, due to regular washing and wiping down, is suffering from a few light defects including swirls, wash marring and a little oxidation. But, of course, all these can be eradicated with a good deep clean and a single-stage correction using One Step. Here's a full detail video, followed by a more in-depth step-by-step guide on how it was done...
Deep Cleaning
There are show cars and there are show cars that get used and, being one of the latter, we opted for to go a little further than usual with a spot of deep-cleaning. The first part of this process of course, involves getting the wheels off and attacking under those arches.
Cleaning as thoroughly as possible here is arguably even more important than during your routine maintenance routine, and it's not just for looks, or simply for making the more awkward areas that may be highly contaminated (such as inner wheel arches and behind wheel spokes) easier to clean. The most important point is that deep-cleaning is also a form of damage limitation, removing harsh contaminants that could come back to haunt you later when performing your paint correction. As you can imagine any sharp particles getting blown out of recesses and onto your polishing pad, and then whizzing around on your paintwork, isn't a good thing. This will inflict even more damage that will need to be removed, meaning yet more polishing. The golden rule for paint correction is, after all, only polish when you need to.
The deep-cleaning also comes into play later during the pre-wash with other vehicle areas, particularly in door shuts and panel gaps - it's important to rid the vehicle of every contaminant that you possibly can.
Here though, it's a simple case of (safely) getting the wheels off one by one and completely cleaning out the areas that act as the most severe dirt traps. The good news is that it's extremely straightforward using a relatively-strong, 1:5 dilution of Verso All Purpose Cleaner to break down the grime, agitated with our Arch Blaster Arch Brush. With that done you can quickly blast away the grime with your pressure washer.


Wheels and Tyres
As for the wheels and tyres themselves, well you can cleanse these as normal, using your choice of wheel cleaners and decontamination products, such as Imperial Wheel Cleaner, Revolution Wheel Soap, Reactive Wheel Cleaner and Iron Out Contaminant Remover, depending on the level of contamination, and the finish of your wheels. The only real difference here is that, with the wheels off, it will be far easier to get into the barrels and behind the spokes, in fact, carrying out this kind of wheel deep-clean periodically is ideal for keeping your rims in tip-top shape, after all, all those awkward areas on the inside get just as contaminated, if not more so, than those on the outside.
For more information on cleaning all types of wheels, including those with specialist finishes, see our full article - The Definitive Guide To Cleaning Alloy Wheels.
For your rubber, an ample helping of Tread Tyre Cleaner and a good scrub with our Rubber Scrubber Tyre Brush will help prevent browning and fading, and give the perfect surface to help any tyre dressing bond at the end of your detail.


Safe Washing
The bodywork is up next and it almost goes without saying that any vehicle should be fully cleaned and decontaminated before you can reach for the machine polisher. It's also true that, even though we'll be removing any blemishes in the paintwork later, it doesn't mean that all the regular safe washing procedures aren't necessary, these should be followed on any detail, not just during routine maintenance. The vast majority of paint defects, including those dreaded swirl marks, are cause by poor wash techniques, so it makes sense that skimping on the wash now will inflict even more defects, meaning you'll need more effort in the correction stages to take them out. When it comes to keeping your finish for the whole season, too… well you don't want to go inflicting defects after you've polished you vehicle, do you?
This is what makes the wet work so important during any detail, performing a thorough 2-stage pre-wash using Citrus Power Bug & Grime Remover and Avalanche Snow Foam (and flushing out those panel gaps, door jambs and fuel flaps to prevent contaminants from emerging and interfering with your polishing) before your two bucket contact wash with Lather Car Shampoo is vital. This will eradicate the risk of dragging the most harmful gritty particles around surfaces with your wash mitt, and the chance of causing blemishes along the way.


Decontamination
The last part of the "wet work' is the decontamination stage, where bonded and embedded contaminants are removed - a vital process before any polishing or paint correction, no matter how in-depth the rest of your detail. This is for exactly the same reason as removing other grime - to prevent inflicting more damage while polishing - and requires the use of specialist detailing products to rid surfaces of the kind of contaminants that washing alone won't be able to shift.
We use a 3-stage process to ensure that all types of contamination is removed effectively, starting with those with perhaps the most potential for scratching - the sharp metal shrapnel that comes from brake dust and embeds itself into the top layer of your paint or lacquer. These sharp metal particles can only be removed safely using Iron Out Contaminant Remover to chemically dissolve them. This product works by reacting with the iron deposits, dissolving them into the solution, allowing the resulting solute to be rinsed away. Iron Out is also safe for use on all types of paintwork and can be lightly agitated with a Microfibre Applicator or Work Cloth for maximum bite. Here you're not so much scrubbing the product in to remove the metal, you're merely moving the solution across the surface so that "spent' product (solute that already contains its fair share of dissolved metal) is moved away, and the surface is refreshed with fresh solution to work on any remaining contamination. You'll see that Iron Out turns blood red when it has reacted, and at this point it can be safely rinsed away, taking the metal with it.
In a similar way, the next step is using ObliTARate Tar and Glue Remover to safely dissolve sticky residues, allowing them to be rinsed or wiped off of surfaces using a microfibre cloth. This strong solvent is capable of eradicating everything from stuck-on tar, to traffic cone rash and other hardy glue residues. The process is quick and simple and ObliTARate gets to work right away breaking down these contaminants. The only thing to remember here is to rewash the treated areas with your Lather Shampoo to neutralise the solvent and stop it interfering with the final step.
Finally, a Clay Bar (along with Glide Clay Lube) can be utilised to physically pull out the protein and mineral deposits that come from sources such as rainwater and bird droppings, this process should be performed on all the paintwork to leave it as smooth and glass-like as is possible prior to polishing.
For an in-depth rundown of the full 3-stage decontamination process, see our guide - How To Safely Decontaminate Paintwork.


Dry and Mask
Once you've finished the wash and decon, and the vehicle is completely dry (including all those annoying drips from mirrors and other recesses) it's important to make sure that any rubbers, weather strips, door handles and badges that may come into contact with your polishing pad are masked up. This not only protects the pads from damage when they're spinning at high speed and come into contact with a sharp edge but also prevents the compound from touching any sensitive surfaces. Compound staining on rubbers in particular can be a nightmare to remove, but it's extremely quick and easy to eliminate the risk altogether with a little Detailer's Masking Tape. That's how it's done by the pros.

Paint Correction and Enhancement
Obviously, this is the heart of the exercise - the reason why we're all here, and no matter the intensity of the swirl marks, application of One Step is the same on every vehicle:
- No matter if you're using a full-size DPX Dual Action Polisher or our MPX DA equipped with its 3-inch backing plate, One Step is designed for use with a medium foam pad. Our Revitalise No:2 Foam Pad (5-inch), or yellow Revitalise Spot Pad (3-inch) are made of open cell foam that give enough bite to effectively cut out swirl marks and break down the compound effectively, but they're also soft enough to finish down without having to change to a softer pad. If you're using a brand new pad we recommend a fine spritz of Pad Prime before applying your compound, this will help lubricate the pad on the initial pass, helping to prevent any unwanted scrubbing.
- Apply 2-3 pea-sized drops to your pad, this is plenty for a workable area of approximately 24-inches square. Set your machine to the lowest speed setting and quickly spread the product around the panel, getting as even coverage as possible. This will ensure that the compound is evenly distributed ready to start cutting and to be worked through effectively. When you start (and stop) your machine, always make sure it's in contact with the panel, this will prevent slinging.
- Work the One Step through using slow, overlapping passes, increasing the speed up to setting medium/fast setting (4-5 on a DPX) and using light downward pressure. Keep your machine slowly moving at all times, around 2-3cm of movement per second is sufficient. Keep working the product until the residue starts to turn clear. Don't forget that due to the fact that One Step breaks down from a coarse abrasive to a fine abrasive over this time it takes a little longer than a traditional compound. On average this process should take around 5-minutes.
- Thoroughly clean the pad of any excess residue using a Pad Cleaning Brush or compressed air.
- Back the speed setting down to a moderate level (around 3 on a DPX) and return to the panel for two more passes. This helps to ensure that the product fully breaks down and refines down paint to near flawless.
- Buff away the compound residue on the panel with a fresh microfibre cloth.
- For the best results (especially when polishing indoors) we always recommend using a light source, such as our Swirl Spotter Detailing Light, to check the result.
- Once the section you're polishing is free of swirl marks, you can move on to next one, until the whole vehicle has been completed.


Adding Protection
After any polishing we always, always add protection. This is for two distinct reasons, first it will add gloss and make your paintwork look even better… but mostly it will safeguard the finish, and the work you've put in, by offering a barrier to the elements, increasing water beading and essentially making your vehicle easier to clean on the next maintenance wash. The key questions here though, are how durable do you need that barrier to be? And indeed, how would you like it to look?
As we said, One Step doesn't use any waxes or fillers, so the result of your machine polishing is always the true finish. It also means that a ceramic coating can be used for protection because there's nothing to stop the chemical bonding of the coating. Of course, a silica-based (Si02) cermic coating - like the one you'll find in our easy-to-apply Caramics Paintwork Protection Kit - is designed to give maximum protection and maximum durability - Caramics lasts for up to a whole year! The coating also deepens the gloss by levelling the optical finish of the lacquer layer. This makes it the ideal choice for when extra protection is desired, say on a daily driver or an out-and-out track car. If you're unsure what a coating can do for you, take a look at our guide - What Difference Does A Ceramic Coating Actually Make?
In our case however, we're looking at car that's used as much as a showstopper as it is on the road and, as we firmly believe that you just can't beat the warmth of a wax, we'll be adding wax protection, which can also be applied after using One Step.
Just like a coating, a hard wax (like the selection you'll find for different types of paintwork in our Signature Hard Wax Collection) levels the optical finish by filling in all the microscopic recesses in the surface. This allows light to travel straight through and bounce back to the eye uniformly without being diffracted in different directions, making the paint appear to be deeper and glossier. What's more, a wax will offer anything up to 5-6 months durability, depending on the natural wax (in our case Brazilian T1 Carnauba) content.
Unlike a coating though, which will be engineered to be perfectly clear, waxes contain trace impurities that slightly absorb or bend the light, and this is what gives them their warmth. So, rather ironically, it's the impurities that have a hand in offering the wet, glossy and ultra-warm look of a wax.
Again, your choice this all comes down to the finish you're looking for, and the sort of protection you're after - often denoted by how you use the vehicle. Our waxes, sealants and coatings are all easy to apply, so choose wisely.
With this rather showy Honda we've picked our Spirit Car Wax which is specifically designed to bring the sparkle back to metallic paintwork. Loaded with 50% Carnauba, this apple-fragranced wax offers up to 6-months of protection, along with amazing visual clarity and gloss - the ideal product for enhancing this stunning custom blue hue.

Cleansing and Application
It's also worth noting that immediately after our correction we used Rejuvenate Paintwork Cleanser to prepare the surface for our Spirit Wax.
In many circumstances - particularly when you're not polishing - the fine abrasives and cleansers in Rejuvenate is can also be utilised directly after the wet stages to clear away oxidation in preparation for a wax layer. In our case though, as with any time polishing has taken place, we're simply using our Rejuvenate as an extra step to clean away any unseen compound residue that may remain deep down, ensuring that nothing interferes with the wax bonding.
When it comes to your wax, always bear in mind that "application on every painted surface' doesn't mean that you need to slap a whole load on there. It's a common mistake, even by plenty of seasoned detailers, and the simple fact is that all you end up doing is buffing most of it straight off again, you'll just be wasting your wax!
We recommend using our Waxmate XL or Wax Spot Pad which have been designed to fit inside the pots perfectly, a quarter turn in the tin should coat your applicator enough for a whole panel. Remember to get it on the paintwork as thinly and evenly as possible, gently buff away the excess wax after the stated curing time, and wait at least 3-hours for the wax to fully harden before adding another coat. Two coats, bonded one on top of the other, will always give you the best in terms of deep glossy results, and of course, add even more protection.

Finishing up with those little extras…
So, that's how you can use One Step All-in-One Compound to slay the swirls ready for your next event, and how the protection you use can lock in the results for a whole season, making your paintwork even deeper and glossier along the way. But, as always, we're not quite finished there - we are the detailing professionals after all!
Every detail needs to be completed accordingly, and by that we mean rectifying any minor imperfections that may draw the eye and detract from your all your work elsewhere. Paint correction is where you simply have to put the time in, but there's no denying that the resulting state of perfection can highlight other areas that may not be quite as good… but luckily there are quick and simple steps you can take to rectify anything that's not to your liking.
Here's when you can go the extra mile and, if you check out the video, you can see that we also deep-cleaned the interior, using a combination of Total Interior Cleaner and Spritz Interior Detailer. We also polished up the exhaust tip using Mercury Metal Polish and finished off - as you should every detail - by dressing the tyres with Satin Tyre Crème and making the windows sparkle inside and out with Crystal Glass Cleaner.
Other finishing products you may find useful include Revive Trim Dressing for matte plastics, Dressle All Purpose Dressing, which has a multitude of uses inside and out, and we find particularly amazing on engine bays and plastic wheel arch liners. And, how far you go of course, will depend on the vehicle and the time you have... although hey, we've just saved you a whole load of that on the correction anyway, right?


And don't forget...
There is one last finisher that your detailing kit should never be without of course, you already know the mantra - always finish with Finale! Here in particular our flagship, carnauba-infused quick detailer is effective for a final wipe over to safely remove any dust or stray fingerprints and the results speak for themselves. Yes, this is exactly what can be achieved without spending a good few days on a full multi-stage correction.


For more on single and multi-stage paint corrections, machine polishing and how to remove the heaviest swirl marks you can see our in-depth guides - How To Remove Swirl Marks From Paint and The Basic Guide To Machine Polishing.


- Tags: Machine Polishing


