


50 Top Detailing Tips
A full half-century of professional tricks and tips put together specifically to push your detailing to the next level.

 Skip to content
United Kingdom
The ultimate step-by-step guide to not only get you started in the world of car care, but to help you obtain the fundamental skills and knowledge on the best detailing products to be well on your way to mastering the art of detailing.
Our fully-loaded Back To Basics Course serves as both an intro and a handy refresher suitable for every skillset from beginners looking to detail their own car, right up to trade professionals valeting and detailing multiple vehicles every week. The type of vehicle doesn’t matter, either – this course teaches the professional tips and tricks that are crucial for safe maintenance and obtaining the best possible finish on everything from daily drivers to the most pampered projects and show cars.
We'll take you through the entire process from start to finish, covering every process needed to complete a full detail, including the most vital steps such as super-safe grime removal during your wet work, 3-stage paintwork decontamination, hand polishing, protection procedures and products, and maximising the shine when finishing your detail.
Learn the difference between our pure protection products such as our Signature Hard Waxes and abrasive hand polishing products - like Tripple All-in-One Polish - that are used to not only enhance surfaces but to clean away oxidation and leave a layer of wax protection. In addition, find out how heavy-hitting cleaning products like Iron Out Contaminant Remover and ObliTARate Tar & Glue Remover can be used effectively to help you prepare for any paint correction process.
We’ll also answer all the common questions including: What is a decon-wash? How often is it safe to polish my paintwork? What cleaning chemicals and processes are needed to safely remove ferrous metal shrapnel? And, What are the absolute essentials to have in my detailing kit for every occasion?
Whether it’s to quickly push your car care routine to the next level, or to help you best serve your customer’s needs, the Back To Basics Course will impart crucial techniques and product knowledge to help you safely clean, decontaminate, enhance, protect and finish any vehicle on the road to the highest possible standard.
Preparation – Learn how to get ready for your detail the professional way and see how to prepare the vital products and accessories for every detailing task.
Wheels, Tyres & Arches – The beginning of the process, this part of the course takes you through the deep-cleaning stages for the dirtiest parts of your vehicle.
Pre-wash & Snow Foam – Discover how to shift the harshest grime and potentially damaging particulates without ever touching the vehicle. Here you’ll find the most important steps of all the wet-work stages.
Contact Wash – How many buckets you’ll be needing, the best cleaners and lubricants to use, and the path you should take around the vehicle to eliminate the chance of swirl marks and other defects.
Hand Polishing & Protection – How to use abrasives to enhance paintwork, and the protection needed to safeguard that work while adding a whole load of gloss.
Interior Deep Cleaning – You can take the filthiest cabin straight back to factory-fresh by using these simple step-by-step solutions. Master the art of the interior valet and add a little protection along the way.
Finishing Touches – A detail just isn’t a detail without those all-important finishing touches. Here you can discover what they are, how they’re carried out, and why they’ll give the best possible results.
So, let's take you right back to the basics of professional-level detailing and valeting.
Whether you've never detailed a car before, or you're an industry professional tackling multiple vehicles every week, we have you covered with the following insights into cleaning, decontamination, polishing, protection and finishing.
Grab yourself a coffee, a pen and a notepad and buckle up as we go Back to Basics and help you master the art of detailing...
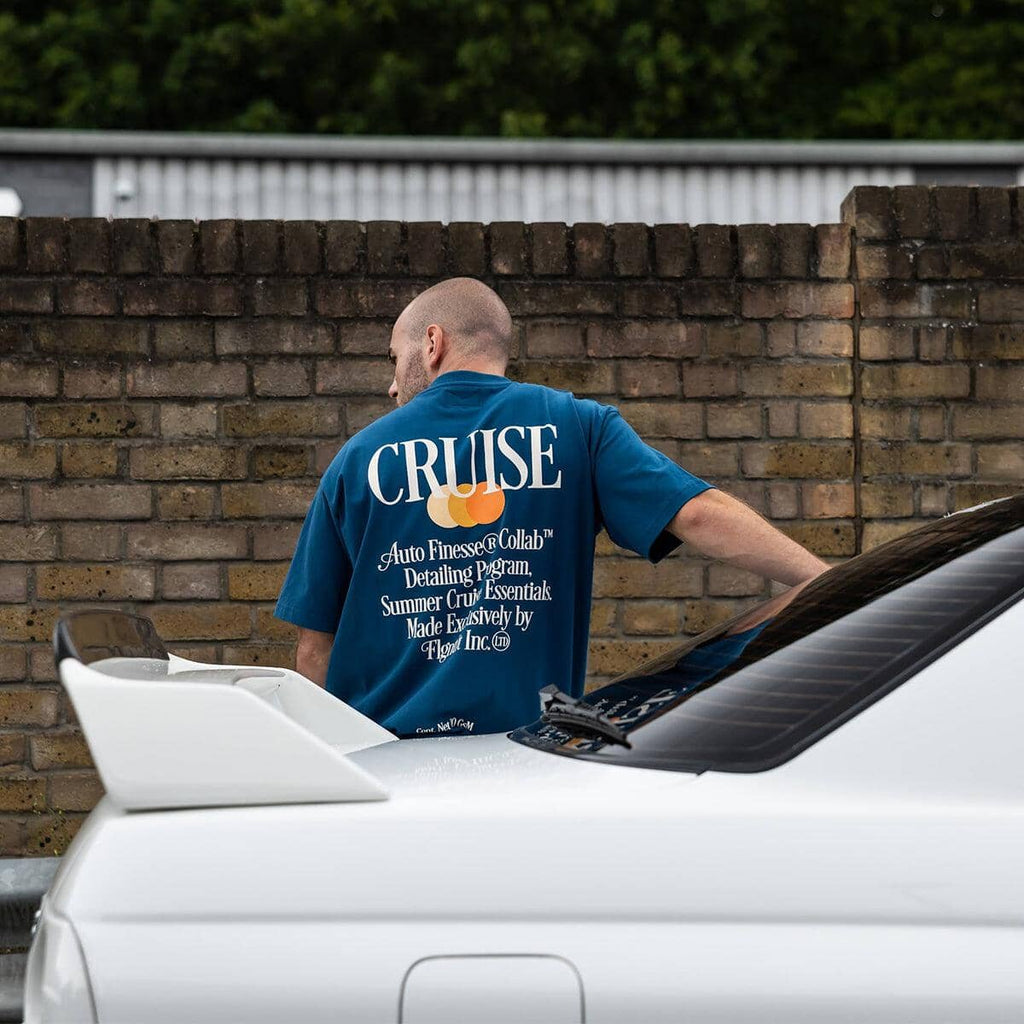
Before we dive into the step-by-step process, let's take a look at our weapon of choice for this detail - a 503bhp, V8 twin-turbo Mercedes-Benz GTS.
On inspection it's clear that this 2015 model has seen better days with regards to sheer cleanliness, but that's never a bad thing because we love to see owners of high-end prestige vehicles who aren't afraid to use them for what they're intended. And besides, that's exactly where the detailing comes in.
The particular GTS boasts an array of genuine Mercedes-Benz carbon fibre upgrades from side scuttles and mirrors, to the front splitter and huge rear diffuser. This vehicle also features a stunning tan leather interior, all things that will come into play and should be considered for the full detail.
Detailing Products:
Revolution Wheel Soap - Breaks down brake dust and road grime, while being gentle on specialist finishes. Can be used as a stand-alone sealant-friendly cleaning agent on the most sensitive wheels, or as a supplementary cleaner and lubricant when agitating/brushing-in other wheel cleaners.
Tread Tyre Cleaner - Heavy duty, spray-on tyre cleaner designed to break down and lift the most ground-in contamination.
Citrus Power Bug & Grime Remover - Wax, coating and sealant-safe, ready-to-use pre-cleaner that uses special surfactants to lift and encapsulate heavy particulates, allowing them to be safely rinsed away.
Avalanche Snow Foam - Thick, citrus-infused foam cleaning agent which lingers on surfaces and works its way into panel gaps to safely remove bonded contamination without degrading protection layers.
Lather Car Shampoo - Protection-layer-safe car shampoo containing an advanced blend of surfactants and lubricants specially formulated to lift and encapsulate grime for the safest possible contact wash.
Iron Out Contaminant Remover - Chemically dissolves harmful ferrous metal contamination, particularly iron shrapnel and sharp particles found in brake dust and environmental fallout. Safe on paintwork, glass and rubber trim.
ObliTARate Tar & Glue Remover - Solvent-based formula used to dissolve sticky contamination including tar, traffic cone rash and glue residues.
Clay Bar - Fine grade detailing clay developed to remove bonded contamination including protein and mineral deposits.
Glide Clay Lube - Advanced lubricant designed to make the claying process safer, easier and more efficient.
Tripple All-In-One Polish - Paintwork cleaner polish designed to remove oxidation, lightly refine and leave behind a layer of wax protection in a single application.
Rejuvenate Paintwork Cleanser - Light abrasive paintwork cleanser used to remove oxidation and prepare paintwork for the most durable wax bonding.
Spirit Hard Wax - A blend of natural waxes, oils and 50% T1 Carnauba specifically developed to enhance metallic paint finishes. Offers up to 6-months of protection.
Total Interior Cleaner - Powerful interior cleaner capable of removing stains, spills and ground-in grime. Safe for use on all materials including carpets, upholstery, leather, plastics and rubber.
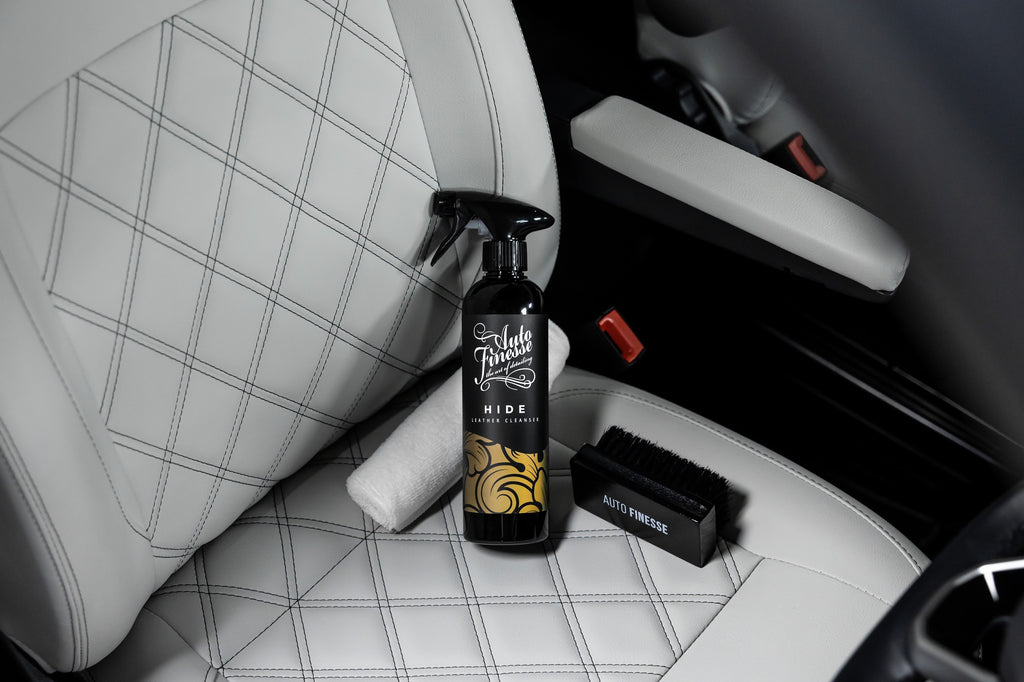
Hide Leather Cleanser - A mildly balanced glycerin-based cleaner that targets deeply ingrained dirt to remove stains safely.
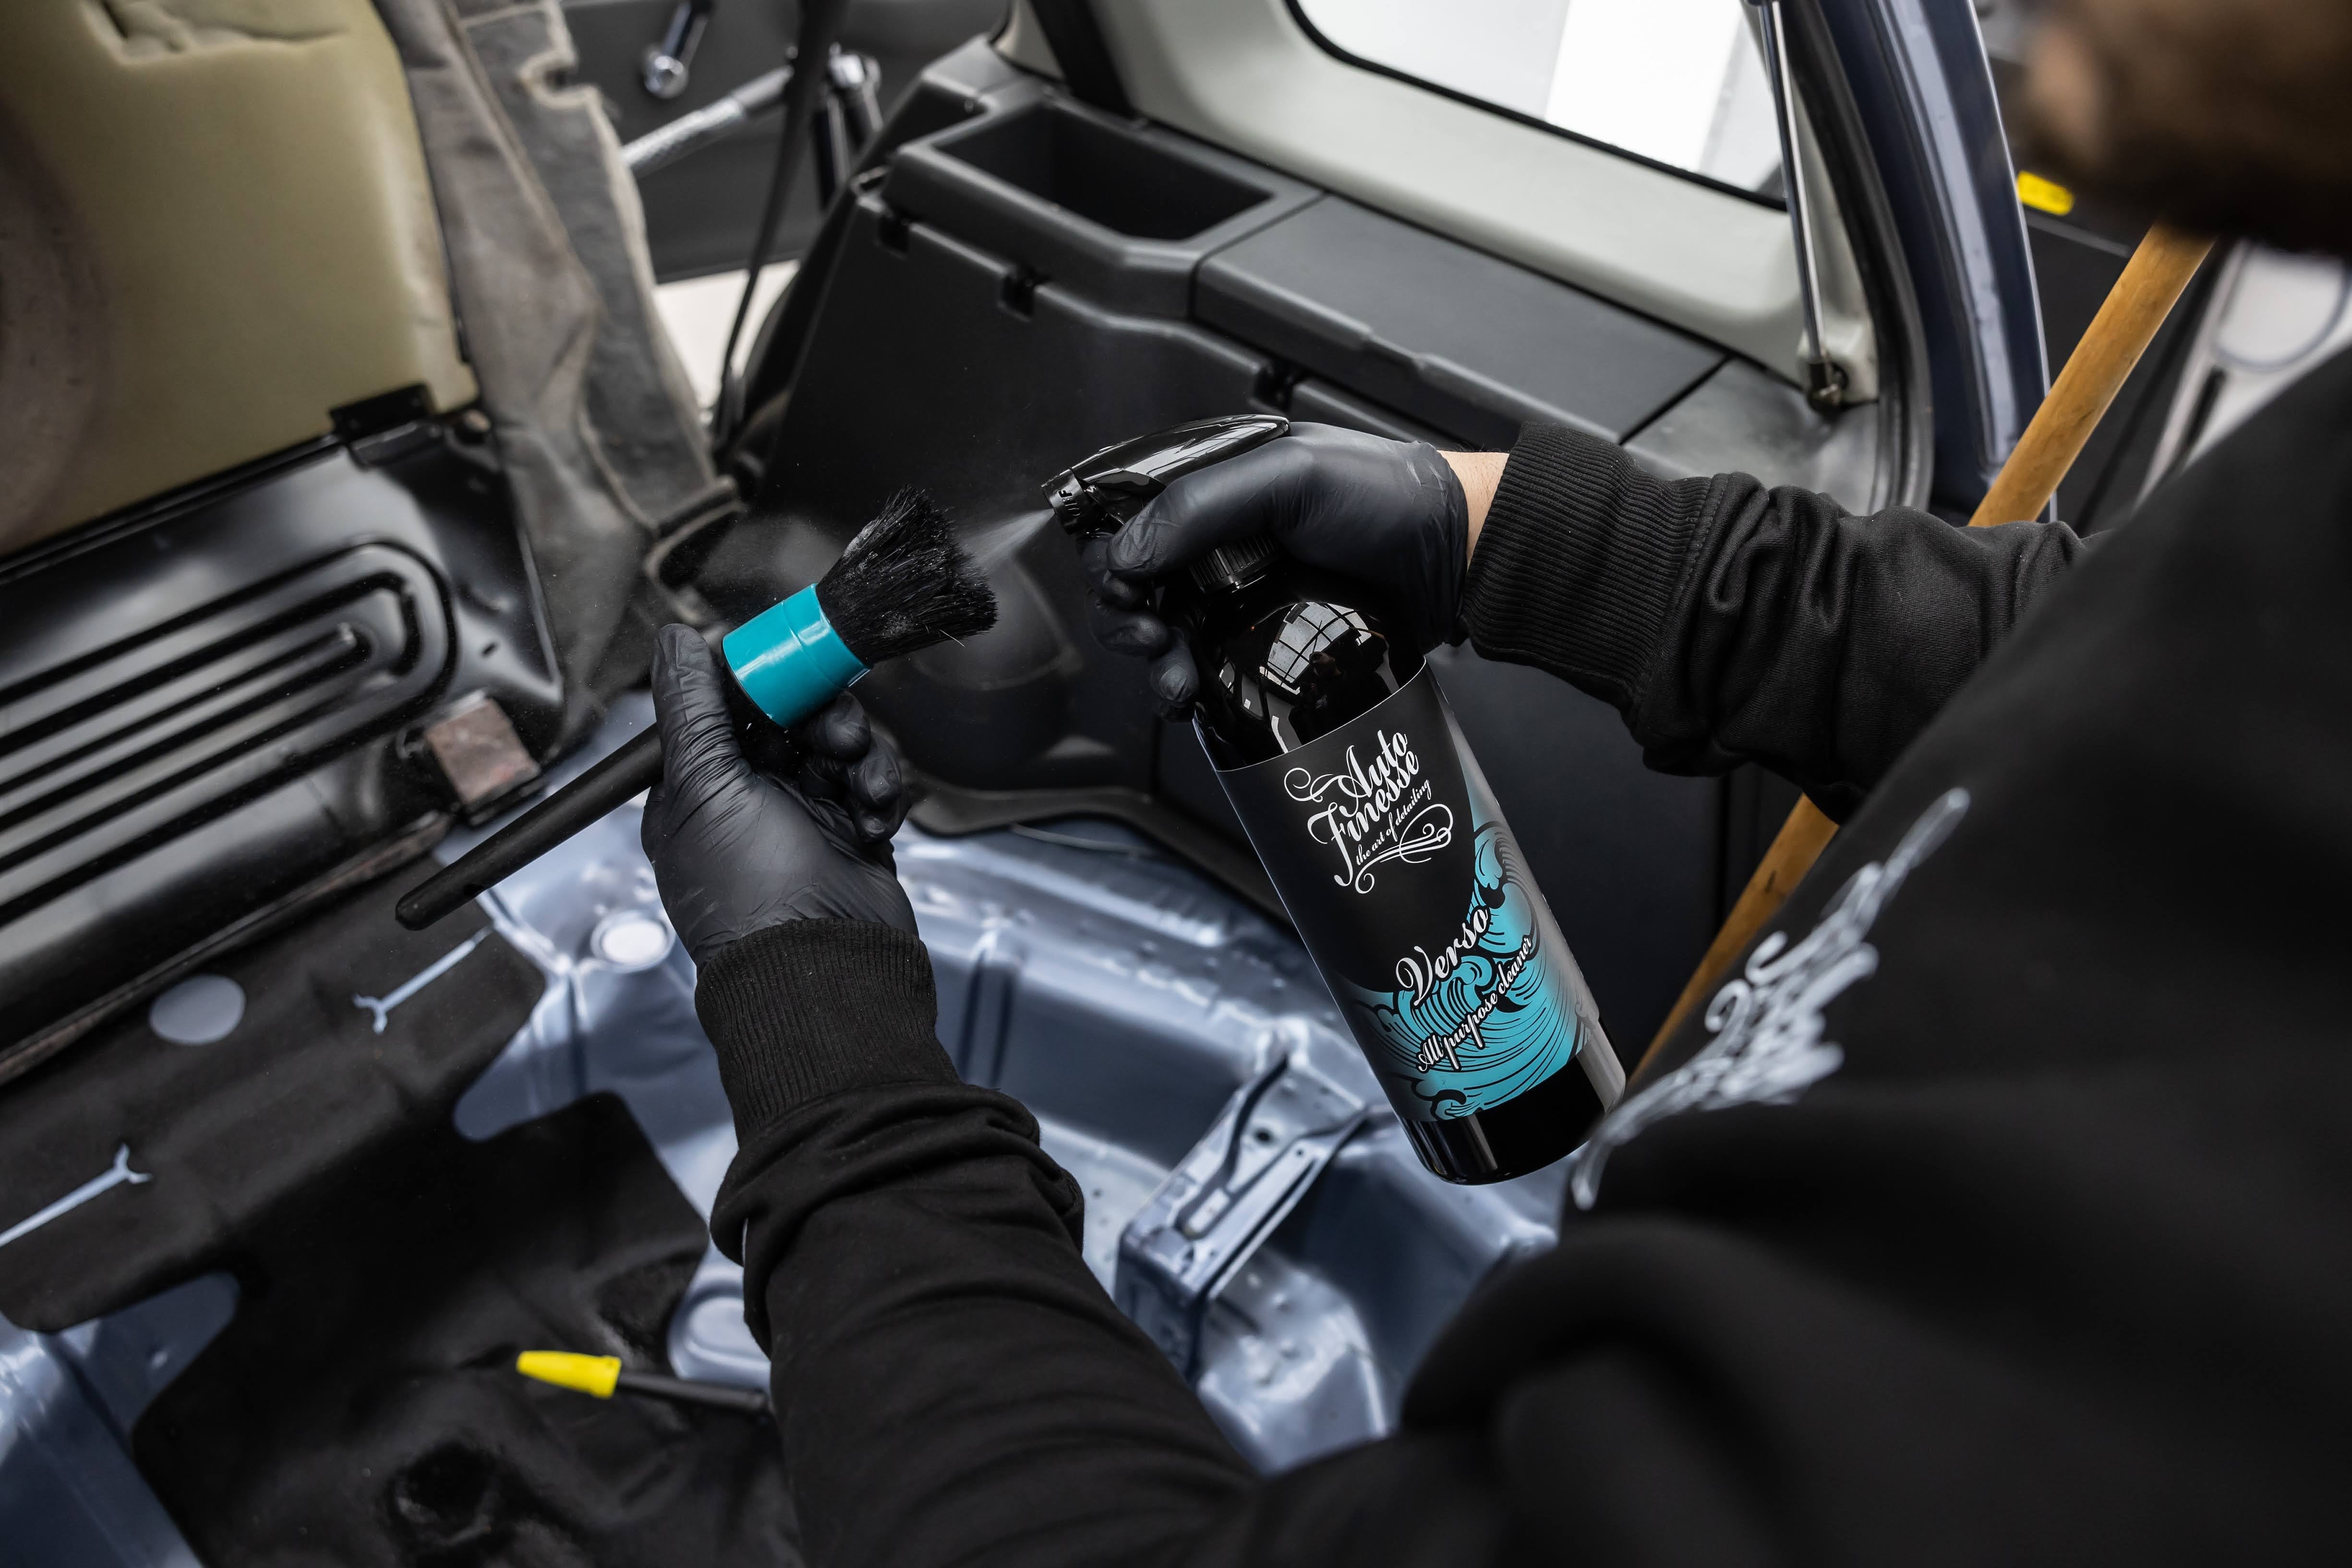
Verso All Purpose Cleaner - A concentrated all purpose cleaner and degreaser, perfect for cleaning a vehicles interior and exterior surfaces.
Hide Leather Conditioner - Its first function is to condition the hide by reintroducing essential oils, softening it, and restoring its original colour. Its second function is to act as a protective barrier cream.
Crystal Glass Cleaner - Finely balanced, distilled solvent solution that's safe to use on all glass surfaces and designed to cut through grime, sticky contamination and greasy films.
Satin Tyre Crème - Progressive tyre dressing allowing you to decide on the level of shine. One application gives a subtle, satin sheen and multiple applications give a wet-look gloss. Also contains UV inhibitors to protect against fading and browning.
Mercury Metal Polish - Light abrasive cleaner polish for metal surfaces such as exhaust tips, wheel lips and brightwork.
Revive Trim Dressing - Silicone-based, water-resistant dressing used to revive and protect factory plastic trim.
Finale Quick Detailer - Water-based, carnauba-infused finishing spray used to perfect all vehicle surfaces in the final stages of any detail.
Accessories:
Ultra Soft Wash Mitt - Super-soft lambswool mitt, ideal for use on any sensitive surface, including paintwork and specialist wheels.
Noodle Wash Mitt - Microfibre wash mitt with long ultra plush fibres designed specifically for getting into recesses and holding onto heavy grime. Ideal for safely cleaning dirtier or more awkward vehicle areas.
Detailing Bucket - High 20L capacity and removable grit guard cuts down the risk of harmful particulate recirculation back to wash media. For the safest maintenance we recommend separate buckets for wheel cleaning and your shampoo solution, along with an additional bucket for rinsing media during the contact wash.
Kneeling Pad - Designed to take the strain off your knees when kneeling to clean your wheels and other lower sections of the vehicle.
Barrel Brush - Long-reach, scratch-free wheel cleaning brush specifically designed to access wheel barrels and awkward areas such as behind spokes.
Detailing Brush Trio - Set of 3, scratch-free Detailing Brushes useful for safely agitating a range of cleaning solutions in and around the vehicle.
Rubber Scrubber - Stiff bristle brush used specifically for agitating tyre cleaners and helping to remove harsh, embedded grime.
Arch Blaster - Stiff, contoured brush used to aid in the removal of contamination from inner arch liners.
Snow Foam Lance - Designed for Snow Foam/Ceramic Foam application. A professional Foam Lance that activates the cleaning agents and whips up the solution into a thick, lingering foam.
Feather Tip Brushes - Super-soft detailing brushes, ideal for agitating cleaning agents on the most sensitive surfaces.
Silk Drying Towel - Highly absorbent, twist-loop microfibre essential for absorbing rinse water (along with any impurities contained within) from all surfaces after completing the wet work.
Ultra Plush Microfibre Cloth - Ultra-absorbent microfibre towel, ideal for many finishing tasks and also useful for drying complicated alloy wheels.
Waxmate XL - Ultra soft, fine foam applicator for use when applying hard waxes.
Micro Tweed Buffing Cloth - Premium microfibre cloth designed for buffing away wax residues. Incorporates special pockets in the microfibre weave to trap excess residues away from paintwork and prevent clogging.
Microfibre Work Cloths - 300GSM general-use microfibre cloth, suited to a huge variety of cleaning, polishing and finishing tasks.
Microfibre Applicator - Dual sided microfibre applicator pad used for applying and working through polishes, along with the application of dressings.
Upholstery Brush - Essential for agitation of interior cleaning solutions and for deep-cleaning fabric convertible roofs.
Superior Waffle - Designed specifically for use with spray-on glass cleaners, the waffle weave material has been specially developed to pick up and trap particulates and sticky residues.
Tyre Spot Pad - Contoured foam applicator specifically designed for tyre and trim dressings.
As we detail this car we'll be looking for any paint defects or other areas that may require further attention prior to the wash and before the protection and finishing stages. Obviously the first part of the detail is getting the car completely clean and free from dirt, grit and any other contamination, so we can see what we're dealing with. This is where the wash stages - which are always the most important part of your detail - come in. After all, in some cases - when it comes to routine maintenance for example - these stages are the bulk of the job. The wash stages must be performed effectively, and most importantly, safely to prevent inflicting damage along the way. The 'wet work' is when paint defects, such as swirl marks and scratches, are most commonly inflicted.
The wash stages also help you to identify areas of the vehicle which may require enhancement, correction or restoration. The chances are that you will find far more paint defects as you work your way around the vehicle when you're cleaning it than you will from any quick inspection.
Having all your detailing products and accessories within reaching distance is a simple concept that's not to be underestimated. The last thing you want to do is to keep running back and forth throughout the detail to access your cleaning products.
Note that accessories such as microfibre cloths, brushes and wash mitts should never be put down on the floor or onto any other contaminated surface where they run the risk of picking up potentially harmful grit. The reason that many of these clean so well is that they're designed to be extremely adapt at lifting and holding on to particulates to remove them from the vehicle surfaces. It goes without saying that it's important to protect these from picking up grime until they're on the actual vehicle...
At this stage we also recommend removing any jewellery to eliminate the risk of hard accessories making contact with and scratching the paintwork.
To protect your hands from cleaning chemicals, along with grime and general contamination, we also advise to wear gloves throughout the pre-wash, wash and decon stages. It's worth remembering that many contaminants you'll find on your vehicle are harmful to your skin - road salt, oily fluids and brake dust can be particularly corrosive and even carcinogenic.
For the safest possible contact wash, we always use three Detailing Buckets - one for our car shampoo solution, one containing plain water for rinsing out our wash media between passes and one for cleaning our wheels. This safety measure is to help avoid cross contamination and the chance of potentially harmful contaminants being transferred back to the vehicle during the contact wash stage.
To avoid confusion when identical buckets are used, we always recommend labelling your buckets for ease of identification. A great solution here is to use our durable vinyl Bucket Stickers.
Once you are ready with all your products, accessories and equipment to hand, you can fill all three buckets up to three-quarters with water in preparation for your wet work....
We advise all professional course trainees that visit us to start their detail with the wheels of the vehicle. Why you ask? Well, if you opt to wash your bodywork first, you are simply increasing the chances of water marks appearing on the paintwork while you clean your wheels. This problem is particularly prevalent in hard water areas where the tap water you'll be using to clean contains increased impurities that may be left behind on the vehicle if allowed to dry naturally. Cleaning the body first also increases the risk of the, typically heavier, contamination found around the wheels and arches being accidentally transferred back onto your clean paintwork when rinsing.
The only exception here is if you're undertaking the specialist tasks of deep-cleaning your engine bay or under-vehicle chassis cleaning, in these cases the cleaning processes should be performed first due to the heavy, oil based contamination often found in these areas.
When cleaning wheels it's also advisable to start with the shaded side of the vehicle first. This is so, when you come to washing both sides, the first side that you've already cleaned doesn't have opportunity to dry in direct sunlight - you'll thank us for this later!
Our wash mitt of choice for complicated wheels is either a small Ultra Plush Wheel Mitt or the Ultra Soft Wash Mitt we're using here; you'll see that this accessory has a thumb insert making it ideal for reaching behind the wheel spokes during cleaning. Remember that it's not just the face of the wheel that you need to tackle here, the insides of the spokes and barrels are just as susceptible to the contamination which will eventually bring on surface corrosion.
Depending on the wheel finish, multiple products can be used to safely rid the surfaces of grime and brake dust contamination. We always advise using Revolution Wheel Soap which is safe for any finish. This product can be used as either a stand-alone wheel cleaner on the most sensitive finishes, or as an extra lubricant to aid the safe removal of heavy grime in conjunction with other specialist cleaning products. Revolution is a dilute-to-suit shampoo and for normal soiling we advise adding 2-3 capfuls to your Detailing Bucket.
To produce the perfect water to soap suds ratio (after pouring your Revolution concentrate into the bucket) place the jet wash nozzle 1-2cm above the water line of the bucket ready to fill.
Maintaining the 1-2cm gap as the soapy water rises, by the time you reach the top of the bucket you'll have a perfect diluted solution ready to start the wheel cleaning process.
You are now ready to tackle your wheels. You'll often find that professional detailers wash two wheels at a time, unless the vehicle is in direct sunlight. If there's any risk of premature drying, it's important to clean one wheel at a time. For the same reason always ensure that wheels are cool to the touch, and never clean wheels immediately after driving... especially driving involving a lot of heavy braking.
First rinse both wheels and both inner arches with your pressure washer, and then move back to the wheels for one more rinse. You'll see this mentioned time and time again in our professional training courses - we rinse the wheel faces twice as any debris that may be removed from the inner arches and land on the wheels will be cleaned away by the second rinse. The reason we always pre-rinse (without applying any cleaning product) is that, through this mechanical cleaning action alone, loose grit and grime will be removed relatively easily. This means that, once applied, your cleaning agents will get to work where they're needed most - on the bonded contamination. In this way the pre-rinse simply helps you avoid wasting your products.
One of the most corrosive substances commonly found on wheels, and typically in the highest concentration, is brake dust. Essentially this substance is made up of tiny, serrated metal particles. In severe cases, like here, these particles are able to embed themselves into surfaces, penetrating protective layers and allowing the early onset of corrosion.
This type of ingrained ferrous metal shrapnel requires a cleaner capable of safe chemical removal, a process whereby the particles are dissolved into the solution, allowing them to be rinsed away without inflicting surface damage. All our wheel cleaning products, such as Imperial Wheel Cleaner and Revolution Wheel Soap are capable of intensive brake dust removal during larger details or routine maintenance but, that said, it also pays to deep-clean and decontaminate your wheels periodically using a product specifically formulated for use on ferrous metal, in this case we're using Iron Out Contaminant Remover.
While Iron Out isn't primarily designed as a wheel cleaner, and shouldn't be used on every maintenance wash, the combination of compounds capable of dissolving metal particles and powerful degreasers provides the ideal solution for the most heavy hitting decontamination after extended periods. Once a month or so will help rid your wheels from the most ingrained brake dust and help prevent against corrosion.
For the most sensitive wheel finishes, routine maintenance and on vehicles that use carbon ceramic brakes, Iron Out should be substituted for Imperial Wheel Cleaner, or Revolution alone.
Before you apply your cleaning agent, be sure to have all your wheel and tyre cleaning products and accessories to hand. Tread Tyre Cleaner, Iron Out, Imperial, a selection of dedicated brushes, and your Revolution solution are the staples for the most effective wheel cleaning. It's also advisable have a Kneeling Pad at the ready.
Apply your Iron Out liberally over the wheel face, between the spokes and over the barrels. Then leave the solution to get to work for 2-5 minutes, depending on the weather and temperature conditions. You can actually see the reaction take place as it 'bleeds'.
You'll see the solution slowly turn blood red, this is a chemical reaction taking place between the solution and any iron contamination that is present. It also temporarily highlights the contamination while it is being dissolved.
It important to ensure that you never let the solution dry completely on the wheel surface, so always keep in mind that during warmer weather you should allow slightly less dwell time.
Once the reaction has taken place, you will need to rinse the wheel thoroughly to safely remove the solute of Iron Out solution and dissolved metal particles. It's important to be thorough here - you don't want to leave any fallout remover behind.
The next step is to re-apply Iron Out liberally over the faces and barrels, this is to ensure that any traces of embedded metal fallout left behind makes contact with the solution and is removed. In this stage we also agitate the solution, starting on the inner wheel barrels using a long-reach, non-scratch Barrel Brush that's specifically designed for maximum effectiveness. Here we use the Revolution solution in our Detailing Bucket as an extra cleaning agent and lubricant to brush-in the Iron Out.
Agitation, in this instance, isn't so much about mechanically scrubbing away contamination, but to give the product maximum bite by moving around and constantly refreshing the Iron Out/Revolution solution. This is because the solution can only dissolve and clean away so much contamination by physical volume of solution. Agitation is a way of moving away 'spent' solution, or solution that's already encapsulating the maximum amount of contaminants, and refreshing the area with fresh solution to work on any remaining contamination. This is a simple way of increasing product contact and ultimately the effectiveness of many cleaning agents during your detail.
Top Tip: Start from the valve cap and work your way around the wheel clockwise or anti clockwise. This way you know where you started and will ensure you don't miss any spokes as you work your way around the wheel.
Next you can use your wash mitt and Revolution solution to clean the wheel faces, lips and behind the spokes, working in and agitating the solution as you move around the wheel. This also presents a good opportunity to clean the brake caliper.
Finally, using a soft, scratch-free Detailing Brush, you can tackle each lug nut and other awkward recesses such as around the valve cap and tyre beads. This method is particularly useful for the hard-to-reach areas, and you can also use the brush to work product into the brake caliper, too.
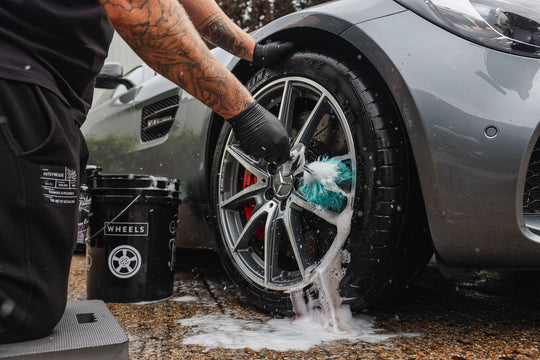
It stands to reason that your tyres are the only part of the vehicle to physically touch the ground, so removing the heavy grime and ingrained contamination usually found in these areas will usually require a hard-hitting combination of mechanical cleaning and a powerful chemical cleaning agent designed to lift and encapsulate heavy particulates. Cleaning your tyres is not just an essential part of your wet work for looking good and not spreading grime to cleaner areas but it will also help further down the line when you come to the finishing stages. Tyre dressings will not only look better but they will always bond more securely, enabling them to last longer, when applied to a clean tyre.
For this heavy cleaning stage we utilise Tread Tyre Cleaner which is specifically designed to be effective on the harshest grit and grime, agitating the solution into the sidewall using a stiff bristle accessory such as our Rubber Scrubber Tyre Brush. In this case the agitation is as much about mechanical scrubbing as it is refreshing the Tread solution along the way. This physical action helps lift and remove the most ingrained dirt but, don't worry, unlike paintwork and other sensitive surfaces, you're not going to damage your tyres through any level of physical cleaning.
After we have finished with the tyre wall, the next stage is apply Tread liberally to the inner arches and agitate using an Arch Blaster Arch Brush. For easier access, you can turn the wheels left or right - or even go as far as jacking the car up - to give more arch clearance. Once agitated, we can then proceed to rinse the arches and the wheels thoroughly, ensuring that any traces of cleaning product, along with the dirt it encapsulates, is removed.
While most people would move straight onto the pre wash stage here, bear in mind that this is the perfect opportunity to fully inspect your work on the wheels and arches. Be your own biggest critic and remember that; if you see it, other people will see it. Check your wheels, tyres and inner arches are completely clean and no dirt remains in the arches. If any grime is still present, re-apply your cleaning agent, agitate and re-rinse wherever necessary.
Now we are happy with the wheels, we can begin to shift our focus onto the paintwork. The pre wash stage of any detail is equally as important as any other stage, if not more so. The purpose here is to remove as much contamination as possible before we make any physical contact with the vehicle - this will massively reduce the risk of inflicting swirls and other defects on the more sensitive surfaces such as paintwork and gloss plastic trim.
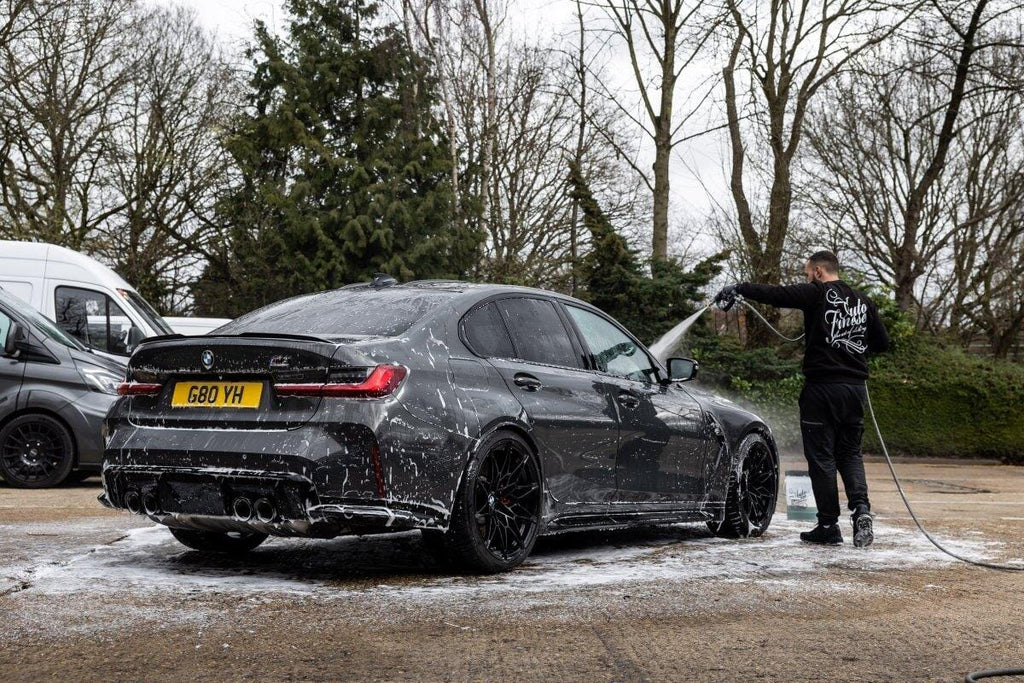
As with your wheels, the first stage is to pre-rinse the vehicle with your pressure washer to remove as much heavy soiling as possible before utilising any cleaning agents. Once again, this mechanical cleaning process is designed to rid all surfaces of any loose contaminants that can be removed easily, leaving your cleaning products to break down the bonded grime, where they're most needed.
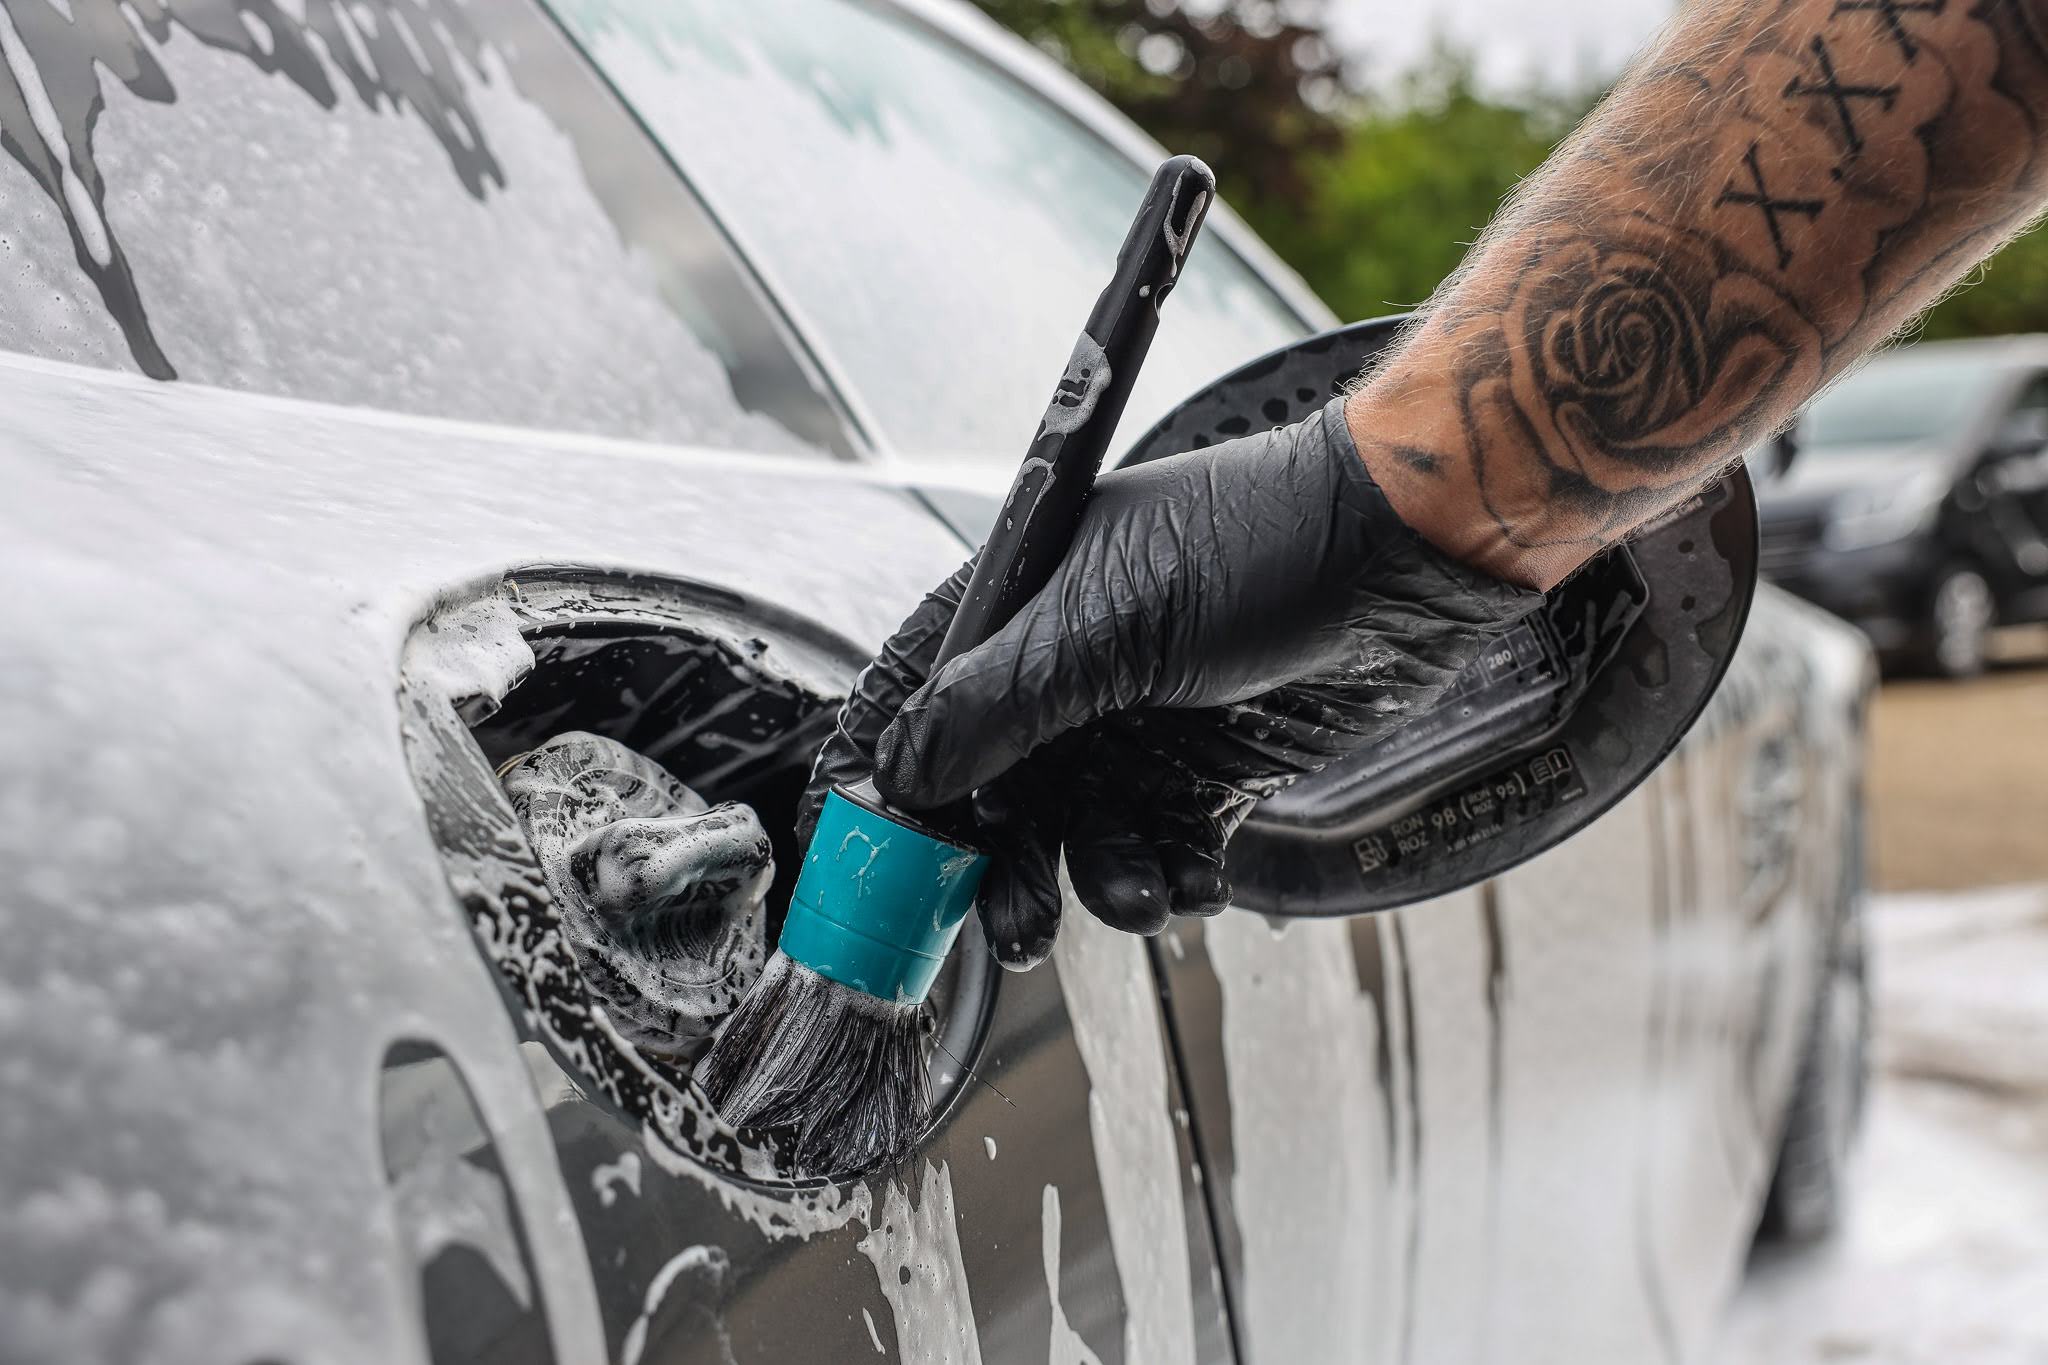
Start at the top and work your way down, rinsing any loose dirt straight off the vehicle and onto the floor. Don't forget to rinse and flush out any shuts, door returns, panel gaps and fuel filler caps - these are notorious dirt traps and you don't want any of that grime coming out later and interfering with the rest of your detail.
To get to work on the stuck-on grime, a cleaning agent - or more specifically a pre-cleaner - is used to break the bonds and encapsulate potentially harmful contamination. This mechanism, which is facilitated by special surfactants within the solution, allows these particulates to be rinsed away without touching, or more importantly abrading, the surface.
We offer two spray-on pre-cleaners, the professional staple that is our ready-to-use Citrus Power Bug & Grime Remover, and Dynamite Traffic Film Remover, a product that can be diluted to suit almost any cleaning task. Both products are not only immensely powerful, but they're also kind to previously-applied protection layers, meaning they won't strip away your waxes, sealants and ceramic coatings.
While the car is still wet you can apply your pre-cleaner. A professional tip is to start at the bottom of the vehicle as it's generally the dirtiest part of a car, this will allow more time for the product to dwell and break down the heavier grime before you rinse.
Ensure you have applied you pre cleaner to all bodywork panels and all shuts/returns - including the roof, filler cap, wing mirrors and the glass.
Leave the product to dwell for as long as possible, but never let it dry on any surface. If the car is starting to dry out before you're finished application, you can use your pressure washer to spray a fine mist over the car. The idea here is to keep the car wet and prevent water or drying marks.
While we don't recommend agitation of any pre-cleaner on sensitive exterior panels, it is sometimes necessary on the most contaminated, non-sensitive aeras such as inside fuel flaps and door shuts, along with window rubbers, headlights and mirrors. Again, the idea is simply to refresh the solution and ensure it makes full contact with the most awkward areas and dirt traps.
Once your pre-cleaner has been allowed to dwell rinse the entire vehicle thoroughly, working from top to bottom, to ensure that all traces of solution - and the grime along with it - are removed.
Citrus Power bug & grime remover is a versatile citrus pre-wash an essential that no car detailing kit should ever be without. Designed to aid the perfect... See product details More
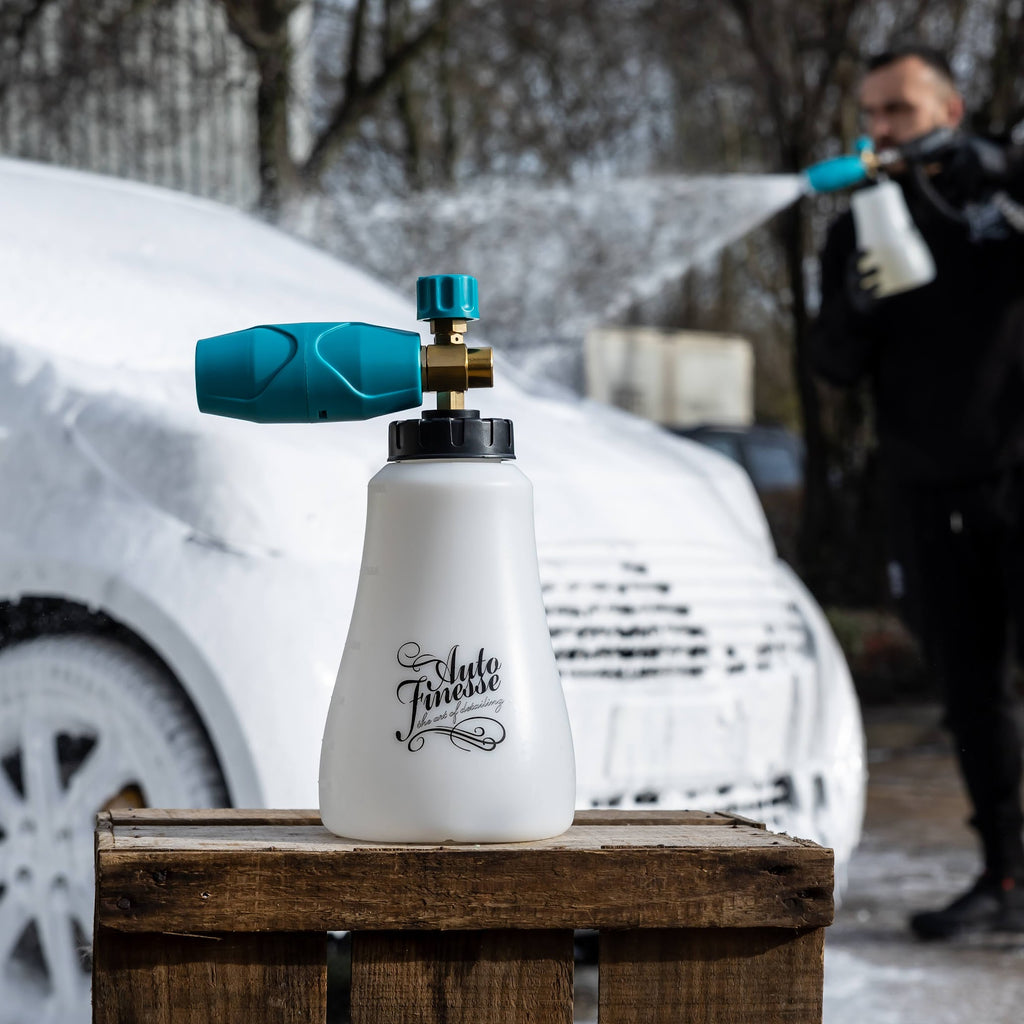
Your pre-cleaner will remove the worst of the large particles but, for the safest possible cleaning process, using a snow foam is still another essential part of the pre wash process. Our citrus-infused Avalanche Snow Foam is designed to work on the extremely bonded contamination, simply through the nature of the way it lingers on surfaces for the maximum possible time. By being allowed to dwell for longer, Avalanche is effective in breaking down contamination, again using special surfactants to pull grime away from surfaces on a molecular level, and trap it safely in the solution until rinsing. Snow foam also has the advantage that it works its way into panel gaps and other unseen areas, cleaning those out, too.
Like all professional snow foams, Avalanche is applied using a Snow Foam Lance attached to your pressure washer. This piece of professional equipment is designed to dilute the solution and force it through a special metal gauze which has the dual purpose of activating the cleaning agent and whipping up the solution into a thick, lingering foam.
The first step of this process is to add 200-300ml of Avalanche to your Foam Lance bottle and top up with fresh water.
Top Tip: Instead of filling up your Foam Lance bottle with a tap or a hose, instead dip it into a bucket of fresh water, this will prevent the snow foam concentrate from bubbling up prematurely.
Our Snow Foam Lance is fully adjustable for ease of application. The front nozzle twists to adjust how the foam comes out of the lance. With the fins closer together the product is projected as a fan, and with them set wider the snow foam is released as a straighter flow.
The top nozzle dictates how much water passes through the lance at any one time and allows you to control the amount of product being used, this will also allow you to control the thickness of the foam for varying water pressures.
Apply your snow foam to the car on all areas - including the wheels - from the top down and leave to dwell for 3 to 5 minutes (dependant on the weather conditions). A little judgment is needed here, leave the snow foam to dwell for as long as possible for maximum cleaning, but never allow it to dry out. A good professional tip is to keep an eye on the glass, as typically this is where it will start to dry out first.
Avalanche Snow Foam can be safely worked into any crevices and hard-to-reach dirt traps using a soft scratch free Detailing Brush or FeatherTip Brush. The idea here is to make sure that that the foam has enhanced contact with all areas and that the solution is refreshed to work on the most ingrained grime with the maximum possible effectiveness. Dip your brush into your clean water bucket first, and then gently work the foam into areas such as grilles, vents, window rubbers and around badges.
Finally, after dwelling, thoroughly rinse the vehicle from the top down, double checking that all traces of product are removed. This ensures that all surfaces are fully prepared for the next stage - the safest possible contact wash.
For the safest possible contact wash it's always essential to use two Detailing Buckets - one containing your shampoo solution and the other with plain water for rinsing out your wash mitt in between contact passes, especially those with sensitive areas such as paintwork.
It's also advisable to use two wash mitts, one for sensitive areas and one for dirtier or more awkward areas. This is down to personal preference on design of the mitt, although here we recommend using our Plush Wash Mitt (for use on bodywork) and a Noodle Mitt (for more contaminated or more intricate areas such as front grills, the sills and the rear end). Rather than scrubbing away contamination, microfibre and lambswool wash media is designed to glide over surfaces, agitating your shampoo and, most importantly, picking up particulates trapped in spent cleaning solution. A good mitt is designed to trap potentially harmful particles deep within the material, essentially holding them away from the most sensitive surfaces until they're physically rinsed out. This is why good quality mitts are a crucial part of your kit.
For normal soiling add two to four capfuls (or a firm squeeze) of Lather Car Shampoo into a three quarters-full Detailing Bucket of water. Top up the remainder of your bucket with your pressure washer for the perfect soap sud consistency.
Lather Car Shampoo is a wax, sealant and coating-safe car cleaning agent, this product contains no shining agents or waxes that may interfere with the rest of your detail - it's purely used as a powerful cleaner that's assisted by advanced surfactants and lubricants to lift and safely encapsulate grime, ready for it to be rinsed away. Lather is also a dilute-to-suit cleaner, meaning that you can simply add a little more for heavier soiling, and a little less for light soiling.
When contact washing, we always start with the cleaner portions of the vehicle first, this is to cut down on the risk of transferring heavier grime to cleaner areas. In most cases this will involve starting with the roof and upper sides, before moving on to the bonnet, lowers sides, front bumper and finally the rear. To further avoid swirling, wash in straight lines rather than circular motions.
Top Tip: Ensure you cover all areas above the sills. 99% of cars will have a design line which will help differentiate the cleaner "upper sides' to the more grimy "lower sides', something similar to this…
To prevent transferring grime into your clean shampoo solution it is vital to remember to rinse your wash mitt thoroughly (using the rinse bucket) after every contact with the vehicle, before dipping back into the wash bucket to load up with fresh wash solution.
You can maximise the potential of your wash mitt by utilising both sides when cleaning any vehicle panel by panel. This will also ensure that you don't miss any panels as you work your way around the vehicle. Working in small areas at a time is the best approach.
When tackling dirty lower sides and rears, along with intricate areas such as grilles, bumpers and diffusers, a Noodle Mitt can make life infinitely more straightforward. This design incorporates long ultra plush fibres with a huge surface area that are designed to work their way into recesses. The deep pile material used in our Noodle Mitt is also great for trapping heavier grime, keeping it away from your paintwork, making it ideal for use on the grubbier areas, and helping to keep the other mitts you use on the most sensitive surfaces in the best condition for longer. Ensure you keep your wash mitt well lubricated at all times as you wash, and remember that extra rinsing is always advised for any particularly dirty areas of the vehicle.
Once the contact wash is complete, the vehicle should be rinsed thoroughly from the top down. For routine maintenance details on protected vehicles, this is the last wet work stage before moving on to drying, finishing and possibly topping up protection. For full details however, especially where there will be polishing or defect removal involved, we move on to full paintwork decontamination.
Full paintwork decontamination is the next cleaning stage to fully prepare the vehicle for polishing - this is simply where we remove the kind of ingrained, bonded and sticky contaminants that cannot always be removed by washing alone. The types of contamination here include embedded iron deposits (chiefly derived from brake dust), tar, glue and other sticky residues, and protein/mineral deposits from organic sources such as bug splatter and bird droppings, along with inorganic sources like corrosive environmental fallout.
To ensure that all these potentially harmful contaminants are removed and are not able to inflict more defects during the polishing process, we employ a 3-stage process using Iron Out Contaminant Remover, ObliTARate Tar & Glue Remover, a Clay Bar and Glide Clay Lube.
The first stage is applying Iron Out directly to the vehicle while it's still wet . Spray Iron Out liberally onto all paintwork and glass, allowing it to dwell for 1-2 minutes while it reacts with any ferrous metal deposits. Note: If the vehicle is in direct sunlight, apply to a panel at a time and always avoid applying to any plastics where possible. As with your wheels earlier, the Iron Out bleeds, turning blood red as it dissolves the iron contamination.
For maximum effectiveness you can use a damp Microfibre Wash Mitt or Microfibre Work Cloth to work the Iron Out into the paintwork and lightly agitate the solution. Your mitt can be rinsed in the Rinse bucket, but we advise against putting the mitt in the Wash bucket you previously used for the Safe Contact Wash. Because the car has been washed already, you don't need to worry about going from top to bottom.
Once agitated fully rinse the vehicle from the top down, removing any residue. Remember that this spent Iron Out solution will be encapsulating dissolved metal contamination, so never let it dry on the vehicle.
Developed as a heavy-hitting ferrous fallout remover, Iron Out is an advanced decontamination remover in a reactive gel, capable of safely and effectively erad... See product details More
Now we can tackle the tar and other sticky residues using ObliTARate, a powerful solvent capable of lifting and dissolving the glue and oil-based contamination typically found on the lower half of your vehicle. In most cases these contaminants can be seen with the naked eye and targeted directly.
Spray on to the lower areas of vehicle paintwork, leave to dwell for around 10 seconds, and then spray a little ObliTARate onto a clean microfibre cloth. Use this to agitate the solution into the bodywork by rubbing it in straight lines, this action should remove the sticky residues, depositing them on your cloth. For any heavily tarred areas, you can repeat the process until all residues are removed.
After using any tar & glue remover on your paintwork, it's important to neutralise any left-over solvent residues to stop them interfering with the Clay Bar in the next step. First re-rinse the vehicle thoroughly, and then contact wash the areas that have been treated with ObliTARate using your Lather Car Shampoo solution.
Auto Finesse® ObliTARate tar and glue remover, is a solvent-based formula that quickly dissolves stubborn tar and glue residues and contamination on contact ev... See product details More
Detailers use clay to remove bonded organic and inorganic contamination. Clay is the perfect substance because it's capable of physically pulling out hardy contaminants leaving behind a smooth glass-like surface. After using clay you can actually feel the difference.
First ensure that your clay bar is clean and free of dirt. Use approximately one quarter to one half of the clay bar, dependant on how big the vehicle is. Note: for the Mercedes GTS we're using half a clay bar.
Work the clay into your hands so that it's warm. Fold the clay into itself several times, flatten into your palm and adequately lubricate with Glide Clay Lube. The trick to effectively using a clay bar is ensuring the panel and the clay itself are fully lubricated.
Using three or four fingers to lightly pass the clay over the bodywork, panel-by-panel. The clay should never create friction; provided it's fully lubricated, it will glide across painted surfaces without issue, picking up contamination along the way. Keep an eye on the condition of your clay, once it has picked up any dirt or gritty particles, fold the clay inwards on itself to reveal a fresh, clean portion and carry on.
Repeat this process over the entire vehicle, ensuring that each panel is sufficiently lubricated. Ensure that you cover every inch of paintwork. Glass, headlights and gloss plastics can also be decontaminated using your clay bar.
Rinse the vehicle thoroughly from top to bottom to remove the majority of the Clay Lube residue.
Contact wash the whole vehicle once again. You don't need to worry about the two bucket method at this stage as any paintwork contaminants should already be removed. We always wash a vehicle after claying, as any left-over residue can go on to interfere with the polishing stages. After your final rinse the car is ready to be dried.
Before we can polish or correct any paintwork, we need to ensure that the car is completely dry. In fact, after any wash, even during routine maintenance, it's vital to dry your vehicle safely using a dedicated drying towel to absorb the surface water, rather than merely pushing it around.
Tap water typically contains a large concentration of mineral impurities that will be left on your vehicle should the water molecules be allowed to evaporate off naturally. Avoiding water marks, and the chance of any impurities causing defects when polishing, is the reason why we use a highly absorbent microfibre towel - such as our Aqua Deluxe, Aqua deluxe XL or Silk Drying Towel - to essentially suck up the water together with the impurities.
Our Silk Drying Towel is being used here. There is no strict drying technique you need follow when it comes to drying a vehicle apart from working from top to bottom.
Our routine tends to start with windows first to prevent any water marks from drying on the windows, before moving onto the rest of the bodywork.
After drying the bodywork, a small, absorbent microfibre cloth, such as our Ultra Plush microfibre, can be used to dry your wheels. The Ultra Plush is the perfect towel here as the smaller size makes it less likely to catch the ground and pick up any dirt or debris. Once the wheels are complete, we then use the same Ultra Plush to dry the door shuts, door returns and inside the filler cap.
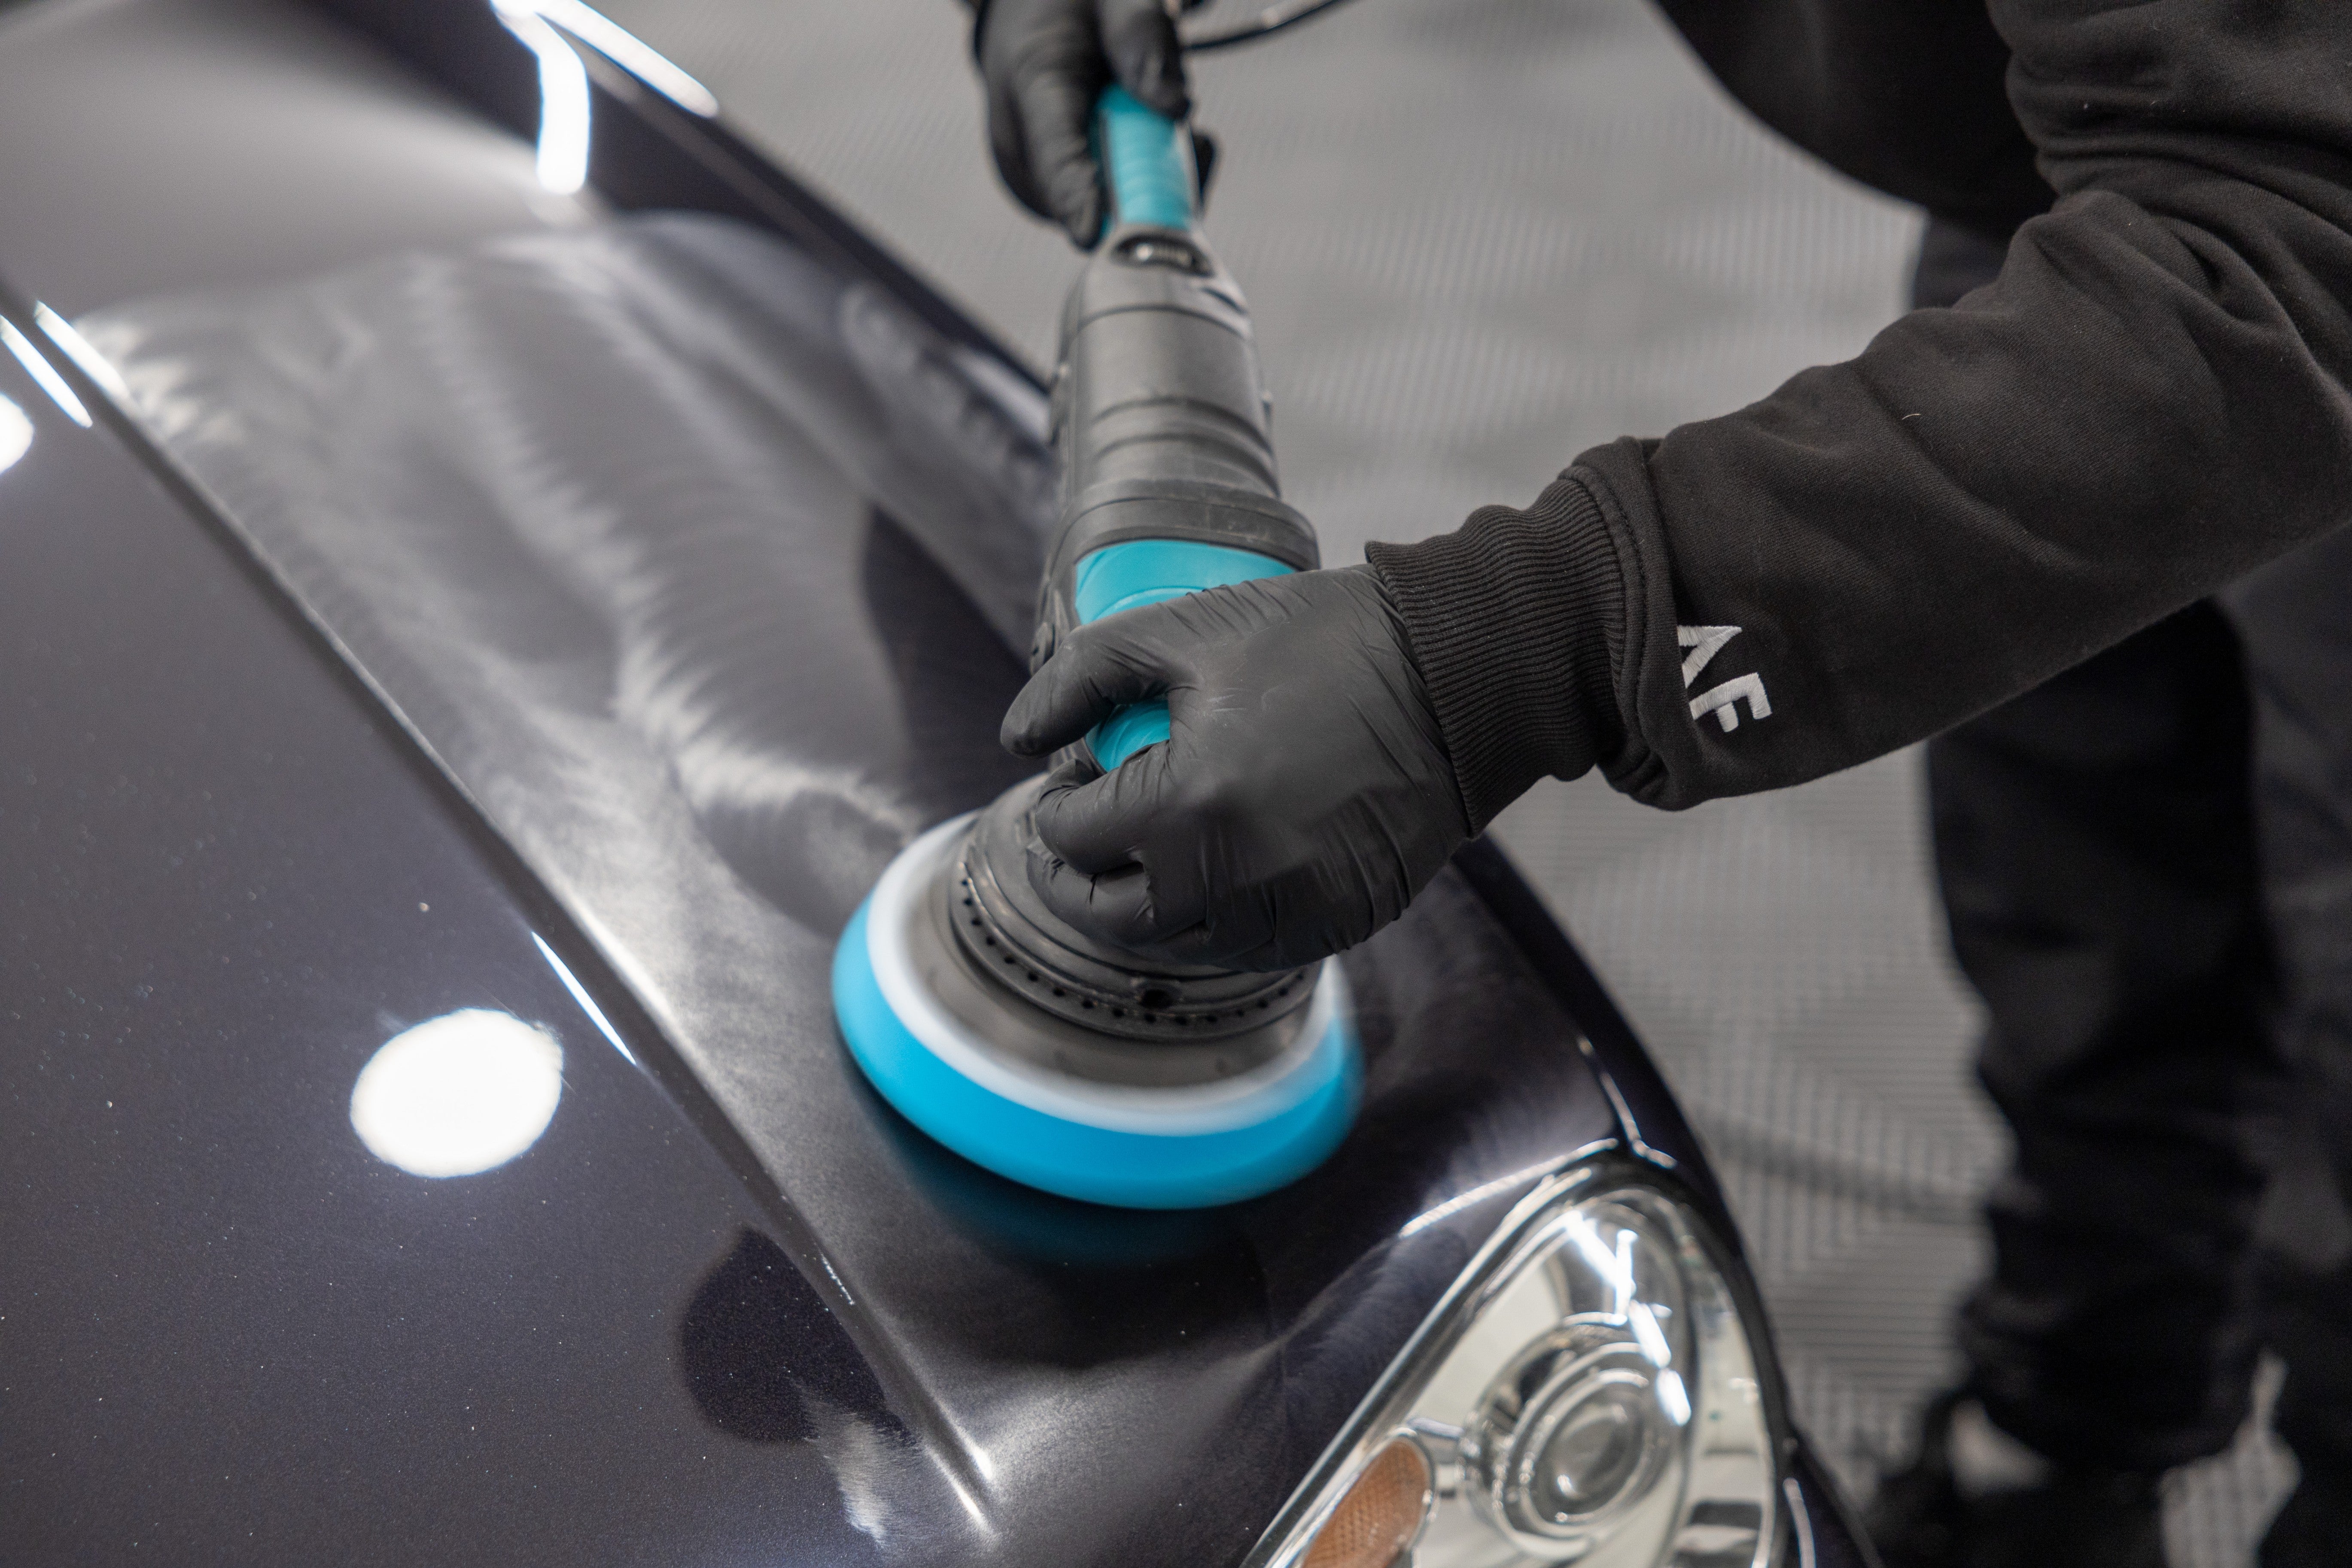
As you can imagine, there are a number of options for paintwork correction and enhancement, the most in-depth being using a machine polisher for application of a polish or compound… which you may say is a whole art in itself. There are also many polishing products available and, coupled with different machine polishing pads, these will dictate how aggressive the process is with regards to cutting away paint or clear coat layers. Any polishing and correction is, after all, the process of removing a microscopic amount of the top layer to cut away surface defects. A coarse restoring compound will always remove more paint than a light refining compound, and the products you choose will depend on a number of factors, including the time you have available (you can spend many hours on a full multi-stage correction, and even a single stage enhancement), what kind of protection you'll be using in the later stages, and of course, the characteristics of the actual defects that need to be removed. Corrections can range from light swirl mark removal to full paint restoration, so, the question when it comes to machine polishing is always, how far do you need to go? This is why we'll cover the whole machine polishing process another time, it's far from the basics of detailing.
Hand polishing, on the other hand, is the easiest way to enhance your paintwork. As with any polishing process, you're essentially using abrasives to not only remove imperfections, but to optically level the finish, smoothing the surface to give the appearance of more gloss and depth. The only difference with a hand polish is that the product you use needs abrasives that can be easily broken down and worked all-the way through by hand, rather than relying on the mechanical force of a machine polisher.
Tripple All-in-One Polish is our go-to product for paintwork enhancements. Capable of removing light swirls and oxidation, it contains special diminishing abrasives which can be worked through easily. This means that, although it can be applied with a machine polisher, it lends itself particularly well to use by hand when combined with a Microfibre Applicator. The added bonus with Tripple is that it's denoted an 'all-in-one' product, so it has attributes that take it far beyond that of a conventional polish. This is because Tripple contains powerful deep-cleansing solvents to remove oxidation and staining, and it will also leave behind a layer of carnauba wax to give around a month of protection. In this way, unlike a traditional compound or polish, Tripple cleans, polishes and protects in a single application.
As with any polish or compound, we are always cautious of working close to rubber or plastic trims. With hand polishing - unlike using a machine polisher - we don't need to mask these areas. When working nearby trims, we advise keeping 2-3cm away to avoid contact. Polish residue can cause staining on rubbers and other trim such as weather strips, and while this can usually be cleaned away using a little Verso All Purpose Cleaner, it's far better to avoid these areas in the first place.
Onto the application process and we can begin by applying four pea-size drops onto our Microfibre Applicator. Working panel by panel, gently massage the product into the paintwork using light to medium pressure, and a circular, overlapping motion. We specifically choose a circular motion over a straight-line motion here because applying polish in a line has the potential to pick up dirt particles and drag them across your paintwork.
After the residue hazes it can be quickly buffed away using a fresh microfibre cloth. Tripple is easily buffed away but even so we always tackle just one panel at a time, especially if we're working outside. Once you've buffed one panel, move on to the next until you've finished every inch of paintwork.
The ultimate all-in-one car polish, Tripple is designed to clean, refine, glaze and protect paintwork in minimal time, and in one simple step. An impeccable en... See product details More
Rejuvenate Paintwork Cleanser is another useful product when hand polishing, like Tripple it contains special diminishing abrasives and deep-cleaning solvents, and has been specifically developed to prepare paintwork for the application, and successful bonding, of a protective car wax. Rejuvenate is also particularly handy for removing oxidation and staining on trim. You'll notice that painted "Black Pack" trims from factory are extremely prone to these kind of imperfections, which are often caused by the application of TFRs (Traffic Film Removers) at hand car washes.
To remove these defects, start by using a Microfibre Work Cloth and applying a little of your Rejuvenate. For the GTS in particular, as we have rubber trims running directly below the trims area we are aiming to polish, we apply a small amount of product onto the corner of a microfibre cloth and spread with our finger further into the corner for more precise application.
Work the product into the area with firm pressure.
Finally, buff the surface with a clean portion of your microfibre cloth and assess the results.
Specifically developed to enhance both the beauty and performance of our Signature Waxes, Rejuvenate is an advanced abrasive pre-wax cleaner cleanser polish, t... See product details More
Although our Tripple All-in-One Polish adds a layer of T1 Grade Carnauba with around a month of durability, the protection and the gloss can be further enhanced by adding a layer of a hard wax that's suitable for the paint type. We have chosen to use Spirit Wax which has been developed to enhance metallic finishes.
Car waxes work by not only creating a durable barrier to the elements that lasts between 4-8-months, but by leveling the optical finish to make paintwork deeper and glossier. By smoothing out and filling any microscopic ruts and ridges in the surface, light bounces back to the eye more uniformly, giving the appearance of more gloss and the optical illusion of deeper paint. Natural waxes, such as those in our Signature Hard Wax Collection, also slightly bend the light to give the famous warm glow associated with carnauba-based products. We maintain that no other protection layers can ever look as good as a wax.
Application of a hard wax is also extremely straightforward. Place a Waxmate XL directly into the wax pot, twist 90-degrees and that will coat your applicator with enough wax to complete a whole panel.
We then evenly distribute the wax across the panel by wiping in straight lines, followed by working the wax over the whole area in small circular motions. The key to successful application is spreading the product as thinly and evenly as possible. You only need a very thin layer of wax to bond to the surface and cure, and the rest will be buffed away. By laying on an excessively thick layer of wax, you're essentially wasting your product because most of it will be removed in the next step.
Once the wax has initially cured, you can buff to a glossy, protected finish with a clean microfibre cloth. Here we recommend using our Micro Tweed Microfibre Buffing Cloth which has been specifically developed for safe residue removal. The super-soft microfibre weave has special pockets designed to catch excess wax, stopping it from clogging on the cloth or the panel.
Note that different hard waxes have different curing times, both in the 'initial' cure (when you can buff off the residue) and the 'final' cure (where the wax has fully hardened, and you can choose to add another layer).
A good professional tip is to 'leapfrog' panels during application to give sufficient time for the wax to bond, without leaving it so long that the residue is difficult to remove. This process involves applying your wax to your first panel before immediately moving on to the second. Once the wax has been applied to the second panel, you can return to the first to buff away the residue. Then apply your wax to your third panel before moving back to buffing the second. Follow this procedure around the whole vehicle until each panel has been completed.
Finally, there's the question of layering. Adding a second coat of wax is always a good idea as it will give even more protection and gloss, but always wait at least 3-hours for the wax layer on the car to fully cure. This will allow your new layer to bond on top of the hardened wax, rather than simply mixing with it.
It's not just the outside that's important, deep cleaning your interior is one of the key ways to push your detailing further than ever, and in this section we'll be covering the process from start to finish.
First - along with your vacuum cleaner - you'll need a few detailing products to compete the process, these include Total Interior Cleaner, Hide Leather Cleanser, Verso All Purpose Cleaner and Hide Leather Conditioner. Accessories such as FeatherTip Bushes, Microfibre Work Cloths and an Upholstery Brush are also essential for the ultimate interior deep clean.
Before you begin the cleaning, take a look through the vehicle and remove anything of value, loose change or personal belongings, and set these aside.
Professional detailers always begin their interior deep clean at the back of the vehicle and work their way to the front, starting with the boot space to tackle the biggest, and potentially dirtiest area first.
We begin with a simple vacuum to remove any loose dirt and debris. Using a brush attachment is a good idea here, the firm bristles will help to pick up any engrained dirt as it's agitated against the carpet. For extra safety you can position the hose between your legs, or over your shoulder, this will give you more control and prevent the hose from scrubbing against the exterior paintwork and trim.
Begin by vacuuming the entire surface area. There is no particular method here, just apply a little pressure to the nozzle whilst rubbing the carpet, in a left-to-right and right-to-left motion to lift as much dirt and debris from the carpets as possible.
Once complete it's onto the application of cleaning products to remove dust and bonded contamination from surfaces such as the boot trims and plastics. Total Interior Cleaner is our product of choice here. Like many cleaning agents that are specifically for use on other areas of the vehicle, Total is formulated using advanced surfactants designed to lift and encapsulate grime, allowing it to be safely wiped away. With a little light agitation from your cloth (to refresh any spent solution) Total is capable of physically pulling stuck-on contaminants away from surfaces. Unlike most heavy cleaners though, it's also gentle enough for regular use on all materials used in interiors, including plastics, carpets and upholstery. Simply spray, agitate and wipe.
After successfully cleaning your trim, you can deep-clean and sanitise your boot carpet with a few spritzes of Total - or for extremely dirty, stained carpets a 1:10 dilution of Verso All Purpose Cleaner - agitated with your Upholstery Brush and wiping away any excess with a clean microfibre cloth.
One popular way to finish is by 'striping' and the best way to tackle a large area is to start in the middle and work your way outwards by brushing the carpet in the opposite direction. After your first line, continue each stripe in the opposite direction, until you run out of carpet on each side. You should end up with a finish similar to this…
Moving on to the cabin, we begin by spritzing Total onto the dashboard and wiping away any dust and grime with a clean microfibre cloth. Start high and work your way down - this way, if dirt or debris fall onto lower areas, you'll pick them up as you move downwards.
For the more intricate, or hard-to-reach, areas such as air vents, multimedia screens, dials or switches, we use a soft FeatherTip Brush to work Total into each area. Total can be applied directly or sprayed onto your brush. The trick here is to ensure that your cleaning agent makes contact with every area, lifting away dust and deep cleaning the surface.
Once agitated, your cleaning solution will be encapsulating particulates and sticky grime, so the next step is to gently wipe this away with a clean, dry microfibre cloth. Be thorough here, being careful not to leave any area untouched, to ensure that all product is removed. Turn the cloth to a dry portion and buff the area to a clean, natural finish.
Top Tip: Don't forget that, when working around the steering wheel, you can often steering column up and down to ensure you can reach all the hidden areas with your microfibre cloth or detailing brush.
Deep cleaning a steering wheel itself is an extremely simple process when you know how, but is one that's often skipped, even by the odd professional. Our Mercedes GTS wheel has certainly seen better days. So, how we can restore it back to its former glory? First thing's first, we lightly spritz Total Interior cleaner over the entire wheel.
We also spritz a light mist of Total on an Upholstery Brush, before moving on to agitate our cleaner into the wheel. Apply firm pressure to the brush and work it around the entire wheel in small circular motions. If additional product is required, you can spray it directly onto the wheel as you go.
Remove any excess Total with a clean microfibre cloth. Hold the wheel with a firm grip between your thumb and index finger and twist the microfibre into the leather or Alcantara rim to remove any ingrained dirt - you'll be surprised how much dirt you can pull out at this point. What you're looking for here is a clean, natural satin finish - shiny leather and Alcantara usually means that it's dirty.
Once you're happy with the steering wheel, it's time to move your focus to the rest of the interior trim.
You will find that cup holders are prime areas for the collection of dirt and debris, so you may need to vacuum away any loose debris before spraying on any cleaning product.
When cleaning cup holders, it's always good practice to remove the cup holder insert for a more thorough clean. Here we use Total, along with a soft Detailing Brush or a Firm Detailing Brush, depending on the level of contamination.
More Total can be worked into the tray itself and the underside of the insert (this is where spills and drink residue may remain, so it's always worth checking).
We repeat the process of spraying Total, agitating with a brush and wiping clean with a microfibre cloth in multiple areas around the interior. The key here is to tackle every surface from the door cards to the rear plastic trims, just remember that (generally speaking) the more human contact any area receives, the dirtier it tends to be.
Don't forget to clean the smaller areas, or more specifically those not immediately noticeable, too. Pulling out the seatbelts for a spritz of Total, cleaning plastic seat backs and sides, and cleaning out seatbelt buckles are tricks that the pros use to ensure that they've gone the extra mile to expel any lingering odours and to create a happy customer.
One large area that is usually extremely noticeable is the centre console, a notorious dirt-trap where you'll commonly find an array of crumbs and dirt. Again, a quick vacuum, followed by a little Total and your Detailing Brush, will rectify any problems.
Auto Finesse Total is a ready to use car interior cleaner which is safe to use on all interior car surfaces. Whether you are cleaning plastic, vinyl rubber, cl... See product details More
Believe it or not, interior glass - including windows, mirrors and panoramic roofs - is another commonly forgotten area, but one that's extremely quick and easy to deal with using Crystal Glass Cleaner.
This solvent-based formula immediately cuts through fingerprints, grime and other sticky residues, flashing fast to leave nothing but a crystal-clear finish.
For interior glass, simply to limit the amount of overspray on other surfaces, we always recommend spritzing Crystal directly onto a Superior Waffle Cloth, transferring the cleaner to the surfaces with a wipe, before turning the cloth to a clean portion and buffing to finish. Bear in mind that a little always goes a long way here, just 2-3 spritzes on your cloth will be enough to clean an entire windscreen.
When it comes to your seats, your cleaning product of choice will always depend on the materials used by your car manufacturer. Total Interior Cleaner is water-based that's ideal for use on cloth upholstery but, although it can also be used on leather, we'd always recommend switching to Hide Leather Cleanser, which is a mildly balanced glycerine-based cleaner that's suited to regular use without drying out the hide.
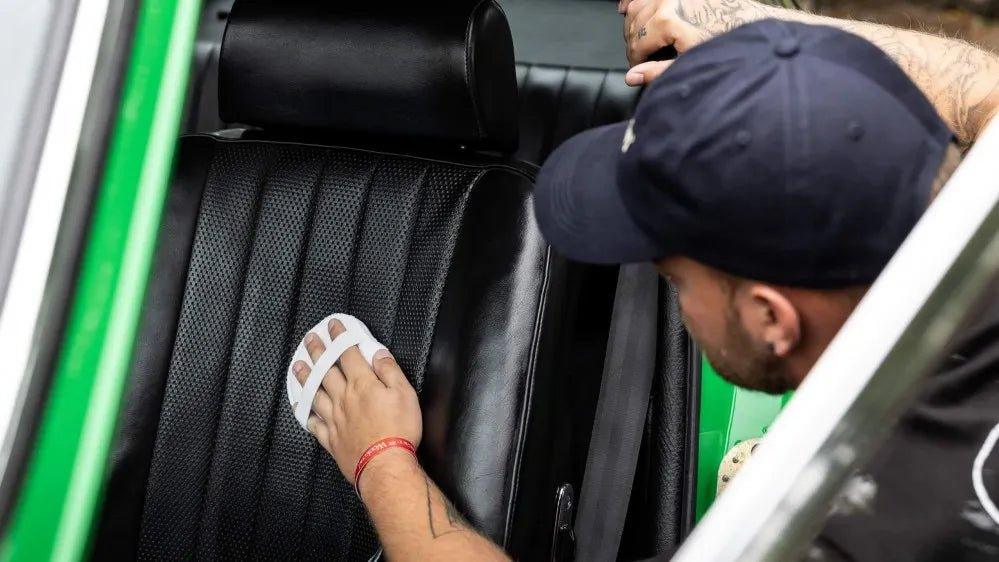
First vacuum the seats (starting with the rear) being sure to not only remove loose dirt and debris, but to get in between all the bolsters. A crevice tool is extremely useful here and be sure to physically pull the cushions apart as you go for the best possible access.
Once any crumbs and loose dirt is removed, lightly mist your cleaner over the seats working from top to bottom.
Then, spray a little more of your cleaner onto an Upholstery Brush and agitate into the entire area, this will help it target and remove any ingrained grime, suspending it in the solution, ready to be wiped away. Finally, finish off by immediately buffing away the spent solution with a clean Microfibre Work Cloth.
In the case of leather seats - along with leather-trimmed dashboards and door cards - you can also nourish and protect the hide using Hide Leather Conditioner. Think of this as you would a wax for your exterior paintwork - adding protection is never a bad thing. Hide Conditioner also restores the original colour and reintroduces natural oils to help soften and maintain your leather.
Apply a sparing amount onto a clean Microfibre Applicator and massage into the leather starting from the top and working to the bottom to ensure that no part of the surface is missed. Allow the product a couple of minutes to haze, and then lightly buff to a natural satin-matte finish with a fresh, clean Microfibre Work Cloth.
We intentionally leave the carpets until last as - once they are finished off - we will have no need to re-enter the vehicle again for anything else.
Begin by vacuuming loose dirt on floor mats and then removing them to work on the carpets underneath. If the matts have done their job, the vehicle carpets will be much less dirty, but even so, be sure you tackle the other commonly forgotten dirt traps such as under the seats and down the sides of seats and consoles. Again, it pays to start with the rear mats and carpets, before working your way forward to the front. A quick spritz of Total, a little agitation with an Upholstery Brush, and finally a wipe with a microfibre cloth will see the carpets completed. Unless any heavy staining of extra ground-in dirt is present (in which case a 1:5 - 1:10 dilution of Verso is great for intensive spot cleaning), you can proceed onto the mats.
Floor Mats can be tackled outside of the car, and it's good practice to vacuum and wipe the undersides first, before laying them out on a clean surface ready to clean the top carpet portion. These are completed in the same way as the boot carpet, first use your brush attachment to vacuum away loose grit and grime, before applying a few spritzes of Total and agitating with your Upholstery Brush.
Wipe the surface dry with a microfibre cloth, and then vacuum once more to remove any remaining dirt that the cleaning agent may have drawn out.
Details, as they say, are all about the details, and there's a few essential finishing touches that will always push yours to the next level.
Dressing your tyres is one of the all-time greats, after all, why let faded, brown rubber detract from the rest of your detail? Dressing your tyres by applying a small amount of Satin Tyre Crème, will not only nourish and restore your rubber from within, but it also offers a protective barrier from the elements and fading caused by UV radiation.
Satin is also an advanced 'layerable' formula that allows you to choose the level of shine you require. A single application will leave a subtle satin-matt finish but, by adding more layers, you can build up a slick, wet-look gloss.
One professional tip is to always ensure that the whole sidewall is completed, without dragging your applicator along the ground and picking up a load of grit. You can either drive your car onto a raised platform - something like a plank of wood - or simply apply your dressing to three quarters of all four of your tyres, and then roll the vehicle forward slightly to complete the last bit.
Exhaust tips are also a part of any vehicle that's commonly forgotten. For the most part these will be stainless steel or chrome and can always benefit from a quick application of Mercury Metal Polish. Mercury is classed as a cleaner polish, and that means that it not only contains abrasives that will strip away a small amount of the surface to restore the original lustre, but it's also packed with special deep-cleaning solvents to help it cut though harsh grime, oxidation and staining.
Application is as easy as applying a small pea sized amount to a microfibre cloth or applicator and then working it into the metal surface. Keep working the product through until the cloth goes black (denoting the grime and oxidation being removed) and then flip the cloth to a fresh portion to buff away the residue and reveal the original shine.
Mercury can also be utilised on polished wheel lips and other bare metal brightwork.
Mercury Metal Polish is an advanced abrasive compound developed specifically for restoring bare metal to a factory fresh finish. Suitable for use on all types... See product details More
On many vehicles bare matte plastics and rubber trim is prone to fading due to long-term exposure to UV radiation and the relatively easy impregnation of grime. These parts - for example scuttle panels, mirror bases and window rubbers - are often forgotten but are so noticeable that they can really detract from the rest of an otherwise perfect detail.
Restoring these back to their former glory is easy using our silicone polymer-based Revive Trim Dressing. This water-resistant product is designed to darken and restore the original colour, leaving behind a subtle satin finish that actively protects from fading. Simply apply sparingly with a Microfibre or Foam Applicator, allow 5-10 minutes for the product to soak in and cure, and then buff to an even finish.
Auto Finesse® Revive Trim Gel is a silicone-based trim dressing that brings life back to your exterior plastics, while being water resistant, a detailing produ... See product details More
The penultimate finishing touch of any detail is always cleaning the exterior glass, we leave this until near the very end because it's almost inevitable that your glass will pick up a few smears, dust and perhaps the odd fingerprint as you work your way around the rest of the vehicle. As with the inside, we utilise Crystal Glass Cleaner for this task, but here we can spritz the product directly onto the glass before spreading and buffing until crystal-clear. For the best results, we recommend using Crystal in conjunction with a Superior Waffle. This is the ultimate glass cleaning towel for safely lifting and locking away grime because it utilises a unique microfibre weave construction developed purely for the task. Crystal not only cleans but is also capable of filling and obscuring light scratches and defects, leaving behind nothing but a sparkling, smear-free finish.
A top tip for windows that contain any hardy ingrained dirt, or sticky residue from parking tickets and the like, is to use a few spritzes of Crystal and a razor blade to gently scrape the contamination from the surface. The mild distilled solvents will soften any glue that's present and act as a lubricant to help prevent the blade from scratching.
The last stage is always to finish with Finale. Just like your exterior glass, it's almost inevitable that a little light dust and one or two fingerprints will have found their way onto your paintwork while you've been busy completing the rest of your detail. This is why we always recommend a final wipe down with our water-based Finale Quick Detailer, just to make sure that everything's as it should be. This product is designed to ensure that any light contamination is removed safely, and that your paintwork is looking its best at the end of your detail. This is not only important for enthusiasts, for professionals this is the part when you hand back the car, appearances are everything after all. Finale is also infused with carnauba wax, so it adds just a little more protection, and plenty more glow.
Lightly mist Finale onto each panel and spread evenly using a microfibre cloth (for best results we recommend using a soft, absorbent finishing cloth such as our Ultra Plush Microfibre or Primo Plush Microfibre). Once the product is spread across the whole panel, fold your cloth to a fresh, dry portion and lightly buff to a streak-free finish. Remember that a little Finale always goes a long way.
Finale Quick Detailer is a fast finishing spray, drying aid and master all-round valeting and detailing perfector developed to give an immaculate, non-streak f... See product details More
Congratulations! Your detail is complete. Take a step back and admire the results.
Congratulations on completing the Back to Basics course!
Before you go, don't forget to have a peek at some extra resources that you can take advantage of right now to continue your learning. We have a whole selection of online resources in the Guides section of our blog.
We welcome your feedback and hope you've enjoyed the course. Don't forget to shout about your new skills and knowledge, and share your progress on Social Media, too!
If you have any questions after you go, please don't hesitate to send an email to support@autofinesse.com