


Getting The Most From Lavish Ceramic Foam
Lavish Ceramic Foam is one of our most popular protection products, here's how it works and how you can get the best hydrophobic performance
 Skip to content
United Kingdom

Use it or lose it, that's what they say, right? Well, when it comes to this big ol' modified 7 Series, what they should have said is use it or it'll get mouldy… like really, really mouldy. Come to think of it, the paintwork wasn't what you'd call fighting fresh and swirl-free, either. It's certainly not the most pampered modern classic this one, it's pretty obvious it's been sitting around, doing nothing for a good couple of years.
But, then again, that's the whole point. And it's also where we're here to help because we think we can not only bring the heavily weathered exterior back to life using the correct pro-grade products (and, as it turns out, with just a single stage machine polish, too), but we can also rid the interior of every one of those organic nasties - after all, when it comes to deep-cleaning, that's just what we do!
So, that's the plan then, let's pull this Autobahn bruiser out of what could have easy been its final resting place, load it onto our recovery lorry and get to work on this epic task. Roll the video…
So you've seen the processes in our rather epic video but, all the flash production credentials aside, it's obvious that the detail took a little longer in real life. So, let's get to grips with the full process with an exclusive in-depth guide covering every detailing product used, how we used them, and why they were chosen this time around…
As with most details we're starting here with the wheels. This is because, as you can imagine, they're typically the most contaminated part of any vehicle. In most cases, your wheels come into direct, prolonged contact with some of the harshest contamination on the roads including salt, heavy gritty grime and brake dust - all corrosive contaminants that must be removed to avoid damage to the wheel finish, and eventually the metal underneath.
In this case, the car may not have seen too much action recently, so there's not a lot of corrosive brake dust present, but the wheels are reasonably contaminated with heavy soiling and gritty particulates. As this particular 7-Series is sitting pretty on air ride, we'll jack that up fully too, just to get the best access to the wheels, tyres and inner arches. As with every detail, we adapt our routine to cater for the car and the conditions.
Safe cleaning is the priority here. As you can see these particular wheels are far from standard and have a relatively sensitive finish compared to "tough-as-old-boots' stock BMW wheels. With that in mind the goal is to remove the grime without risking causing any damage to the surfaces. In many cases aftermarket wheels, even when they're lacquered for protection, will be more prone to the infliction of scratches and swirl marks while cleaning.
The concentration of contamination, and the type of contamination itself, will dictate the products we use on the wheels, but we also have to consider the finish. In this case our main cleaning agent will be Imperial Alloy Wheel Cleaner, which is safe for use on this type of wheel. Here we'll avoid using any hard-hitting chemical fallout removers, first and foremost because of the wheel finish, and second because there's not a whole load of caked-on and ingrained brake dust that will require chemical removal by dissolving. The light brake dust that is present here will be quickly removed by our Imperial Wheel Cleaner and this, along with the heavy grime, will be encapsulated by the powerful surfactants in the solution, allowing them to be rinsed away safely.
The other thing to consider of course, is the wash media we use to agitating our Imperial on this relatively sensitive finish. There's no point in using a safe cleaning agent if you're going to abrade surfaces using a stiff, gritty brush, right? In this case we'll opt for a Wonder Wool Wheel Brush, a soft FeatherTip Detailing Brush and an Ultra Plush Wheel Mitt - all accessories that are ideal for safely agitating cleaners without scratching sensitive surfaces.
For a little extra cleaning power and a whole lot of lubrication (to help grime and heavy soil to slip safely over surfaces) we'll also use Revolution Wheel Shampoo during the agitation process. This powerful deep-cleaning shampoo can be used as a stand-alone wheel cleaner on the most sensitive finishes of all (such as chrome, bare metal and anodised wheels) but is also ideal for making the most of other spray-on cleaners when deep cleaning other types of wheel. In fact, we always use Revolution to brush-in our other heavy hitters such as Imperial Wheel Cleaner (as here) or Reactive Wheel Cleaner and even during periodic decontamination washes with Iron Out Fallout Remover. It all depends on the type and concentration of contamination present but for a full rundown on the different wheel cleaning products check out our article - The Detailers Guide To Cleaning Alloy Wheels.
To get our Revolution solution ready, we simply add a few capfuls to our wheel bucket, and whisk up the suds with our pressure washer.
Working on one corner at a time, first we rinse down the whole wheel and tyre. This is always the first step to remove any loose grit and grime before applying any cleaning agents. This pro tip allows your cleaners to get to work where they're most needed - on bonded contamination - instead of being wasted on contamination that can be removed by water pressure alone. A great way of cutting down on product wastage.
After the pre-rinse we move on to using our cleaning agents to break down, lift and encapsulate the bonded grime that's left on the wheel. First we spray our Imperial Wheel Cleaner liberally all over the wheel, being sure to get plenty inside the barrels and any awkward recesses.
Now for the agitation, one of the most important stages when it comes to cleaning wheels effectively. In most cases the agitation process is extremely light and designed not to physically scrub surfaces, instead it's simply to ensure that your cleaning solutions get into every tiny recess. The process also helps to move away any spent product (cleaning agent that's already reacted or encapsulating the maximum amount of contamination) and refresh the area with fresh solution to work on any remaining grime. If you simply spray on a wheel cleaner and then rinse, in many cases it won't reach every part of the wheel and won't be refreshed enough to remove more than just the surface grime.
We start on the barrels using our Revolution solution and a Wonder Wool Wheel Brush. Don't forget that inner wheels are just as susceptible to heavy grime as the centres, if not more so, that's why we start here, to remove the worst before moving on. The Wonder Wool gently massages the solutions into the surface and, because the cleaning media is deep pile microfibre, it's able to lift and lock away harmful particles keeping them away from surfaces and, again, helping with keeping the process scratch-free.
Once we've finished with our inner barrels, we can we use our Ultra Plush Wheel Mitt to tackle the faces and behind the spokes. Just to be thorough, we follow this up with a soft FeatherTip Detailing Brush for potential dirt traps such as the rims and around the centre caps. Here a brush will give you the best possible access, but we use a FeatherTip to make sure there's no chance of inflicting scratches and swirls.
Instead of rinsing the the contamination from the wheel now, we move on to cleaning the tyres using Tread Tyre Cleaner. What's important with tyres is to use a product capable of shifting harsh oily contamination, road grime, mud and old tyre dressings, while remaining kind to the rubber underneath. Like many of our specialist cleaning agents used for various other vehicle areas, Tread is a cleaner that contains special surfactants. These are designed to physically break away bonded particles, and then surround them in the solution, so they can be quickly rinsed away. What makes Tread different to many all-purpose cleaners though, is that it won't damage or dry out the surface of the rubber, making it suitable for regular use, and ideal for routine maintenance, as well as larger details. This is an example of chemical cleaning.
In terms of physically causing damage - tyres are tough, so you're not going to inflict any through heavy agitation. They're actually one of the very few areas where we can use heavy mechanical cleaning (vigorous scrubbing) with a stiff brush to help draw out the dirt without fear of damaging the rubber. For this we give the sidewalls and reachable tread a good going over with our Rubber Scrubber Tyre Brush. The idea is not only to remove any contamination present, but to leave behind a surface that will be suitable to form a firm bond with our tyre dressing later at the end of the detail. This improves the look and will always help your dressing to last longer - always a bonus.
Once we've scrubbed in our Tread, the final step is to rinse down the whole wheel and tyre, removing all the contamination trapped safely in the three cleaning solutions (Tread, Imperial and Revolution). At the same time, we'll give the inner arch a good flush out to make sure we've removed any mud and grime in there too. This is important because we don't want these coming back to haunt us later.
Now this corner is cleaned thoroughly, we can move on to the next wheel, then the next, until all four are complete.
As you can see, the engine bay is particularly filthy, so that's answers the first question we always ask when cleaning any bay - does it warrant a full wet deep-clean with a jet wash? The reason why we're doing it right now, before we start on the bodywork, is to avoid spreading any muck to paintwork which we've already cleaned.
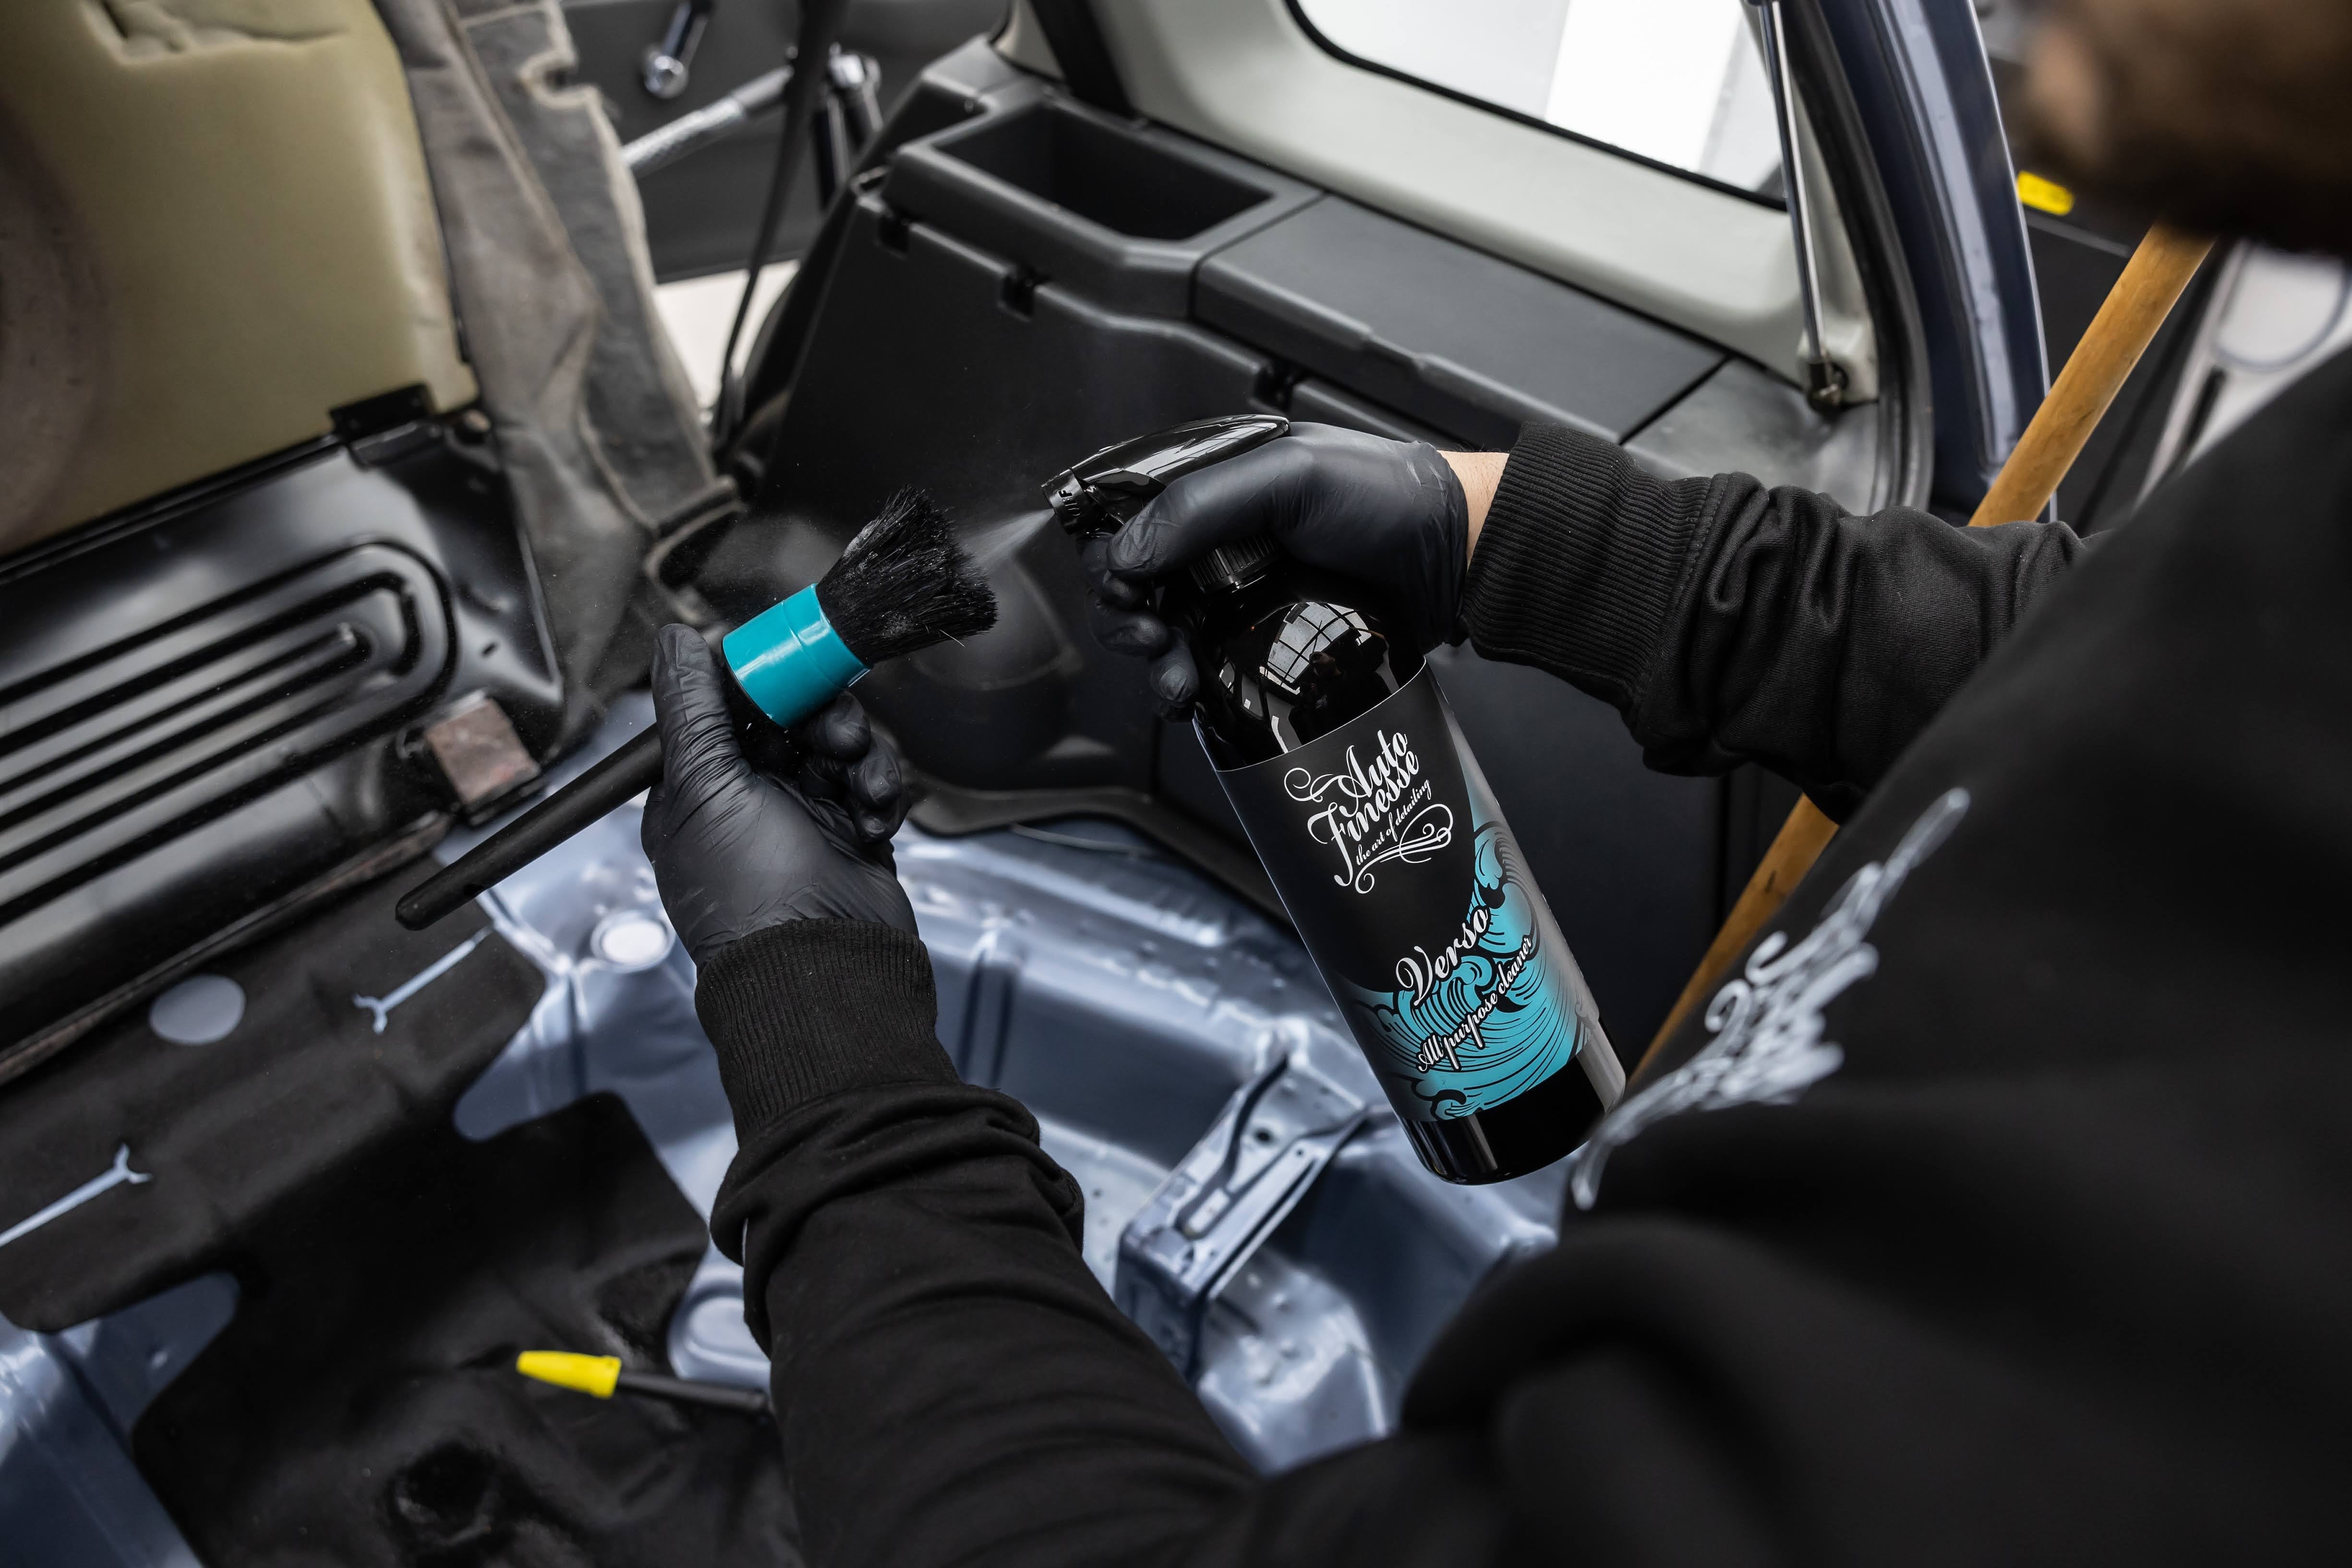
The next question of course, is if the bay CAN be wet cleaned at all. Some cars have all sorts of exposed electrics and vital components that you don't want to risk getting wet. Even though we always "mist' our pressure washer over any engine, rather than sticking it right in there, some cars just aren't suitable for wet cleaning, simply by design. This is usually the case with classic cars, which don't have a whole load of plastic covers guarding their components, but there are also plenty of modern cars with tightly packed engine bays, where a wet clean can be risky. We detailed a Porsche recently where that was very much the case - you can see more on that one in our Porsche 911 Turbo Detail - and you'll find that we tend to opt for more targeted cleaning later on in the detail. A simple 1:10 dilution of Verso All Purpose Cleaner and a Detailing Brush can be invaluable for these types of engine bays. It just takes a little longer.
The same kind of caution is needed for many modified cars. Some will have large cone filters that need to be covered before wet cleaning - have a look at our Focus ST Detail for a great example. Others may have a whole load of specialist parts that lend themselves to a more targeted approach and a little more polishing - check out this Golf Mk8 Detail for one of those. The moral of the story then, is that the specific car always dictates the type of engine bay detail.
So, what about this monster 7 Series? Well, in this case the engine is reasonably modern and completely standard, so we can get right to work with a wet clean. We started by pulling out as much of the leaves and gunk as possible before firing up the pressure washer.
When wet cleaning we always begin under the bonnet. Gravity is to blame for this, it's inevitable that any muck will fall down onto the lower bay, and we'd rather not have to clean that twice. First, we'll give the underside a good rinse down. Once again this it to ensure that any cleaning agents we use will get to work where they're most needed.
With the loose deposits rinsed away, we can tackle the really mucky stuff using our heavy-hitting cleaning agent - Eradicate Engine Degreaser.
For this type of oily, greasy contamination Eradicate is ideal because it uses a whole load of powerful degreasers and surfactants to break down the fatty deposits to make them small enough to be encapsulated into the solution. Potentially harmful particulates are also pulled from the surfaces on a molecular level, surrounded, and stopped from returning. Then they can be simply rinsed away safely. Eradicate is powerful for sure, but it's also safe for use on all the different materials you'll find in engine bays, such as bare metal, plastics, painted surfaces and rubber. Because you can use this one over the whole bay, it makes the process as quick and straightforward as possible - just spray, agitate and rinse.
Speaking of agitation, again this is purely to make sure that the solution is getting to every area and being refreshed as much as possible in the most awkward dirt traps. Here we're lightly agitating our Eradicate on the underside of the bonnet using a Hog Hair Brush, before rinsing away the grime trapped in the residue.
Next, we can move onto the actual bay, which follows exactly the same cleaning process. We'll pre-rinse first, spray on a liberal helping of Eradicate, agitate into all areas, and rinse away the residue. Quick, simple and effective.
With the bay deep cleaned a little finishing is now in order, in most situations this is the only place where we can use a finishing process before we've even cleaned the rest of the car. As with most relatively modern engine bays which contain acres of plastics, if it's possible to deep clean them with a jet wash and Eradicate, you can finish them off with a liberal coating of Dressle All Purpose Trim Dressing. This one is great for breathing the life back into plastics and rubber, and suitable for dressing every material you'll find under the bonnet, so you can save a whole load of time and effort by spraying it all over and get amazing results.
This water-based product is used at this point in the detail for two main reasons. First it can go on while the engine bay is still wet, so you don't have to wait until everything's dry. And second, it's one of the true "spray-and-walk-away' finishing products - you simply spray it on, close the bonnet and forget about it while you complete the rest of your detail.
Dressle will spread itself and cure over a few hours, and when you're adding the finishing touches to your detail you can (if you want to) go back and mop up any excess with a microfibre cloth. Although, in most cases, you don't even have to do that. You'll see how our 7 Series bay turns out once our Dressle has cured at the end of the detail.
Next up the all-important pre-wash - the most vital part of any detail where we rid the exterior (and most crucially, all the sensitive surfaces such as paintwork and gloss plastics) of heavy grit and grime that poses a risk of scratching. The idea here is simple - we carry out a couple of key processes before we dive in for our contact wash, just to avoid unnecessarily dragging sharp particles across the surfaces with our wash mitt. The pre-wash stages are all about eliminating risk, and not inflicting even more damage that we'll have to correct later.
The first part of the process is to tackle the most notorious dirt traps such as the door jambs, inner doors and boot shuts. We do this before anything else to stop any build-up of grit and grime that may be present coming out later and interfering with the rest of our detail. We don't want sharp particles coming out during our rinse when we've already cleaned the exterior, and we certainly don't want any being dislodged when we're polishing. Grit whizzing round on our machine polishing pads is a sure-fire way of causing damage. Deep cleaning these areas now eliminates that risk and also ensures that you don't forget.
In many cases, especially during routine maintenance, we'd use a wax, sealant and coating safe pre-cleaner, like Citrus Power Bug & Grime Remover. Because this car is particularly dirty though, we're using a 1:10 dilution of Verso All Purpose Cleaner, and agitating with a soft Detailing Brush. Verso contains some seriously powerful surfactants and degreasers that will quickly cut through the grime and oily deposits, so it's a good choice on a detail like this. If you're wondering about why we're agitating, too. Well, while most of our exterior pre-wash is designed to be contactless, so we never agitate our pre-cleaners on whole panels, it does help to refresh the solution on the caked-on dirt you'll find in these areas. Agitating will help break the bonds of any heavy grime, allowing it to be rinsed away. In any case we're only talking about very light agitation here, not heavy scrubbing and inflicting swirls as we go, the main reason why we always use a soft bristle brush to gently refresh the solution, and make sure it's getting into all the little nooks and crevices.
With the agitation complete, a quick rinse down to remove the grime trapped in the Verso residues is needed, and then we can move on to the exterior pre-wash.
The first part of the exterior pre-wash, as you've probably guessed from cleaning the wheels and engine bay, is a full rinse down from top to bottom. This will remove the loose soiling and many of the big heavy particles so our pre-cleaner can concentrate on the bonded contamination. It's important to be as thorough as possible, especially on a car like this that just happens to be covered in organic contamination such as moss and mould (you'll want to get as much as that off as possible), and always be sure to flush out any panel gaps as you go.
As you've already seen in the pictures, this particular detail not only brings a whole load of grit and grime, but plenty of organics growing on the exterior, too. These can be particularly difficult to remove without agitation because they cling onto surfaces and tend to grow into every little recess. This type of contamination needs to be broken down and lifted by a heavy hitting pre-cleaning agent, to allow it to be safely rinsed away with all the other grit and heavy soiling. In this case we're using Dynamite Traffic Film Remover, our ultra-concentrated, heavy-duty citrus-based solution. The powerful blend of surfactants and degreasers here will easily break down the organic matter (along with the more typical road grime and bugs) encapsulating the harmful particles, ready for rinsing.
What's also ideal here is that Dynamite comes as a "dilute-to-suit' concentrate, so it can be adapted to any level of soiling. In most cases - even heavy winter soiling - we'll use a 1:10 dilution to cut through the grime. Here though we've mixed it up a little stronger as a 1:5 dilution to ensure we fully remove the organics, too. We're using our pro-grade Pressure Sprayer to make the job easier, but Dynamite can also be sprayed on with a conventional trigger bottle, or even better a Pro Mixing Bottle. It's also supplied in 1-litre and 2.5-litre bottles as well as the big boy 5-litre we've got here.
What's most important is that, in most cases we'll apply Dynamite only to the most heavily soiled areas like the lower halves and bumpers, but it's also safe to use all over when needed. We'll think you'll agree that it's very much the case here. A good tip is to spray on the most soiled areas first, and then all over, just to give it a chance to dwell on the really mucky stuff.
After a few minutes of the Dynamite breaking down the contamination, we rinse the whole car again from top to bottom to rid the heaviest contamination. Any contaminants and smaller particles that are still bonded we'll take care of in the next stage with our snow foam.
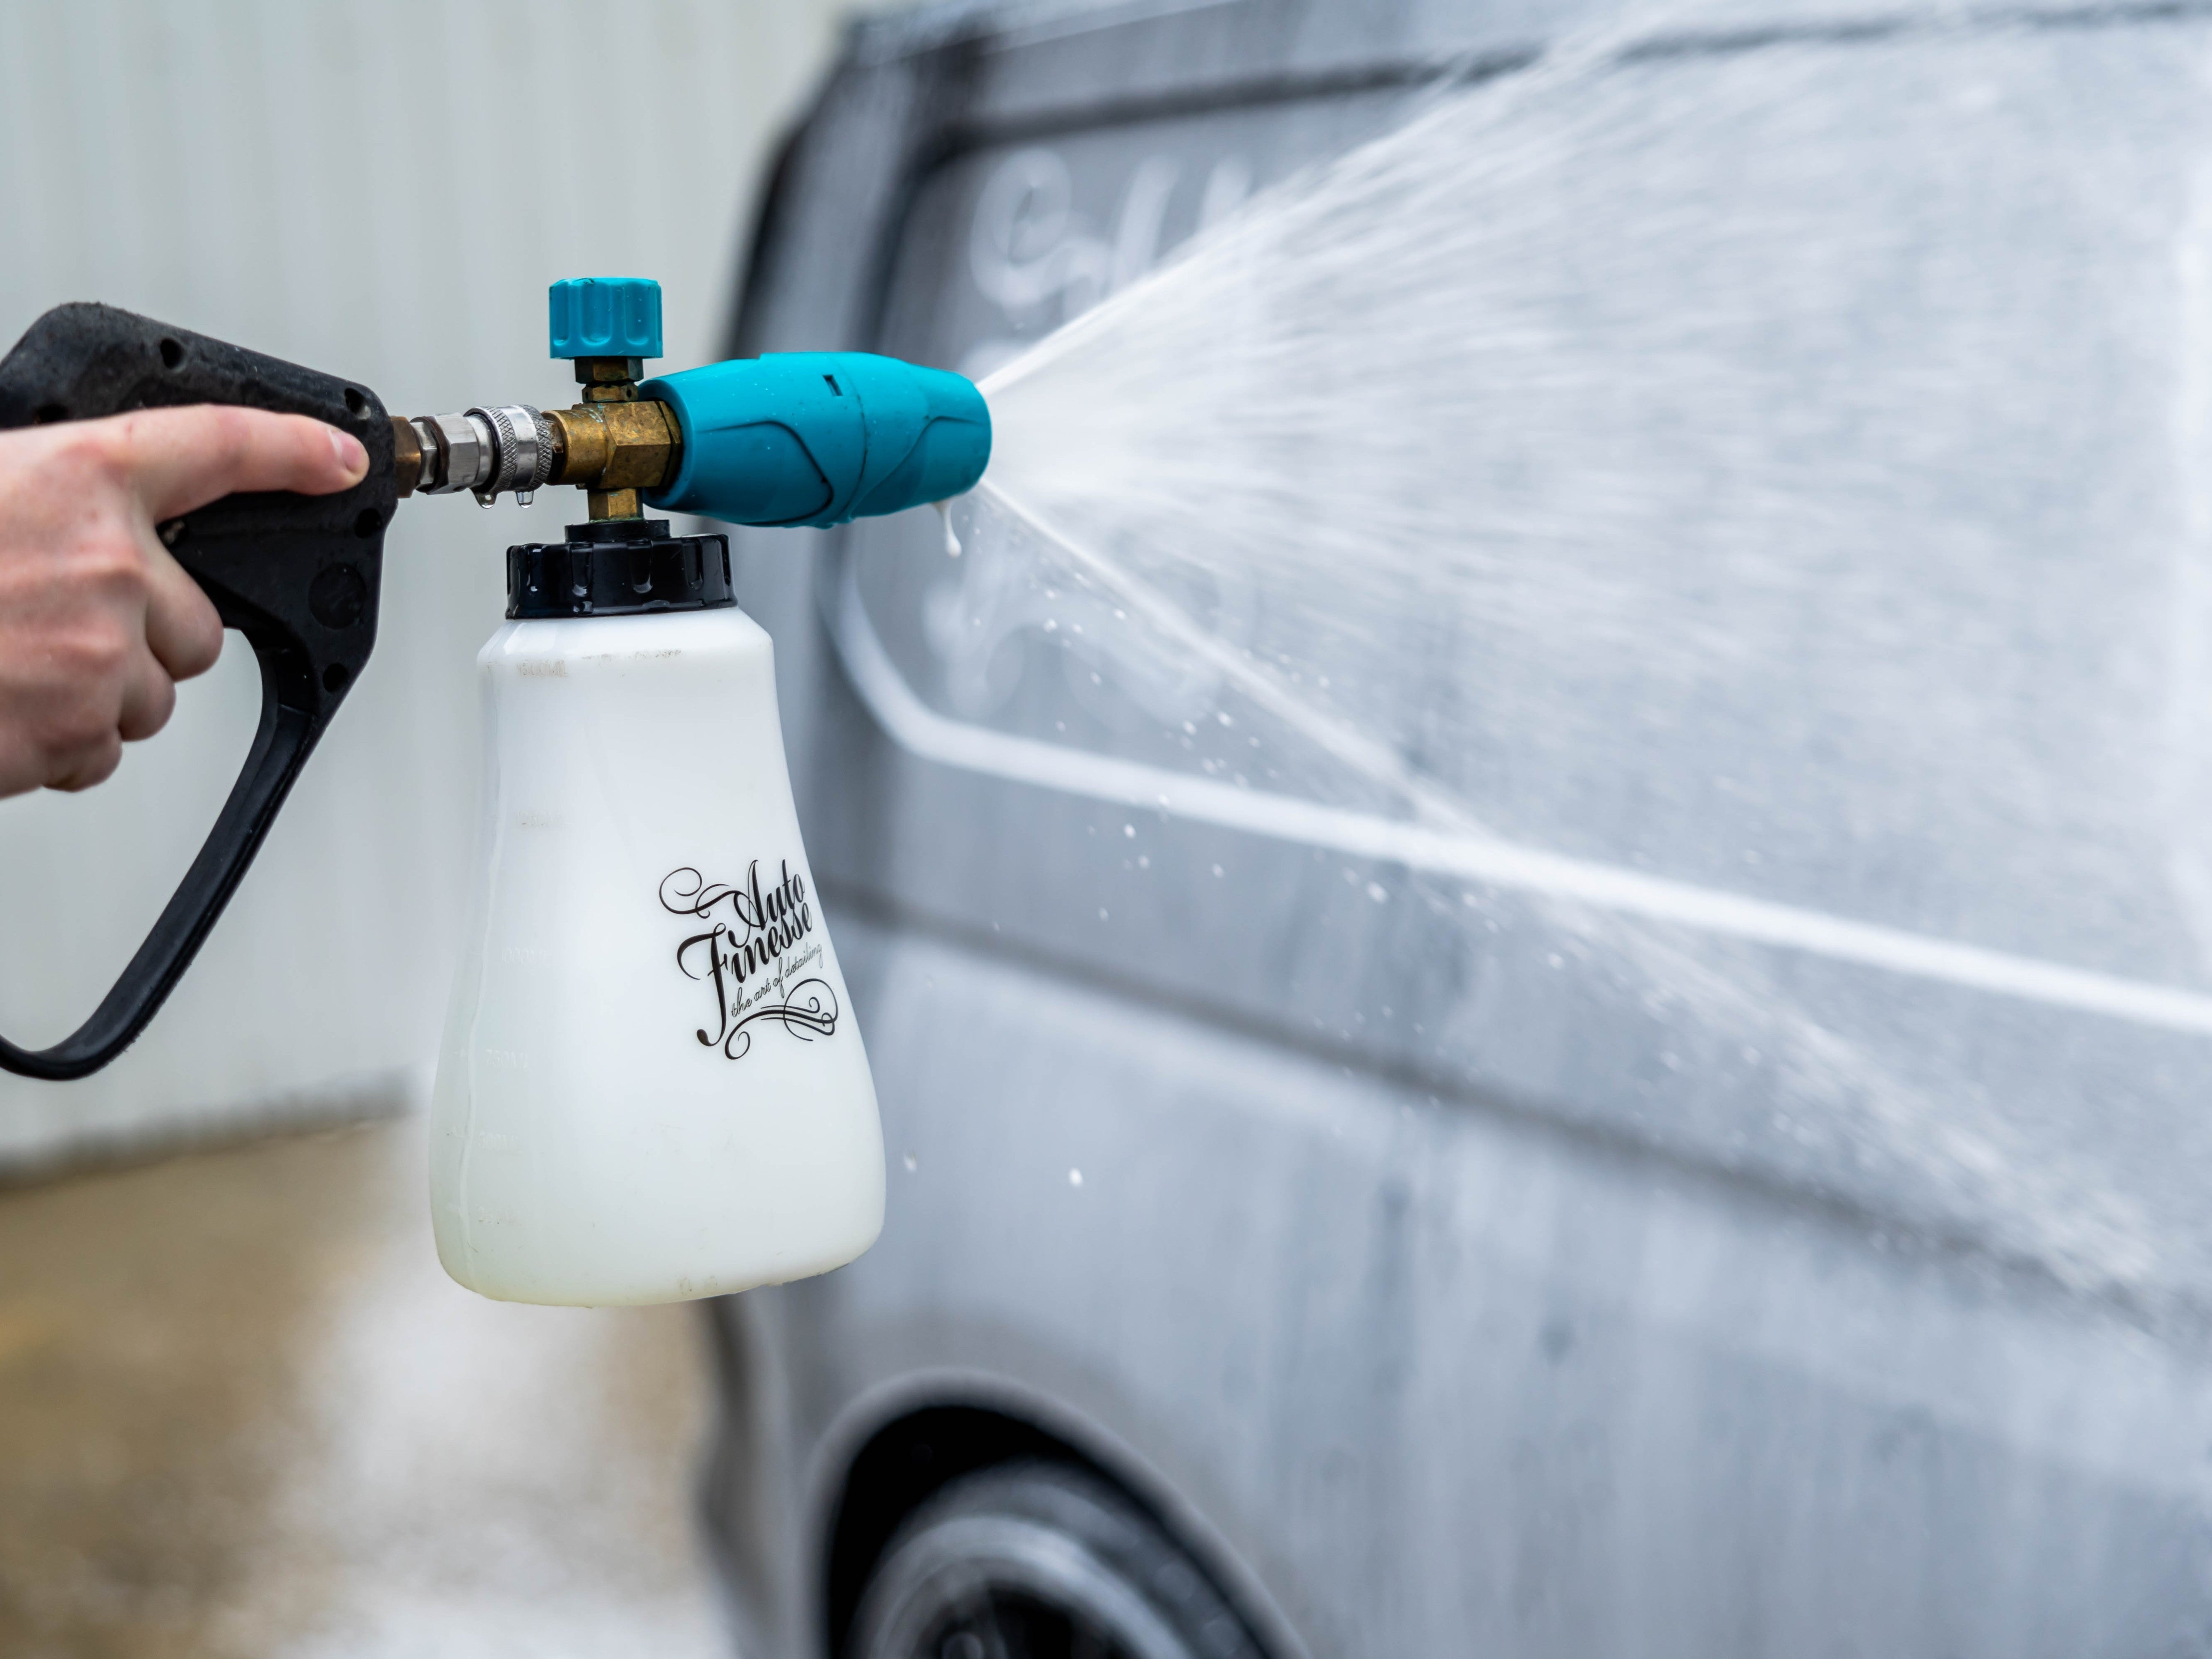
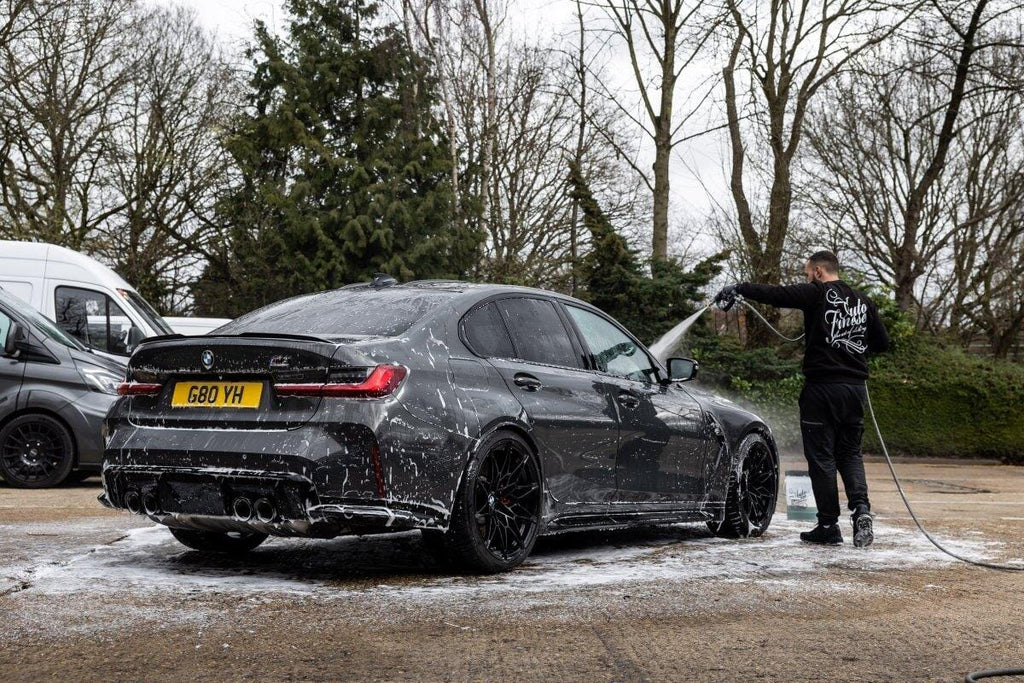
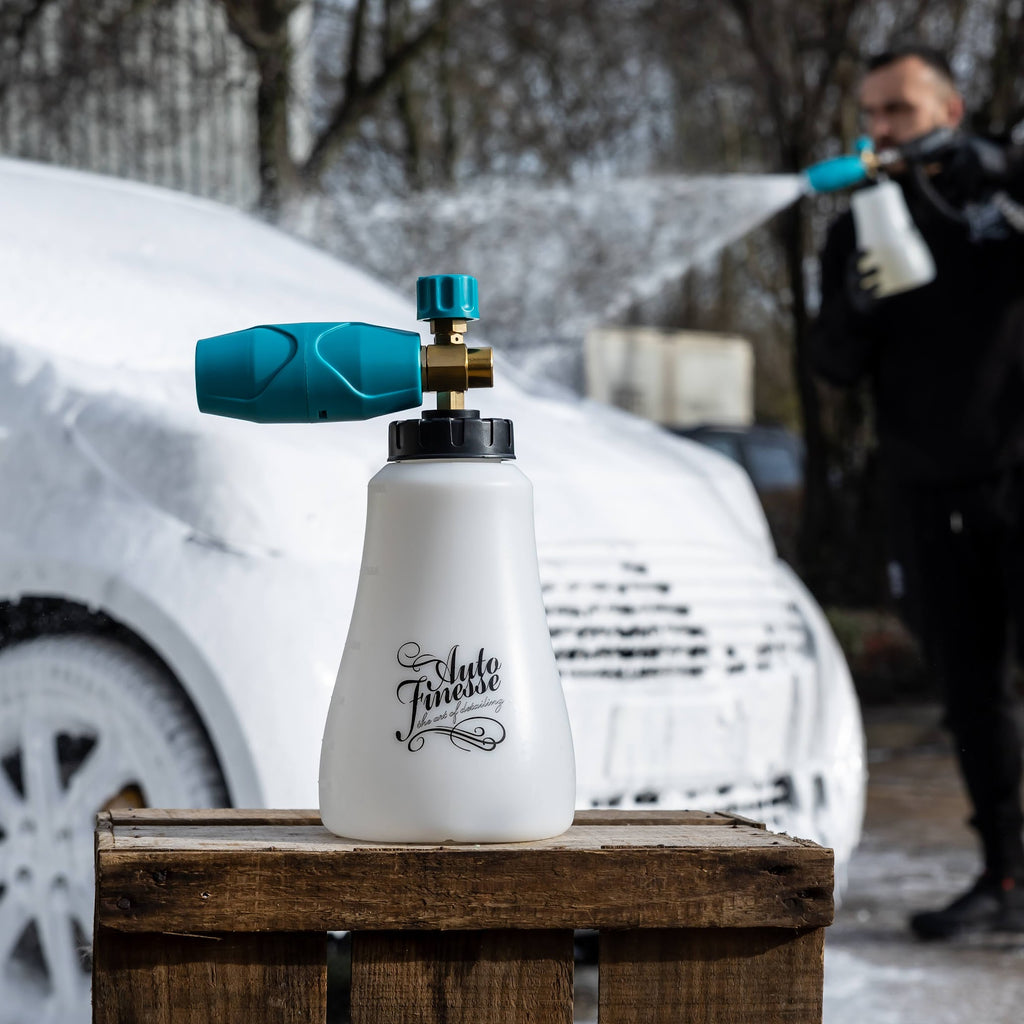
We use Avalanche Snow Foam for the second stage of our pre-wash to break down a whole load more of smaller bonded contaminants. The reason that Avalanche is so effective here is because it's capable of lingering on the surface for an extended period while it breaks down the contamination. Basically, the longer it's on there, the more it can get to work on the breaking the bonds and lifting the grime. As and added bonus, snow foam will also work its way into all the panel gaps to clean the unseen areas, too.
Avalanche is another citrus -based cleaner that uses powerful surfactants to physically pull particles off of surfaces and surround them in the solution. This is the same process as the your pre-cleaner, but on smaller more bonded contamination. This wax, sealant and coating safe cleaner should be used on every detail, even routine maintenance.
The other difference between avalanche and a spray-on pre-cleaner of course, is that you only get the best results when it's applied using a professional Snow Foam Lance. This essential piece of kit not only mixes up the solution effectively but pushes it through a special metal gauze to activate the cleaning agents and create the thick, lingering foam that stays on the vehicle for a long as possible.
We add an inch or so of Avalanche concentrate to our foam lance bottle and top it up with clean water from our bucket, before attaching to our lance and applying to the whole vehicle from the top down. Despite what you might hear, don't be tempted to apply from the bottom up, as this may spread any heavier soiling that's present to cleaner areas, for the safest application always from the top down.
Once applied it's important to let the Avalanche linger for as long as possible, but without letting it dry. As we've carried out a full pre-clean with Dynamite beforehand to remove the heaviest particles, it's beneficial here to agitate our snow foam into the worst dirt traps like around badges, the fuel flap, grilles, door handles and along the window rubbers. Again, this is just to make sure the foam is getting everywhere it needs to be, and it's being refreshed on any build-up of grime. While we wouldn't agitate on full exterior panels, a spot of light agitation with a Hogs Hair Brush is perfectly safe on these areas.
While we're agitating, we're also keeping an eye on the glass. As we said it's important to let the foam linger for as long as you can, but without letting it dry. As the foam tends to dry out on the glass first, as soon as that starts to happen, we give the whole car a good rinse down from to bottom, being sure to flush out any panel gaps, grilles and shuts.
With the vast majority of harmful particles removed it's now safe to move on to our contact wash. You'll already know that this process is designed to remove any remaining small particle grime, but it's always worth keeping in mind that it's still vital to do this safely - every time you touch any vehicle there is a risk, so it's important to cut this down as much as possible. We every contact wash we always utilise a few extra safety measures to make sure the process is super-safe and ultimately swirl-free.
Our first precaution is using two buckets - one containing our shampoo solution, and the other with plain water to rinse out our wash mitt in between passes. This is simply to avoid cross contamination with harmful grit and metal particles. By rinsing out your mitt after making any contact with the paintwork, the idea is to ensure sure that any grit and grime you've picked up isn't being washed out in your fresh shampoo solution and then being transferred back to the vehicle. We also use our professional Detailing Buckets for this job, these not only contain a special grit guard to make sure you're not picking up any gritty particles that have sunk to the bottom of your buckets, but the large 20-litre capacity also helps to prevent recirculation of grime back to your mitt - more water means less risk. Simple. These are two attributes you never get with a standard bucket. Oh, and obviously we never use the same bucket as we've used to clean our wheels, just in case there's some leftover heavy grit and brake dust in there.
The second precaution is to choose the correct wash media. Professional wash mitts are always the first port of call because they're designed not to physically scrub the surface, but to glide across paintwork picking up and locking away the grime deep within their pile. These will keep the nasties there, away from your paint, until they're rinsed out in your bucket. If you were using a sponge, chances are you'd be pushing contamination around, rather than picking it up, this is why professional detailers ditch the sponges and always utilise a mitt made from microfibre or lambswool. In this case we're using our Plush Wash Mitt - which has a deep pile to lock away any grit, but also ideal for soaking up plenty of shampoo and gliding freely over the paintwork.
The last safety measure we use is equally important - picking the correct cleaning agent. Here, as with most details, we're using Lather Car Shampoo which is a powerful surfactant-based cleaner that also contains plenty of advanced lubricants. These allow grit and grime to slide over surfaces without scratching. Lather is pH-neutral and also classed as a "pure' cleaner which means that it cleans surfaces without doing anything else. While it won't strip away waxes and coatings during maintenance, it contains no waxes or shining agents and fillers itself, so it won't leave behind any layers that may interfere with the rest our detail. Always a winner for use prior to polishing.
There are other types of car shampoo that we produce of course, but these have been specifically developed to make maintenance easier. Products such as Wash 'n' Gloss Car Shampoo, or Caramics Enhancing Shampoo, contain extra ingredients designed to install protection, add gloss, or prolong the life of the protection that's already there. This is great for maintenance of course, but not a feature we need on this particular detail.
Here we just need a couple of capfuls of Lather in our wash bucket, which we froth up with our pressure washer to create plenty of deep-cleansing suds. It's worth noting though that Lather - along with our other shampoos - are "dilute-to-suit' products, you can simply add a bit more for heavier soling, and a little less for lighter cleaning tasks.
Now we can tackle the actual wash process but, even here, there's a couple of precautions we use to cut down on the risk of inflicting swirls.
First, we always begin with the cleaner parts of the vehicle to limit the spread of contamination from dirtier to cleaner areas. Basically, we're washing from the top down, but in a structured manner targeting areas that are less contaminated. We start with the roof, windows and upper sides and then move on to the bonnet, front bumper, lower sides and rear end. We also wash in straight lines rather than circular motions which may promote swirling.
The contact wash is the finish of the main cleaning and, assuming our pre-wash and snow foam stages have been carried out properly, we're only removing light contamination here, but remember that even light contamination can be harmful to sensitive surfaces.
Once we've made contact with every part of the exterior, we rinse from top to bottom to remove any residue or grime encapsulated by our shampoo solution.
A full 3-stage paintwork decontamination - otherwise known as a decon wash - is a number of steps were we utilise specialist products designed to remove the kind of tough, engrained contamination that washing alone won't be able to shift. This stage isn't carried out during routine maintenance, but is essential to periodically decontaminate surfaces, especially prior to polishing or any other paint correction process.
What we're trying to achieve here is ridding the paintwork and other sensitive surfaces of harsh contaminants that could cause damage when polishing. These include sticky tar and glue residues and sharp metal fallout along with protein and mineral deposits from environmental sources, such as acidic bird droppings and tree sap. Basically, the decon process is designed to clean deeper on a microscopic level. Some of these contaminants won't even be visible to the eye.
The first decontamination stage is involves removing any sharp ferrous metal particles embedded in your paintwork, glass and other trim. Here we're using Iron Out Contaminant Remover which is capable of chemically dissolving this kind of metal shrapnel into its own solution to create a harmless solute. Effectively this allows us to rinse the away the ferrous deposits safely - the only way of removing embedded metal.
As the chemical reaction takes place, Iron Out turns blood red highlighting the contamination. This product can also be used over every bit of the paintwork, glass and rubber. It's worth remembering that metal contamination, which mostly comes from brake dust, won't be limited to the lower areas and front bumper. You may find a heavier concentration in these areas, but you'll also find embedded metal all over.
Because we're spraying our Iron Out liberally on paintwork that's free of heavy grit and grime, it can also be lightly agitated using a microfibre Polish Pad or Work Cloth to spread and refresh the solution. Once we've agitated, we rinse off the residue.
The second decontamination is the targeted removal of any tar and sticky residues using ObliTARate Tar & Glue Remover.
Most of these kinds of contaminants will be found around the bumpers and lower sides, and this strong solvent is designed to quickly dissolve them, freeing them from the surface and allowing them to be wiped away with a clean microfibre cloth.
When we say "targeted removal' what we mean is that we only use ObliTARate as and when we need it. Because of the heavy concentration of tar and glue residues on this particular car we're also spraying on our ObliTARate directly but if a little more finesse is in order around sensitive trim you can also use a Microfibre Applicator to apply the solvent. After using ObliTARate on paintwork it's also important to re-wash the area using our Lather shampoo solution. The idea here is to neutralise the solvent so it can't interfere with the next step. In other words, you don't want it melting your clay bar.
The last part of the 3-stage decontamination process is where we use a Clay Bar and Glide Clay Lube to pull any bonded mineral and protein deposits out of the paintwork. These types of deposits include tree-sap, bug splatter, bird droppings and minerals from rainwater which, despite being extremely tough, can be removed quickly and effectively using clay.
The process is simple, we just make sure the surface is sufficiently lubricated to prevent marring, or the clay sticking (get plenty of Glide on there) and run our clay back and forth with very light pressure. The structure of the natural clay will lift and remove any contamination present. In fact, you can actually feel the surface becoming smoother as you work. As the clay picks up the contamination the difference in resistance is obvious, and what you're aiming to achieve with this process is a glass-like surface that's free of any microscopic contamination and ideal for polishing.
The only things to remember are to make sure you clay every inch of paintwork and gloss plastics, and to periodically fold your clay to reveal a fresh portion as and when it gets dirty. It's a quick stage that requires hardly any effort but the results speak for themselves.
After a quick rinse down to remove any left-over lubricant, we can move onto drying the exterior. Even on a routine maintenance wash you should never skip the drying stage because tap water - the stuff you're probably using to clean your car - contains a huge number of mineral impurities. If left to dry naturally the water molecules will evaporate off, but the mineral deposits will be left behind, causing waterspots that may require polishing to remove. In some cases, particularly in hard water areas, these can scratch surfaces so it's vital to free sensitive surfaces of all the water before it can dry. The only way to remove the water and the impurities is together by absorption, which is why we use a dedicated microfibre drying towel to soak them up.
Here we're using an ultra-soft and ultra-absorbent Aqua Deluxe Drying Towel and for some of the tighter areas like wheels and door jambs (and to avoid dragging our large towel on the floor), we switch to an Ultra Plush Microfibre towel, which is similarly absorbent.
Before we can start the machine polishing, we'll get the car in the bay and get it prepared. First, we identify any vulnerable edges and trim that we want to avoid contact with while we're polishing. Areas such as plastic trim, window rubbers and whether strips are often a little too close to the paintwork for comfort, so our best bet is to get them covered now.
This is not only to protect the trim pieces themselves from abrasion and compound staining, but to protect our pads from getting torn on sharp edges. We use a little detailers Masking Tape to get those covered up, before moving on to a visual inspection.
The idea of a visual inspection is to run our eyes over the car to look out for any damaged areas that shouldn't be polished and to gauge the extent of the defects that need to be, or can be, removed. The best way when working indoors is to turn off the main lights and inspect each panel using a Swirl Spotter Detailing Light. This direct light source imitates direct sunshine to highlight any defects. In many cases you'll find defects that may be invisible to the eye in normal conditions but will show up significantly in the sun or streetlights when you're out in the real world. Using a Swirl Spotter here ensures that you know exactly what you're dealing with.
What we're looking for here are scratches, swirl marks, oxidation and orange peel. The worst of the blemishes that we can remove through polishing will always dictate the products we use and give us a starting point for our testing. In this case we can see that the paintwork is dull, scratched and swirled, and a lot of it is obvious without the light, so we're definitely going to need a course cutting compound to level down the top layer, just to get through the defects. With heavily weathered paintwork like this it's more akin to a restoration job than a light correction.
During the inspection we're essentially mapping out the whole car in our heads, making a note of what needs to be done for each area. We also check for other areas aside from the paintwork that can benefit from polishing. These will vary from car to car of course but what we're inspecting will be any gloss, clear and painted plastics such light clusters and trim pieces, along with headlights and mirror caps. Basically, all the stuff that we can fix through using abrasive polishes and compounds.
Along with our paint inspection we also use a paint depth gauge to give us an indication of how much paint there is on the vehicle. For this we'll take multiple readings on each panel just to check that there's enough paint or clear coat left to polish. It's doubly important on an older car like this because we don't know the history, it could have been polished or sanded multiple time in its life, so getting the depth of the paintwork will tell us if we can take away a few microns without issue, or if there's going to be obvious areas to avoid.
Taking depth readings can also indicate if there have been any repairs that we need to avoid, these will usually show up as thicker layers if they have been repainted during a repair. It's important to avoid these because often painters will blend in the paint so there's no hard edges to the naked eye. In other words, we don't want to polish away any blending to reveal the edges, so we're looking for areas like this to be avoided. Again, all we're doing is mapping out the car in our heads so we know what we're dealing with.
Now we can move on to testing where we're looking for the lightest possible compound and pad "combo' to cut through the defects, while preserving the top layer as much as possible. Basically, speaking we want to take away enough to level down through any blemishes, but not go any further than that. We don't want to remove any more of the paint/lacquer than we have to. When you polish, the goal isn't to remove the defect directly, that's actually impossible. The process serves to cut down the entire layer around the blemish until you reach the bottom of the deepest defect. In this way the defect simply disappears.
On this particularly bad paintwork, simply through experience, we can see that we'll need a heavy compound, but we still test just to cater for the paint hardness. Not all paints are the same and a softer paint layer requires a compound and pad combo with a lower level of cut to get the same result as you would on harder paint. So, when we test, we start with a combo that we think is going to be less than we need, and if we're right and it doesn't cut the defects, we work up to a coarser compound to see if that works. If it does, we can use this compound and pad combo to do the job. To learn more about the full process, check out our guide - The Basic Guide To Machine Polishing.
In this case, as we suspected, a coarse compound and firm cutting pad is what's needed to power through the heavy defects. After our testing we now know that we can use our Professional Series No.36 Heavy Cutting Compound and a No.36 Heavy Cutting Pad on our DPX Dual Action Machine Polisher for our restoration. We'll also utilise a firm Revitalise Spot Pod on a compact MPX Dual Action Machine Polisher for the tighter areas.
What's great for us here (and immediately obvious in the results) is that our Pro Series compounds use advanced diminishing abrasives for a wider range of cut and better finishing down than can be achieved with traditional compounds. In fact, there's much more refinement here than you'd expect from a heavy compound, and it also gives a great level of gloss. So, in this case at least, the refinement is enough to achieve the finish we're looking for and we're opting for a single-stage correction using the No.36 Heavy Cutting Compound as our main product. Oh, and we've run a tape line or two here, while testing on a few panels just to show you the difference side-by-side, but you don't need to do this at home.
Now we know the compound and pad combo we need; we can get on with the process over the whole vehicle.
The route you take around the paintwork isn't all that important, it's down to your personal preference. What is important is to tackle every part of the paint work that can be polished and to keep checking with your Swirl Spotter to make sure you're getting the results. Remember that some areas may be a little worse than others, so if you come across a particularly bad patch of defects, you can adapt your detail accordingly. In some places on this BMW our Revitalise Spot Pad was swapped out to a Microfibre Spot Pad, just to give a little more bite. It's all about the end result here after all. So, if you need to step up, or indeed step down, your polishing to get better results, it's all part of the process.
Because the car has been sitting around for so long, it's pretty bad inside, not to mention pretty hazardous to the health of anyone who wants to breathe it all in. While it's given that this is a rare case, there's plenty of damp and mould that has taken hold and a significant amount of ground-in dirt, so as always, we adapt our interior detail to suit.
We'll certainly need a deep-clean here, but rather than a normal detail where we'll work through the cabin bit by bit, our main focus has to be removing the mouldy stuff first before we can get on with the finer details. It's obvious that every surface will need to be contacted (mouldy or otherwise) but we'll start on the headlining as this is the most affected area. Cleaning the mouldy parts from the top down also helps us, because it's inevitable that some contamination will fall from the higher parts. The plan is to clean the headlining and follow up with the pillar trims, the seats, and then the carpets, before tackling areas such as the door cards, dashboard and steering wheel. It's all about the plan, right?
For the whole interior detail we're using Total Interior Cleaner. Versatility is the key here, it's a powerful surfactant-based formula that will easily break down and lift all the harsh grime and organic contamination, but it's also gentle enough to be used (and used regularly) on all surfaces and materials. This product has no problem powering through these sorts of contaminants but won't harm plastics, leather, rubber, upholstery or carpets. The only difference is the application process on different areas and materials. Other interior cleaning and finishing products are available for more specialist tasks of course - check out our Ultimate Interior Cleaning Guide for a full rundown of our interior cleaning products, and how they're used.
Anyway, for the headlining and pillar trims we can spray on our Total directly. In most vehicles we'll tend to apply to a cloth and then wipe, but because the mould has taken hold, we'll use a little more product than normal. The thing to remember with any vehicle headlining is to tread carefully, most are made from covered cardboard or fibre wood, so we're not looking to over saturate material and cause swelling. While this one takes a little more than a simple spray and wipe, we're still being careful.
First we spray on our Total and remove the worst of the mould with a microfibre Work Cloth. Here we're also following up by using a steam cleaner to make sure that our Total fully penetrates the surface, the heat also helps to kill off any nasties. If you haven't got a professional steamer though, another application of Total and a wipe over will freshen it all up nicely.
Next we move onto on to the seats and seatbelts, which are notorious for holding on to mould and odours. Again, we spray on plenty of Total directly, but this time we're working our solution into every crevice with a soft Detailing Brush. The agitation is light, so we're not scrubbing, but on harsh contamination like this it helps to make sure that your solution is being refreshed and breaking down all the grime, especially on materials like leather. We can then wipe away the particles trapped in the solution with our microfibre cloth.
These particular seats also have Alcantara portions so, we can treat those bits more like cleaning softer fabrics. After adding a little extra Total and allowing it to soak in (we're almost saturating the material here) we can draw it back out, along with the mould, using a wat vac. All this process does is makes sure that we're cleaning deep down within the material. We follow up with exactly the same process on the carpets.
Not everyone has a wet vac of course, so the best way of deep cleaning would be to use a normal vacuums first for any loose grime, then spray on the Total, agitate it thoroughly with an Upholstery Brush to draw out the grime, and then wipe away the residue with a microfibre. After that we'd let the seats dry out for a few hours before we use the car. A process that's just as easy.
The last part of the interior deep-clean is using our Total to care of all the other more intricate areas, and making sure we get our cleaner into all those nooks and crevices.
For award areas and hard plastics, like consoles, cup holders and doorcards we tend to apply to a FeatherTip Detailing Brush (or a standard soft Detailing Brush) to work the Total in, before wiping away the residue with a microfibre. And for larger areas, such as dashboards, we'll either spray on the Total directly or spray onto our cloth and wipe. All relatively quick and straight forward.
Now we're onto the finishing stages of our detail, starting with adding paintwork protection. This stage is not just to protect the paint by offering a barrier to the elements, but to safeguard all the work we've put in during the polishing stages. Adding our protection layers also helps to further level the optical finish of the paintwork, installing even more depth and gloss.
First though, we have to ensure that all the paintwork is absolutely spotless. It's almost inevitable that a little dust will have collected - or the odd fingerprint - in the time taken to complete the rest of the detail. To ensure that nothing is left on the paintwork to interfere with the finish, or prevent our protection from bonding, we'll always the vehicle a final wipe down using Finale Quick Detailer. This water-based product makes light work of dust and fingerprints, and it even contains a little carnauba wax which will in itself leave behind a little protection. This also makes Finale ideal for topping up wax protection during routine maintenance.
A little goes a long way here, just a light spritz and a wipe using a super-soft Ultra Plush Microfibre is all that's needed to make sure we're ready to add our final protection layer.
Now obviously, there's many protection products we could utilise here, but we've decided to keep the job simple and super-speedy - not to mention make our life as easy as possible - by adding a cream wax, or more specifically, our Radiance Carnauba Crème.
This product has been specifically developed to give a deep, wet-look finish just like a traditional hard wax, but with a quicker and easier application process. Because this one is formulated as a viscous liquid-cream, it's a fast finisher that's extremely easy to get onto the surface evenly and buff off, making it ideal for use when time is tight, outside or on-the-go.
Radiance also contains natural carnauba wax for around 3-months of protection, and will act like a hard wax in terms of gloss and the appearance of depth. If you know anything about us, you'll know that we think that nothing beats the warm glow of wax-based protection. When the most extreme protection for battered daily drivers isn't a priority, we'll almost always opt for a wax over a ceramic coating or paint sealant.
Anyway, the easy application of Radiance means that there's not much to it here. We just apply using a microfibre Polish Pad, with small circular motions over the whole vehicle, leave for a minute or two to haze and then buff away the residue with a clean microfibre. It really is that simple, and the results are amazing every single time. An all-time great kit bag essential.
Obviously every detail is different, and what's left over here will dictate the products you use to add your finishing touches. This could be any number of process from polishing tailpipes with Mercury Metal Polish, to restoring matte plastics with Revive Trim Dressing or topping up ceramic protection with Caramics Gloss Enhancer. In our case though, we're going to finish off the detail quickly and simply by performing two steps that always make a huge difference, these are cleaning the glass and dressing the tyres.
If you're doing nothing else, these are the key tasks to complete on every detail, and trust us when we say that, although they're super quick steps, they not only make these areas look great but they prevent them from drawing the eye from your super-shiny paintwork… you know, the bit where you've just put bulk of the graft in. In fact, there's nothing worse than brown, faded rubber or smeary streaky glass detracting from the rest of an otherwise immaculate detail, right? So that's why we make sure we don't forget these tasks every time we lay our hands on a car.
We start off with the tyres, and here we've chosen Satin Tyre Crème as our dressing. What makes this product unique is that this water-based formula leaves a subtle, new-look satin sheen with a single application, but you can build up a few more layers for a wet-look gloss if you prefer that kind of show-car finish. With Satin You get to choose. Designed to nourish and condition the rubber from withing it also adds UV protection to help prevent fading and browning in the future and is super-easy to apply using our Tyre & Trim Applicator. A master finishing touches no matter the type of detail.
Finally, we can finish off the whole job by cleaning the glass inside and out using Crystal Glass Cleaner. We generally leave this process until last because there may have been a little build up a little dust, fingerprints or product overspray over the course of your detail. If glass is dirty, it WILL show, so it's always worth completing this step right at the very end, especially if you have to give the car back to a customer.
Crystal is fast-flashing solvent-based formula that powers through sticky residues and lifts away dirt and dust, allowing any remaining contamination to be wiped away without leaving smears. A light mist and a wipe on each section is all you need here.
When we're using any spray-on glass cleaner we also recommend utilising a Superior Waffle. This item has been specially developed for glass cleaning and features a special weave that's lends itself to be the ultimate media for safe cleaning. The special pockets in this super absorbent microfibre can quickly pick up residues and debris, keeping them away from the surface you're trying to clean.
So, that's the in-depth, step-by-step explanation of this particular modified monster, and we hope it helps you push your next detail to the next level. But, before you get to work on your own pride and joy, let's see exactly how this one turned out…
For more big details, along with a whole load of guides covering every aspect of detailing, check out the Guides Section Of Our Blog.